BODY AND BEAUTY: HOMEMADE VEGAN NATURAL DEODERANT CREAM
Hello!
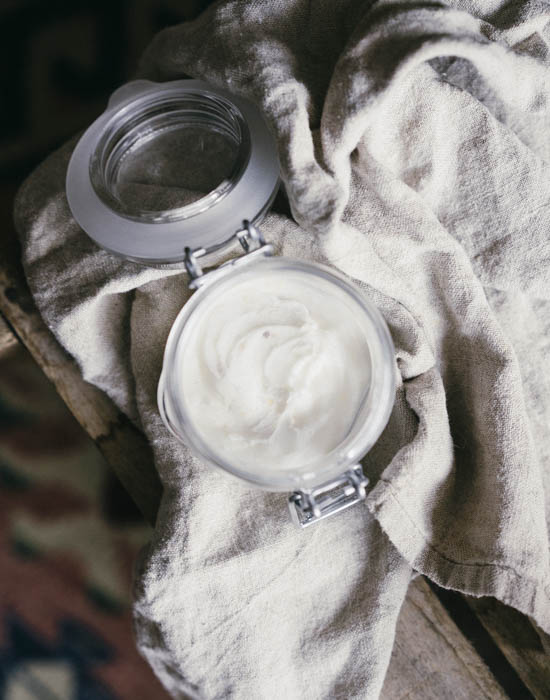
Here’s a slightly different topic for you than my usual food posts but I’m very excited to broaden the spectrum of this blog and include more lifestyle tips and tricks. Today I give you the revolutionising homemade vegan natural deoderant cream. Phew, that was a mouthful. Sorry about the long name but I wanted it to be as accurate as it could be!
Some time ago I started having smelly perspiration, the kind I hadn’t had since I was about 13 years old. I couldn’t really figure out why and still don’t know what suddenly changed to have this effect on my usually smell free pits. It might have been stress or some kind of hormonal imbalance but either way it wasn’t pleasant. At the time I had been using a store bought vegan and more or less organic roll on deoderant for a while which did the job until the sudden change. When I started having problems I changed to another brand but nothing else changed.
I read up on what might help me with my smelly pits and found tea tree essential oil which I now put into the deoderant cream. At first I used to dab a small amount straight onto the skin but as tea tree products are very strong I wasn’t sure this was actually very smart. So instead I started searching the internet for ways of making my own ingredient that could contain my new found friend tea tree oil. And there are lots of recipes out there if you go out for a web surf but after trying and testing I came up with this simple formula that literally takes 5 minutes to whip up. And it only requires 4-5 simple ingredients. Yay!
This deoderant is completely natural, completely aluminum free and completely vegan. Can’t get much better than that and over time it is much cheaper than buying deoderant from the store. To add to the perks you are also not wasting plastic as you are not buying new containers each time you run our of deoderant. Thumbs up to that.
I hope you give it a try and set your arm pits free from chemicals, toxic metal and pore clogging anti-perspirant!
ps. check out my video here to follow along and we can make it together.
Follow Good Eatings on Bloglovin.
Subscribe to Good Eatings’ YouTube channel.
HOMEMADE VEGAN NATURAL DEODERANT CREAM
PORTIONS: Roughly 1/2 cup / TIME: 10 min
3 tbsp corn starch / arrow root flour
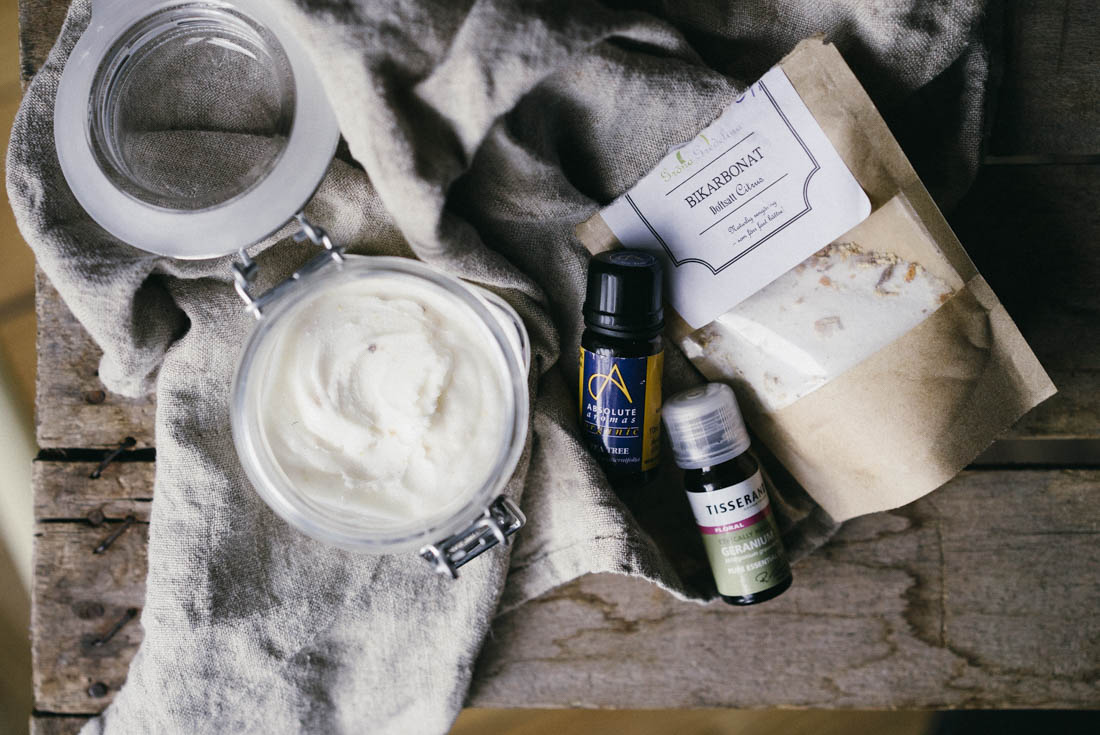
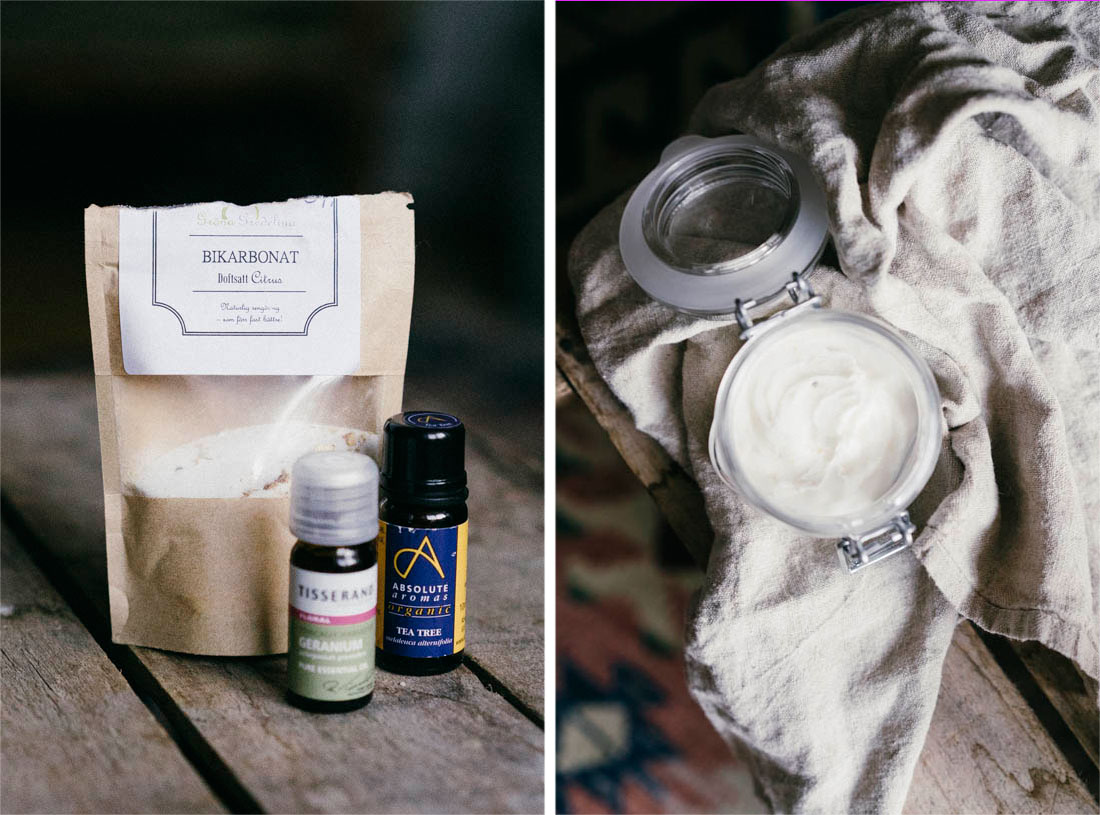
3 tbsp organic bicarbonate of soda
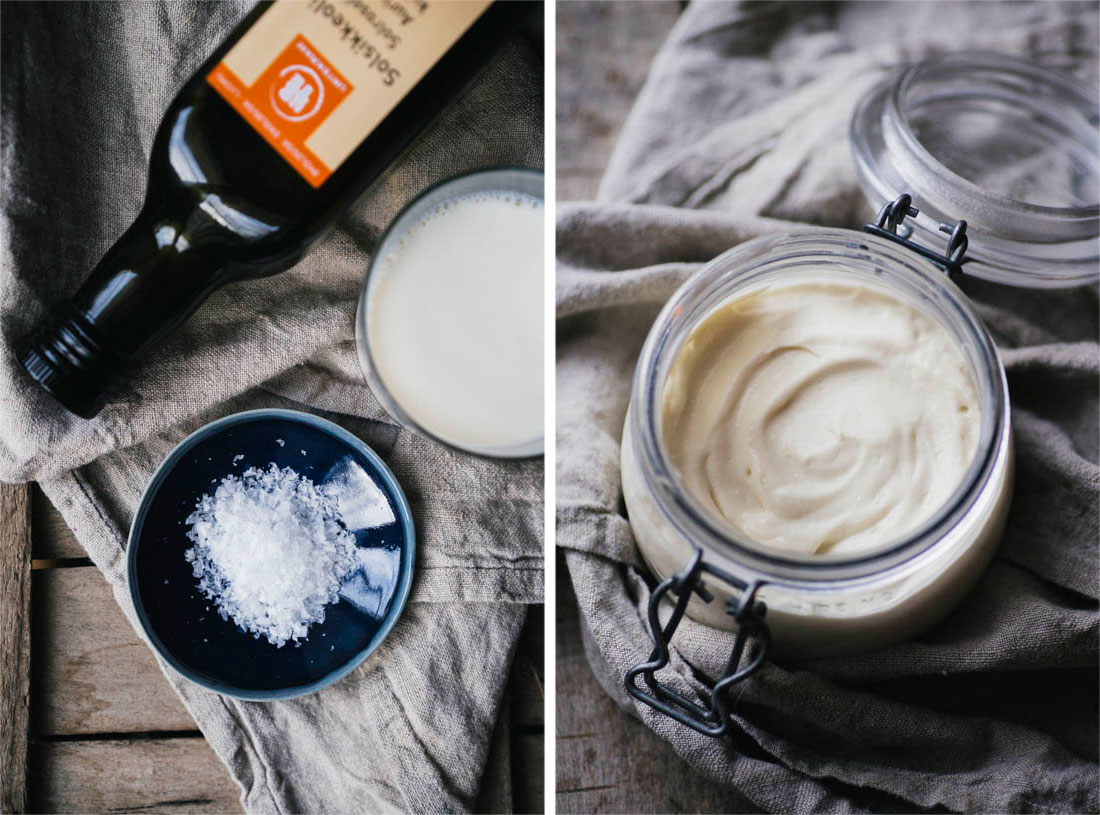
3 tbsp coconut oil, melted
5-6 drops tea tree essentail oil
5-6 drops geranium essential oil, optional (you can also use other oils you like, for example lavender or bergamot)
Mix corn starch and bicarbonate of soda in a bowl or straight in the vessel you intend storing your deoderant in (if it’s big enough for mixing).
Add melted coconut oil and essential oil drops and mix together until well combined.
Transfer to a jar of choice or siply leave inside if you already used it to mix your deoderant.
If in a cool climate find a cool place out of the sun and let your deoderant solidify and you can simply keep it there for the duration. However if you are in a warm climate you might need to refrigerate your deoderant to let it set and then experiment with where you keep it making sure it’s firm enough to use as a cream.

LINK LOVE: JANUARY 2016

Hello and welcome,
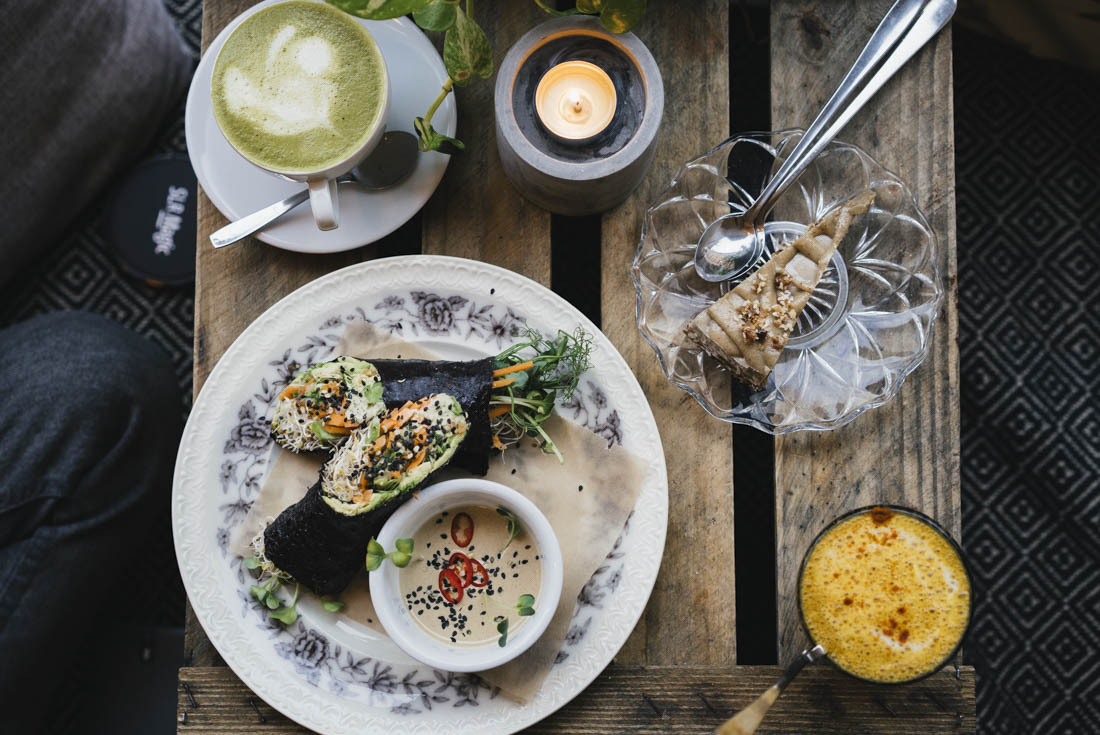
To this new chapter in Good Eatings history; the link love posts. Unfortunately this ones coming a day late but I blame this on the persistent cold I’ve been fighting off the last few days. This January link love post is going to be all about the things that happened in January and the things I enjoyed as I explored Stockholm, Netflix and the internet of course. Also if you enjoy reading these inspiration posts stay tuned for my guide to a vegan’s Stockholm coming to the blog soon! This post is like a little sneak peak of what’s to come, enjoy the chilly pics.
Now let’s get sharing, clicking and enjoying what life has to offer!
Follow Good Eatings on Bloglovin.
I THOUGHT a good place to start would be by setting the soundtrack for this post and surely this has been the soundtrack for many this month as we said farewell to the ground breaking and beautiful musician that was David Bowie. So press play and give him a last thought before we forget as new things appear and disappear in the space and time of 2016. I do realise this is not technically a link but it is the only right way to go as we remember the month that’s past.

Rob on a hill with a view close to Zinkensdamm in Stockholm.
SOMETHING that really set the tone for this month in my life was Netflix and all the fantastic food related documentaries offered on this brilliant service. Here are my four favourites so far that are well worth watching to brush up on your facts and maybe even get inspired to change your lifestyle to a more plant based way (or rather they will most certainly make you think twice about your habits):


Vegan cinnamon roll at Sattva Naturbargeri (Organic Bakery).
NOW THAT you’ve maybe watched one of those documentaries (or when you have) you might want some new food and recipe inspiration to feed your new plant powered lifestyle. Here are my four favourite picks from this month, one for each documentary:
– Spaghetti w. Marinated Tempeh and Lemon/Chilli Sauce by Cashew Kitchen
– Smoked Tofu and Pea Salad or Vegan ‘Fish’ Salad by Nourish Atelier
– Gochujang Sweet Potato w. Coriander and Sesame by Vegan Miam
– Vegan Pho w. Shiitake, Pak Choi and Marinated Tofu by Plant Feed
AND IF you still would like some more plant food inspiration here are my three latest Instagram crushes:

Turmeric Chai at Kaffeverket.
MAYBE YOU are like me and can never get enough of food related media and inspiration and if so this is for you! Here are my two favourite vegan recipe YouTube channels at the moment (next to my own of course, haha):

STHLM RAW.
NOW TO some more site specific items on this list and I’m sure you’ve been enticed by the images in this post and they’re all from the last three weeks that Rob and I spent in Stockholm. And since I’m writing a longer post about all my favourite places to go there I won’t be giving you the full scope right now but I of course want to give you some glimpses into where I enjoyed spending my time whilst there. With that I’m going to leave you and I hope you’ve enjoyed this post! If you have any links of your own to share with us please do so in the comments. x

Västerbron.
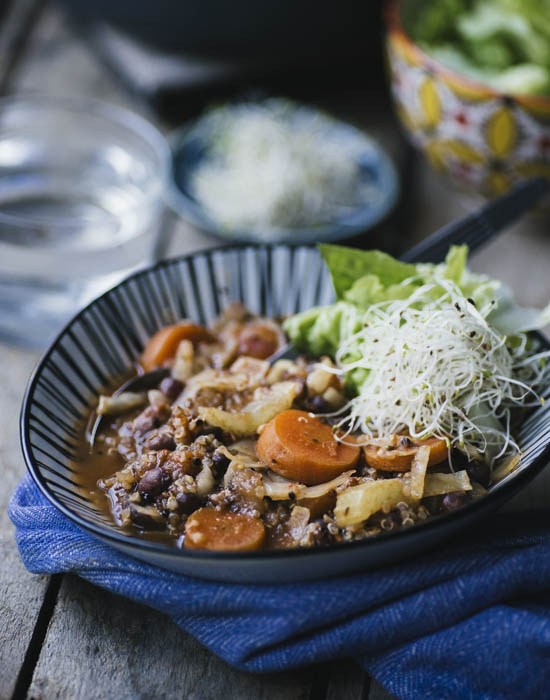
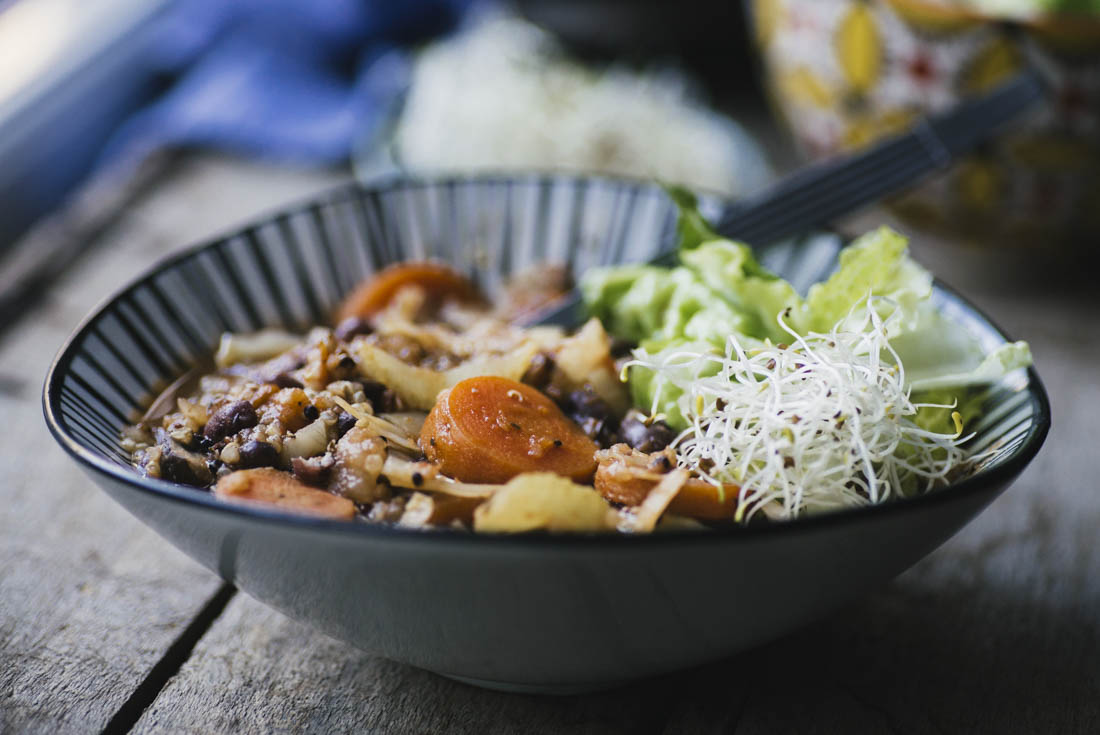
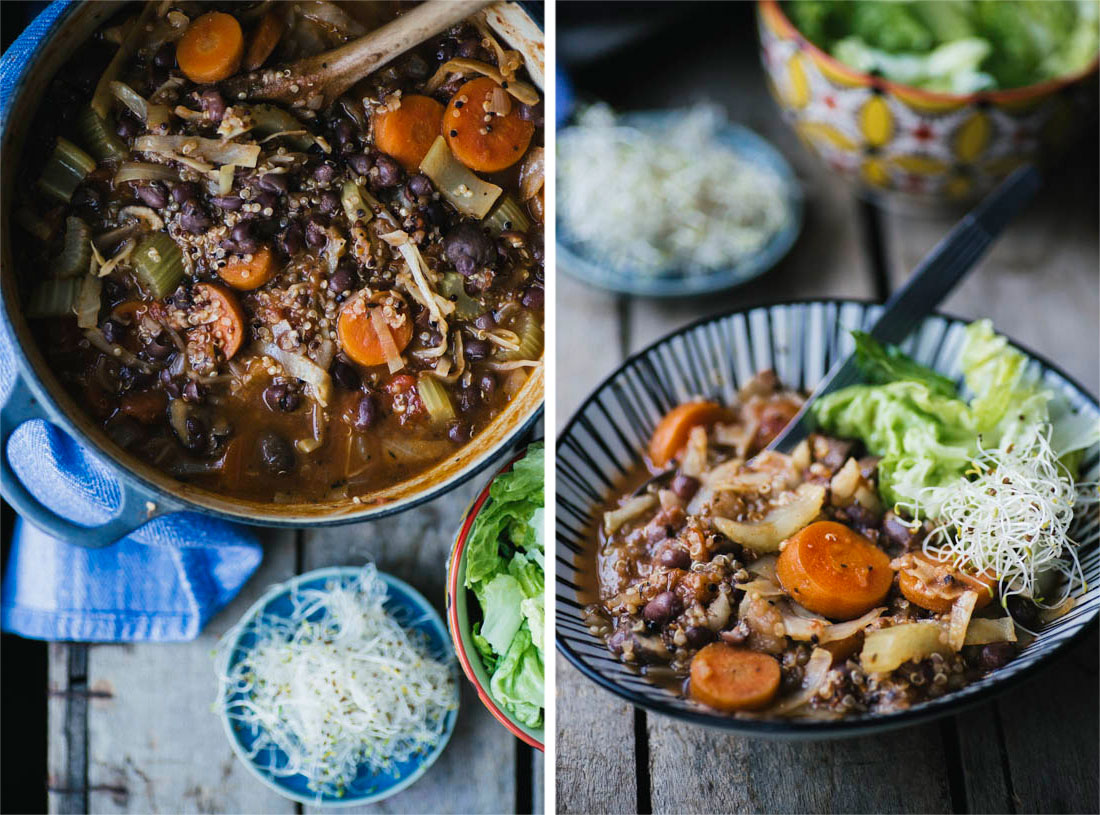
WINTER VEGETABLE, QUINOA AND ADUKI BEAN STEW

Good Day Mates,
A little while ago I posted an image on instagram of a stew similar to the one I’m sharing with you here today and had a lovely response from you guys. One woman asked for the recipe and so here it is; a simple winter vegetable and aduki bean stew. I’ve gotten requests for making more dinner recipes incorporating beans and pulses so to those of you waiting for one of those recipes; this is for you as well! The truth is that when I make a meal like this I don’t usually bother with a recipe, I just look what’s in my vegetable drawer (which often is my whole fridge, haha) and what I have in the cupboards in the ways of grains and legumes. Then I just follow a few simple steps to an easy dinner in. The great thing about this is that also you can do exactly the same thing!
If you don’t have a specific vegetable, grain or bean that is listed in the ingredients list of this recipe – simply use what you have at home and be the master of your own kitchen. I really believe that learning a few simple basics like what steps to take to make a simple one pot stew (not counting the one to prepare the beans) or a good and filling salad or Buddha bowl is the way forward and the a great start to healthier eating habits. Well here is my way of achieving a meal which is nourishing and satisfying in a relaxed and straight forward manner and I hope you’ll enjoy this recipe and play with it to your heart’s content.

There are a couple of things to keep in mind when altering this recipe and it’s cooking time. Maybe you’re choosing a grain like buckwheat instead of the suggested quinoa in which case there won’t be much difference but you could still add it a little later than suggested in my method and let the stew sit for 10 minutes or so after taking it off the heat. If you choose brown rice for example you might want to cook it separately as it takes roughly 45 minutes to cook and only add it into the stew for the last five minutes or so. In terms of beans the choices are endless and don’t be scared off by me soaking and cooking my own beans here, if you don’t have the time or simply don’t want to – use canned/cartonned beans. Your choices are, as I said, endless and that’s the beauty about cooking! Another great thing about this recipe is that you can use up any leftovers that might be sitting in the fridge.
If you have a cup of grain and some cooked beans left over from a previous meal then simply use those and if you have some vegetables rumbling around at the bottom of the vegetable drawer each time you open it and you don’t really know what to do with them then use them here. Make firm contact with your intuition and pick items you think will work well together, everyone is a good cook deep inside (at least that’s my belief and amen to that). If you are buying seasonal vegetables then I think it’s usually quite easy to pair your items in a successful way but really; anything goes! As long as you, and the people you are possibly eating with, are happy and satisfied at the end of your cooking and eating experience you’ve done a good job. All in life is a learning curve and cooking is a wonderful process to get involved in – it will nourish your mind, body and soul! x
Follow Good Eatings on Bloglovin
.
WINTER VEGETABLE, QUINOA AND ADUKI BEAN STEW
PORTIONS: 5-6 / TIME: 50-60 min
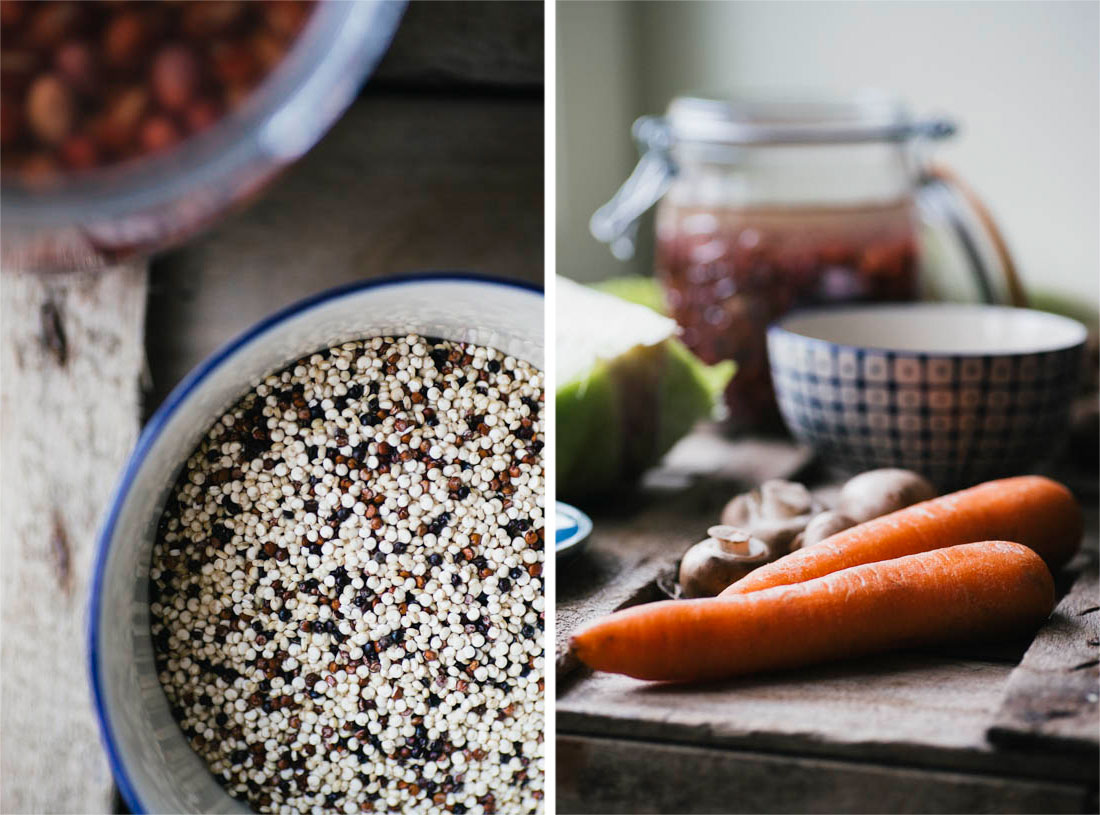
1/2 cup dried aduki beans + 1 kombu/kelp strip, soaked over night or at least 8 hours
1/2 cup quinoa, rinsed and drained
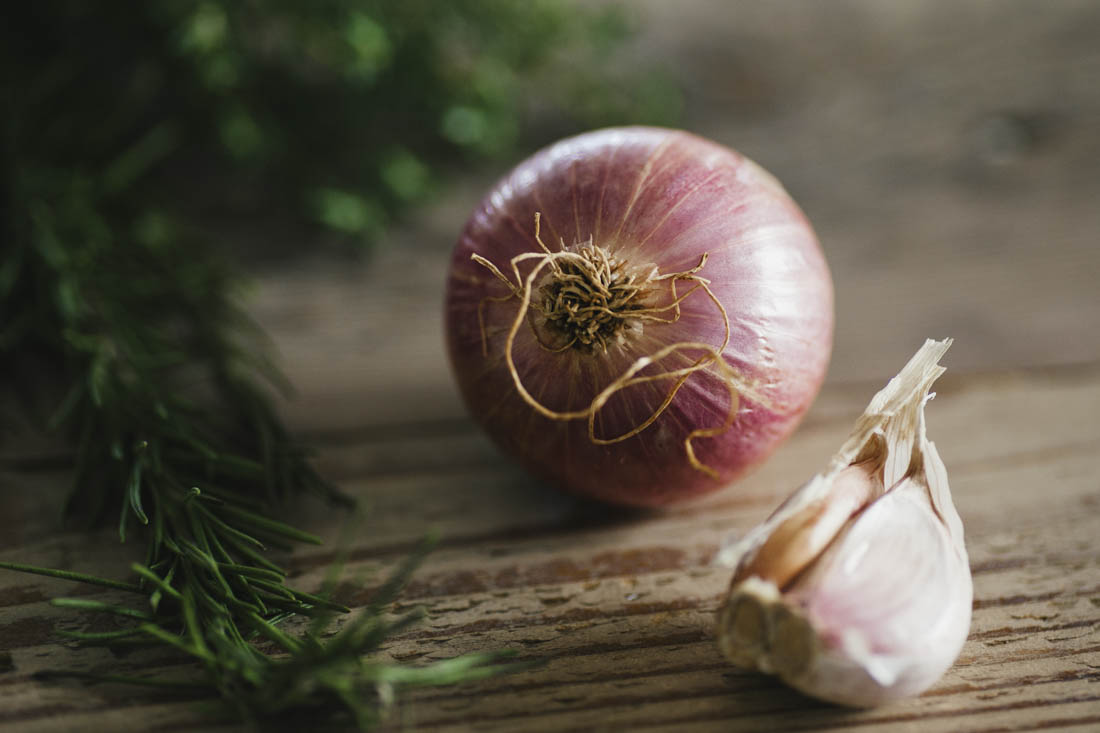
1 large brown onion, chopped
2 garlic cloves, minced
3/4 cup carrots (roughly 2 medium carrots), cut into coins
3/4 cup celery (roughly 2 medium celery ribs) cut into 1 cm long chunks
1 cup cabbage, sliced
1 1/2 cup chestnut mushrooms, halved or quartered depending on size
400 g can chopped tomatoes
Water + 1 stock cube (or vegetable stock)
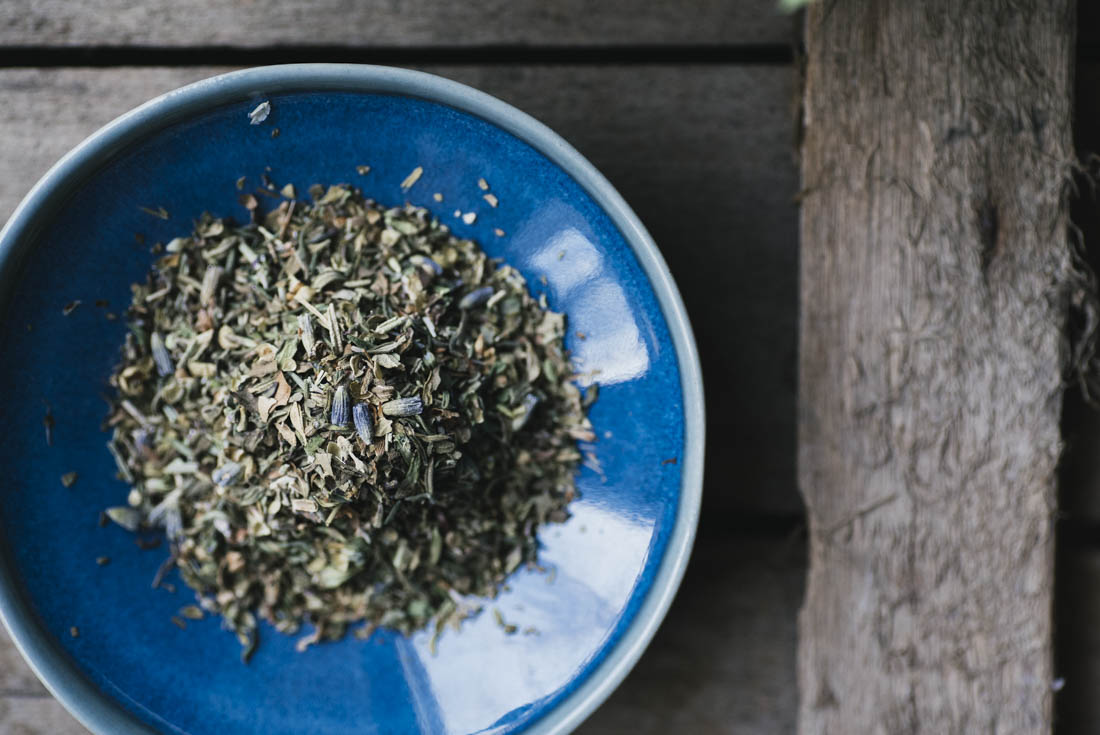
1 tbsp Herbes de Provence
1/2 tbsp dried thyme (for extra herby punch)
2 bay leaves (not for eating, just flavour additions)
1 tsp smoked paprika
Tamari/Shoyu/Soy sauce/Sea salt and black pepper, to taste
Drain and rinse aduki beans and the kombu strip and place them in a pot. Cover generously with water and bring to a boil, and once boiling turn down the heat to a simmer.
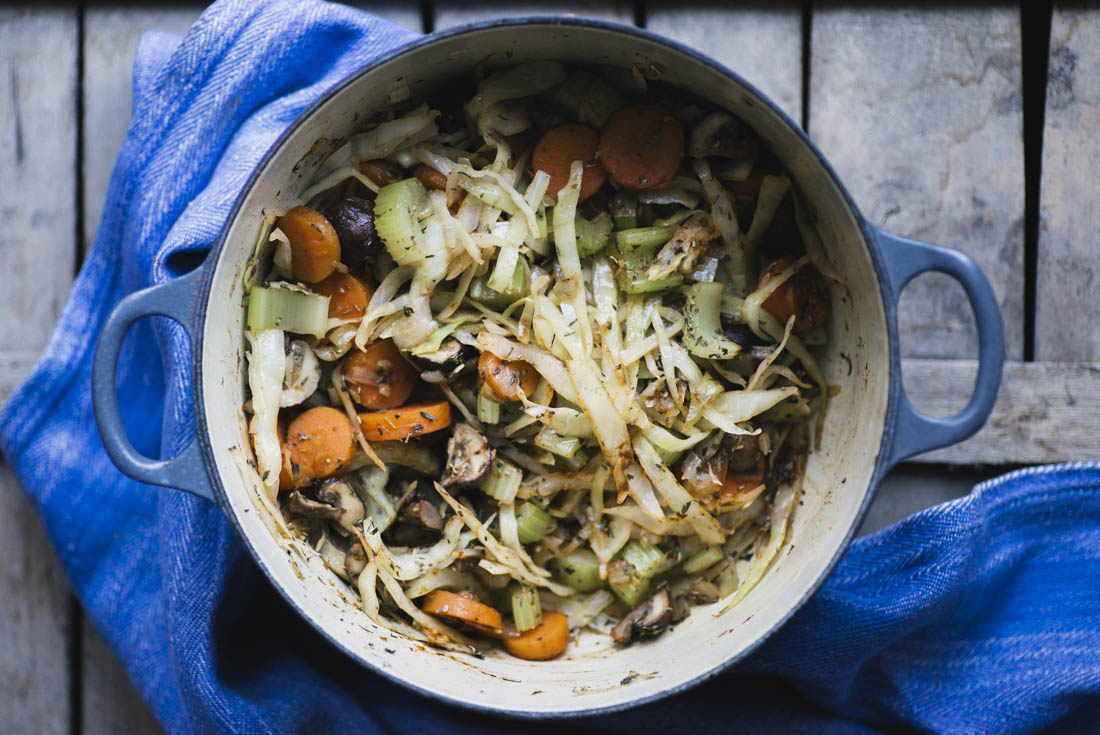
Let the beans simmer whilst you prepare the vegetables. Once you’re done with your prep work you should be roughly 10 min into simmering the beans and you can heat a stew pot (large) with a little oil.
Add onions to the pot and cover with the oil before covering with lid and sweating for roughly 5 min. Then add the carrot coins and sweat for another 4-5 min before adding the rest of the vegetables including the minced garlic as well as the herbs and paprika powder. Sweat for an additional 4-5 minutes.
Once the vegetables are slightly tender and have released some of their juices add quinoa as well as the beans that are now half cooked (discard the kombu). Cover with 1 1/2 cups of water and a vegetable stock cube or vegetable stock as well as the chopped tomatoes and bring to a boil. Once boiling turn down to a simmer and let simmer for roughly 20 minutes or until quinoa and beans are cooked through.
Enjoy with a side of your favourite grain and/or your favourite simple salad.
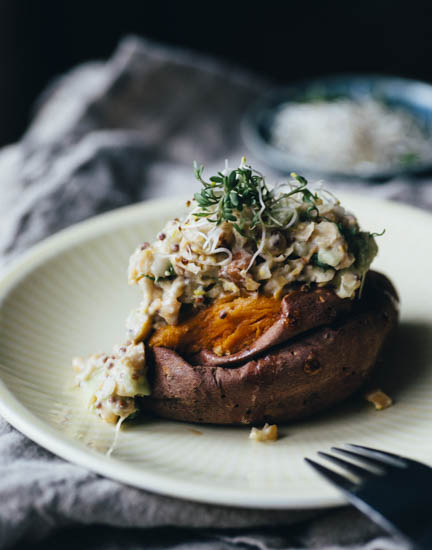
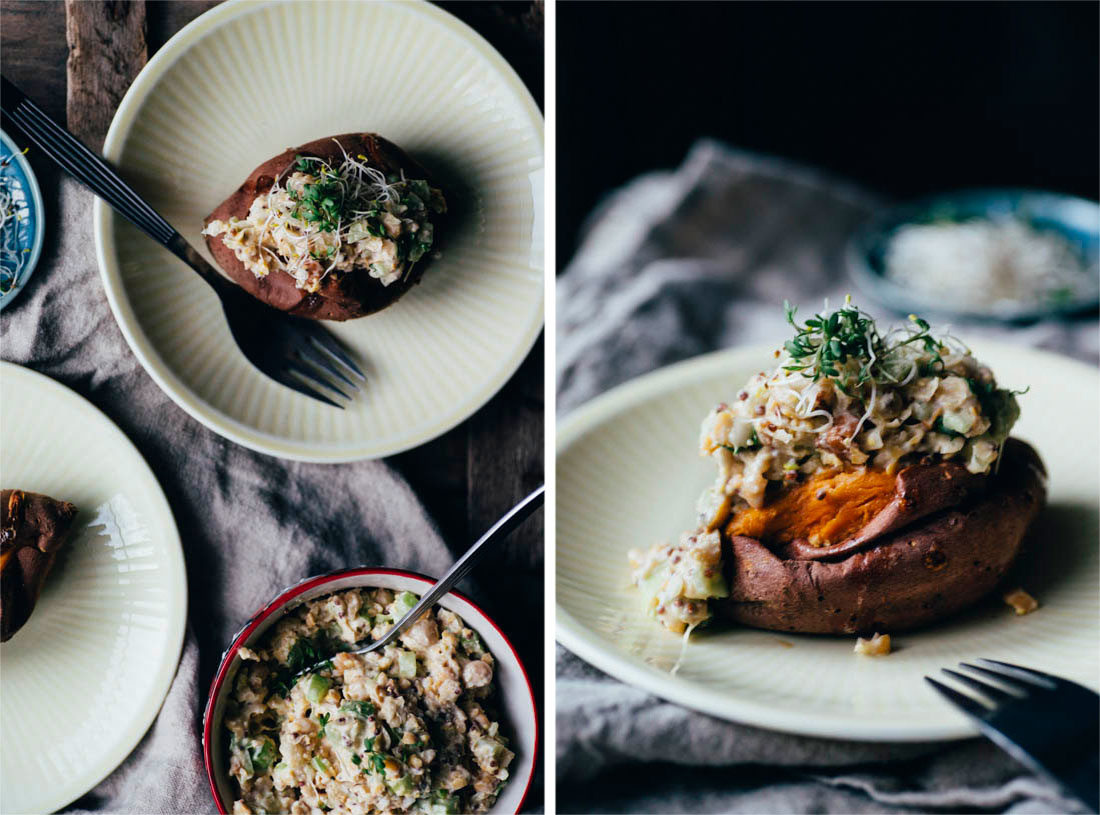
VEGAN 'TUNA' MAYO + ROASTED SWEET POTATO
Happy Saturday People!
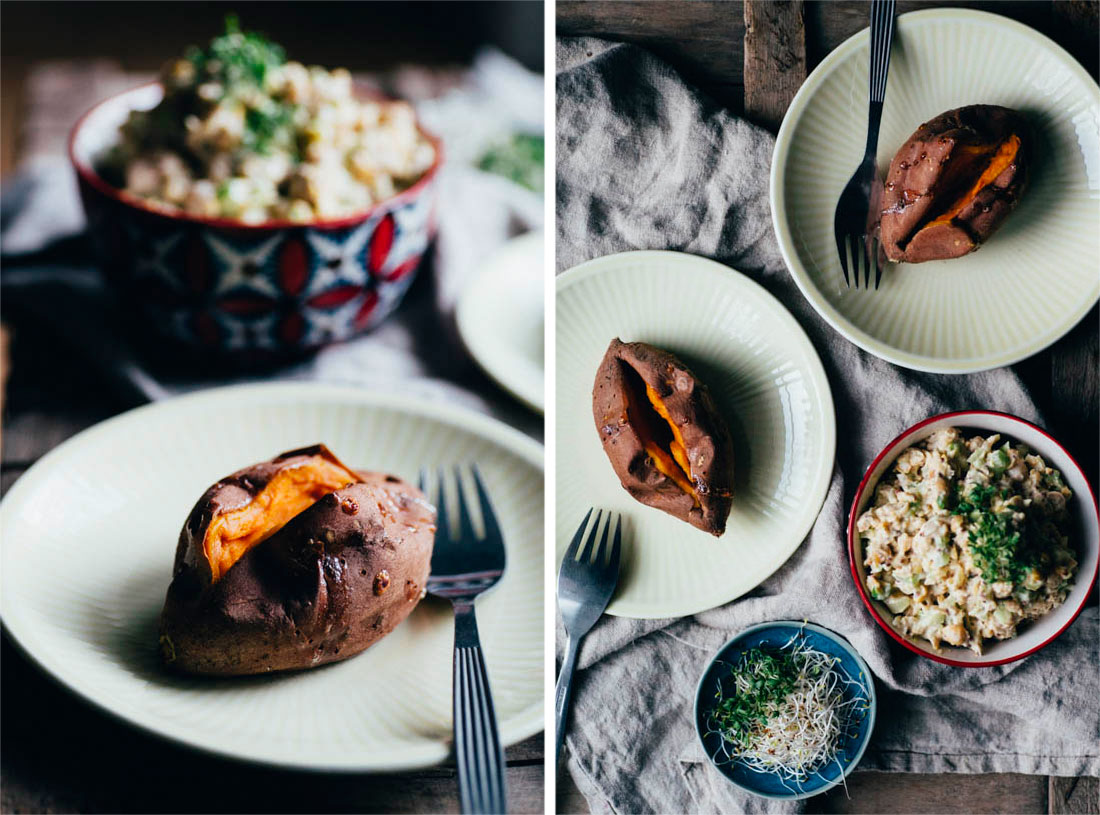
It is rather gloomy here in Stockholm today after a bunch of sunny blue skyed days and as I scrolled through the preview of this post the light in the images definitely reflect this more subdued light that’s coming through my window as I write this. I’m here on the blog today to share with you my best vegan tuna mayo and my favourite simple way of eating it on top of a deliciously roasted sweet potato. This kind of vegan tuna mayo isn’t exactly an innovation but it’s scrumptios nonetheless and it was the perfect next recipe to share after I posted my homemade vegan mayonnaise on Wednesday. I hope you checked it out!
I continue on with my video making for this recipe and I’m thoroughly enjoying myself in the process. It’s great working together with Rob as well and we’re both learning lot as we figure out how to make delicious videos for you guys. I’d love to get some feedback from you if you ahve a minute, let me know in the comments what you think about the videos. I’d love to hear your thoughts and maybe you even have some requests on what I should film next?
Anywho, enjoy our latest video here before checking out the recipe. It really brings the food to life! And if you want subscribe to Good Eating’s YouTube channel to never miss a video.
This recipe brings me straight back to school days when my mother used to mak us tuna mayo all the time. I used to love it and being reunited with my fond memories through this vegan version brings me a lot of comfort and joy. I’m sure you guys have dishes that would do just that too and it’s amazing how so many emotions are connected to our memories of food.
We had another experience here in Stockholm that really took me back to my childhood when we visited a Japanese restaurant called Kokyo. I know what you’re thinking now; ‘how can a Japanese restaurant’s food remind a Swedish girl about her childhood?!’. Well let me tell you! They make their own tofu and soya ‘meats’ at this restaurant and we were served tiny little soya meat balls and jeez! they tasted exactly like the pre cooked and pre packaged ones my father used to buy all the time. We used to eat those straight out the package watching tv (which now seems pretty disgusting) but when I put one of those little soy ball guys in my mouth I wanted to quickly gobble them all up before Rob even had caught a glance of them, ha!
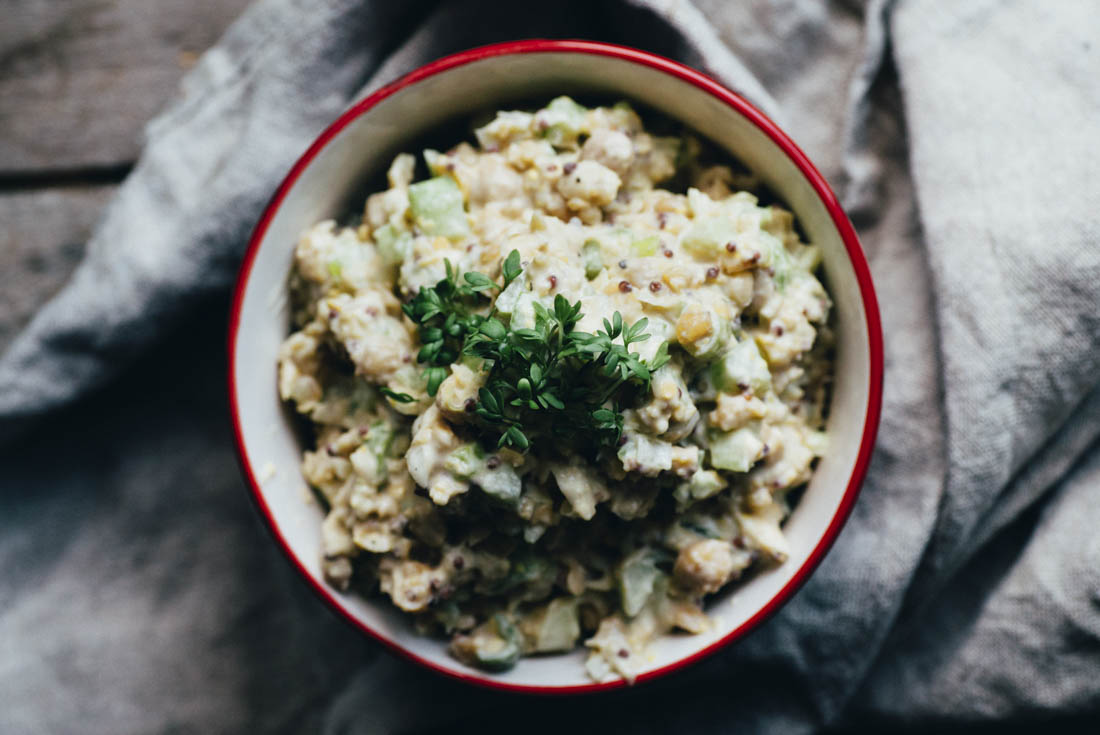
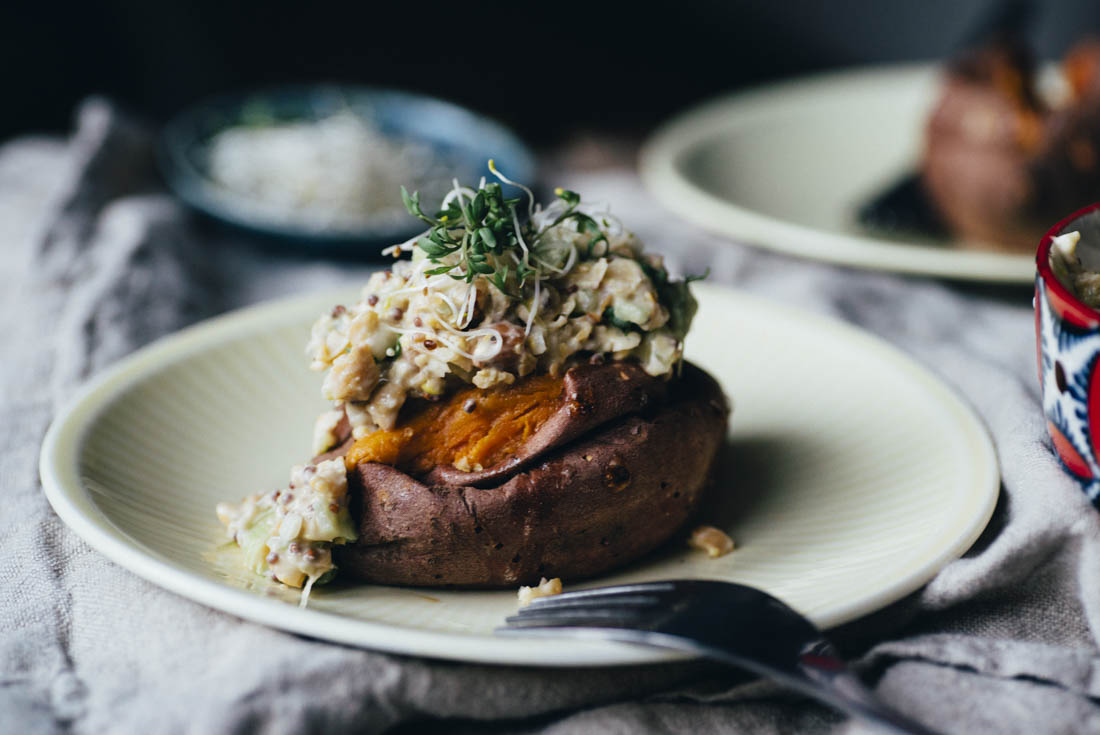
This vegan tuna mayo has a similar effect on me and I absolutely love it on top of roasted sweet potato. Or in sandwiches, but the roasted sweet potato brings a sweetness and colour to my plate which goes perfectly with the pale chickpea ‘tuna’ mayo. And the soft gooeyness of the potato goes perfectly with the creaminess of the mayo and even more so with the crunch of celery and spring onion that spots this vegan ‘tuna’ mayo.
I really hope you give this one a go because it really makes me so excited and let me know what foods take you straight back to your childhood!
Follow Good Eatings on Bloglovin.


VEGAN ‘TUNA’ MAYO + ROASTED SWEET POTATO
PORTIONS: 3-4 / TIME: 50-60 min
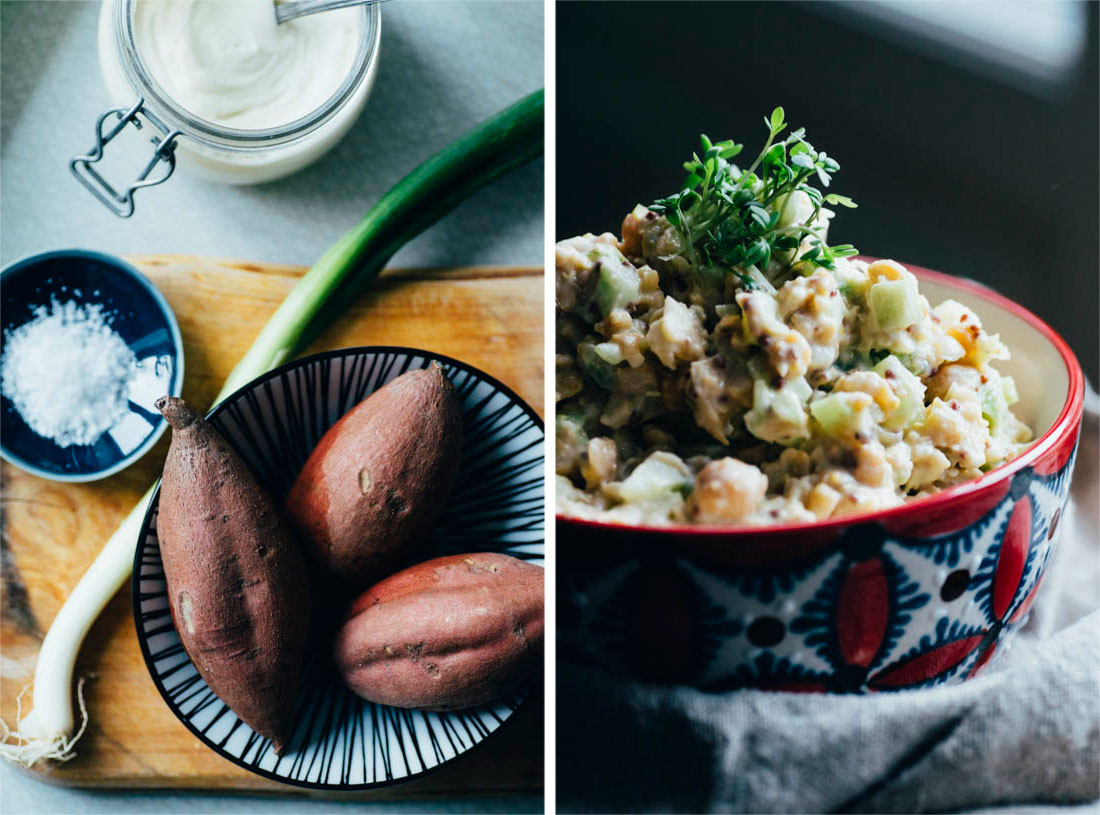
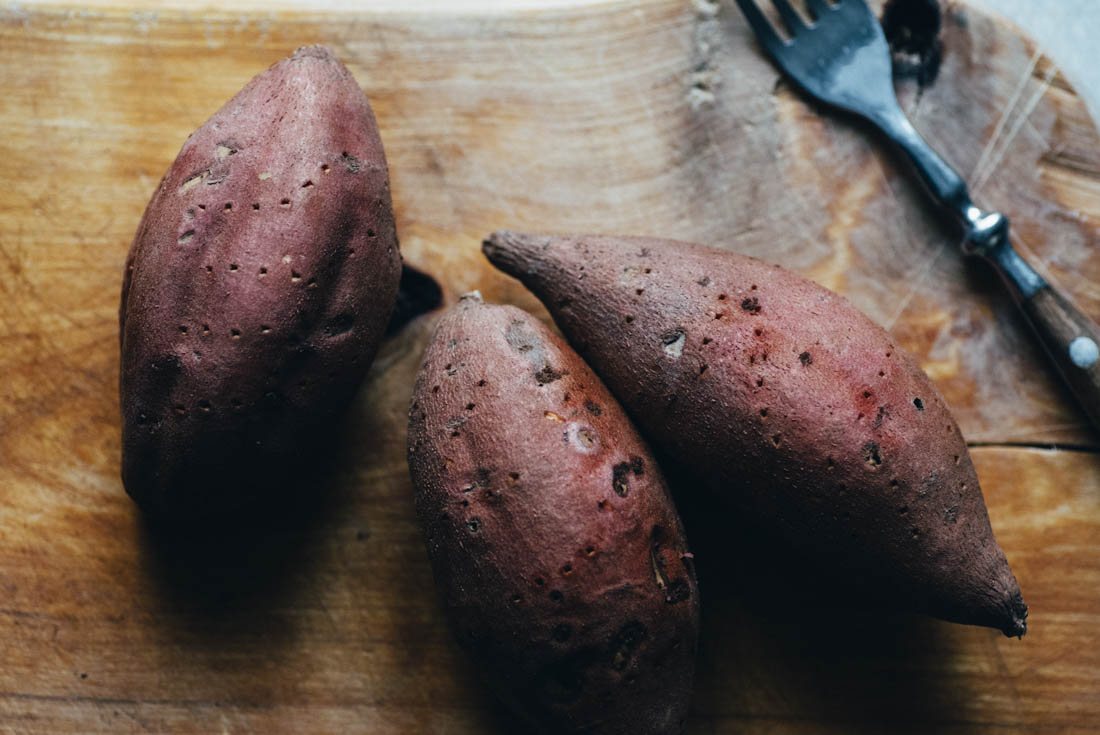
3-4 small/medium sweet potatoes
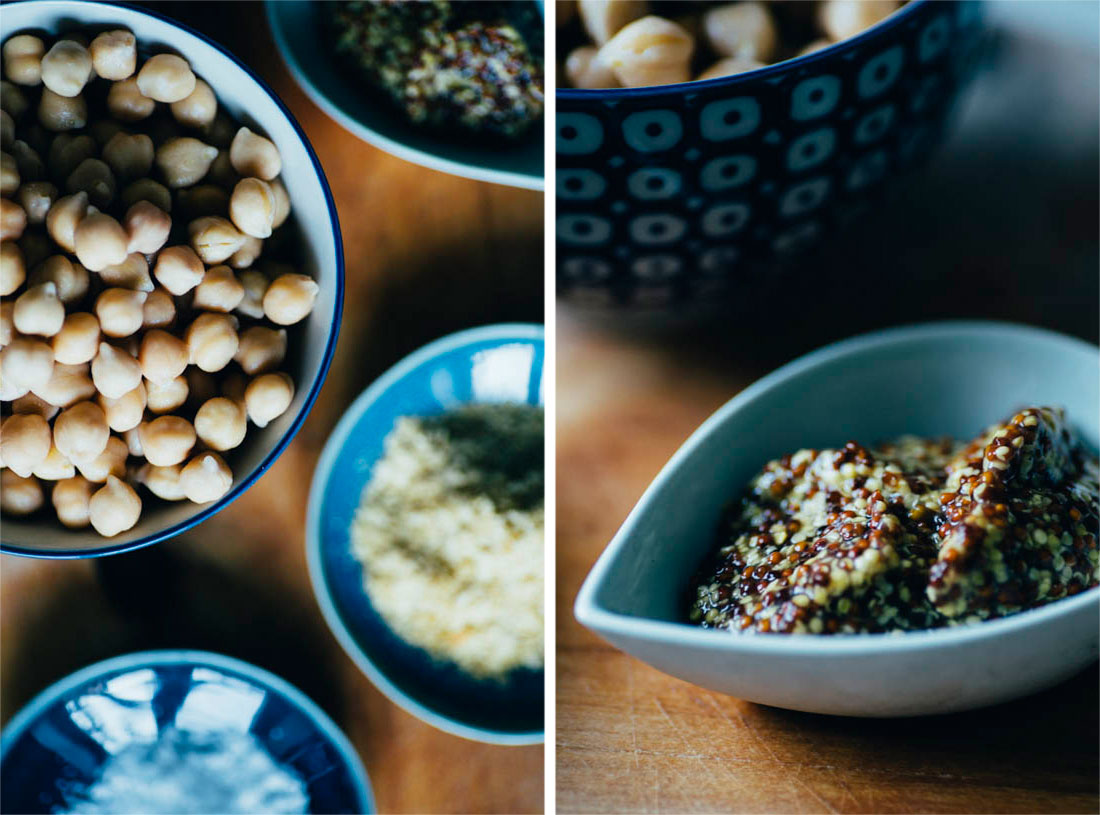
1 1/2 cup cooked chickpeas (equivalent of a 400 g can), roughly mashed
1 large or 2 small spring onions, finely chopped
1 medium/large celery rib, finely chopped
3-4 tbsp vegan mayonnaise
1 tbsp grainy mustard
1 tbsp apple cider vinegar
1 tbsp nutritional yeast
Sea salt and black pepper, to taste
Serving suggestion; greens and sprouts
Preheat oven to 200 degrees celsius and clean your sweet potatoes. Then stab them with a fork a few times before placing them on an oven tray (with or without baking sheet, using one will keep your tray clean). Bake them for 45-60 min. You can push on the potato gently and if it gives way slightly it’s done, or just do the old stick test to see if the potato is baked through.
Whilst your potatoes are roasting make your chickpea ‘tuna’ mayo starting with mashing your chickpeas roughly. You can use a fork, a hand masher , a hand blender or a food processor for this. I like mine a little bit rough however so if you agree be careful when using a blender or food processor.
Add chopped celery and spring onions to the bowl and mix with the chickpea mixture. Then add all remaining ingredients and combine. It should be creamy and flavourful, adjust your seasoning to suit your taste and go for 4 tbsp of mayonnaise if you like it creamy.
Once potatoes are roasted cut them down the middle and push the side to open a pocket. Fill it with your chickpea mayo and maybe top with some sprouts or serve with a handful of your favourite greens.
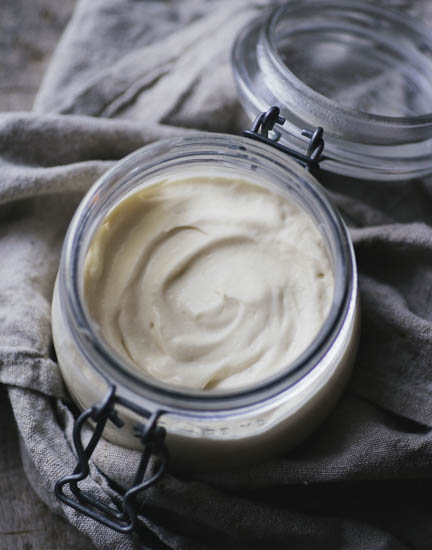
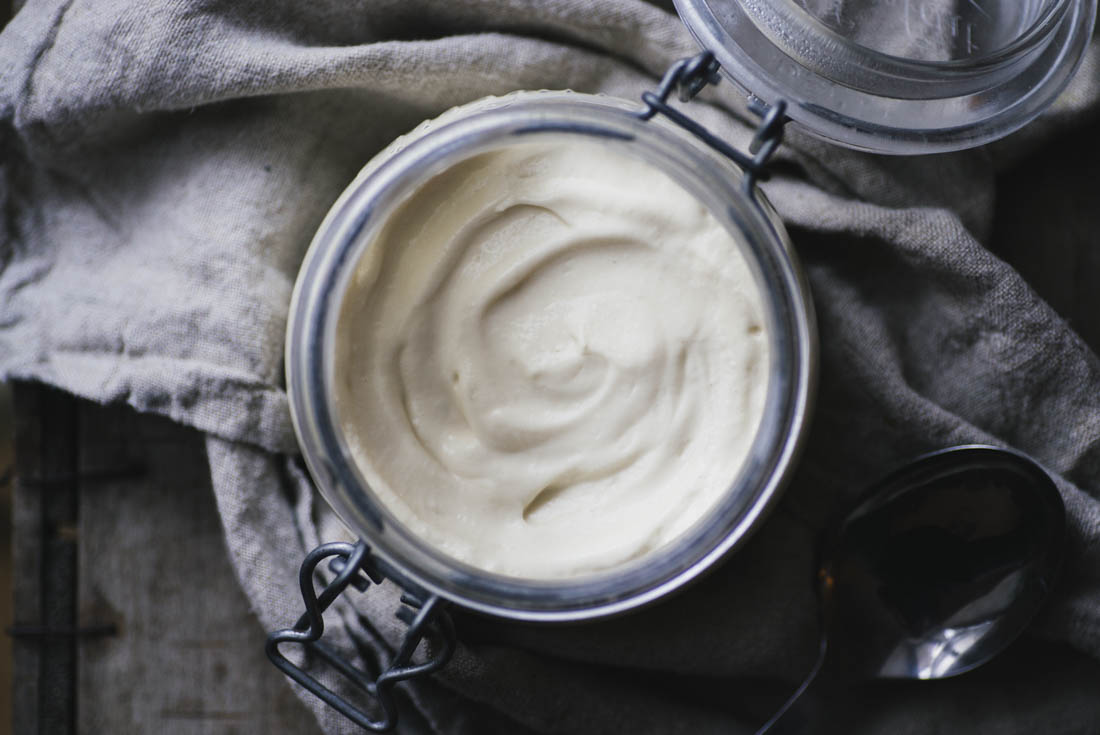
BASICS: HOMEMADE VEGAN MAYONNAISE
Hello!
Here we are; 20 days into the new year and to be honest I thought I had it all figured out but seem to have got lost somewhere along the way into this first month of 2016. Maybe some of you are with me on the lost trail and if you are my only advice is to keep doing what you’re doing and trust the process! So here I am trusting the process with a brand new section to the blog that I like to call ‘Basics’. I’ll be sharing all my tricks and recipes for making vegan staples from scratch in this category and I thought I’d start with the crowd pleaser that is homemade vegan mayonnaise!
You might be thinking that I’m not aware of your new year’s resolution of ditching all the foods that might be harsh on your waist line but believe me I haven’t. I’m very aware that January is a month of new yous and new ways and I’m all for renewing our outlook on various aspects of life but to me it is important to remember that life is best lived in balance. That means having foods that naourish me from the inside out but also eating in a way that makes me feel satisfied. And if there’s something that’s satisfying it’s mayonnaise and if you are conscious about your health and making changes to your ways then learning to make your own is a great step to take.
Often in store bought products there are additives and preservatives to make the item last longer or taste better. Therefore when I can and have the time I like to make my own staple foods. There is something as equally satisfying as eating mayonnaise in using a staple item that you’ve made yourelf from scratch; be that your own plant milk, jam or in this case mayo. I’d really love to invite you to try it for yourself!
And trust me it is not as labour intensive or expensive as you might think making your own goods from scratch and this is what I’d like to show you with this series of ‘Basics’. Come along with me and we’ll start by making homemade vegan mayonnaise in ten minutes!
ps. check out my video here to follow along and we can make it together.
Follow Good Eatings on Bloglovin.
Subscribe to Good Eatings’ YouTube channel.
HOMEMADE VEGAN MAYONNAISE
PORTIONS: Roughly 1 1/4 cup / TIME: 10 min
1/2 cup soya milk (I use organic and non-GMO)
3/4 – 1 cup sunflower oil
1 1/2 tbsp apple cider vinegar
1/2 – 1 tsp maple syrup
Pinch of salt
Place soya milk into a bowl (if using hand blender) or your standard counter top blender and add in all other ingredients accept the sunflower oil.
Be ready with your hand blender as you pour in the oil, blending at the same time on your low/medium speed. If using a counter top blender simply place the lid onto the blender and pour the oil in through the lid hole as you blend on a slow/medium speed.
Start by pouring in 3/4 cup of the oil and if you’ve reached a nice mayonnaise consistency stop here, if you like your mayonnaise richer and more firm than keep adding a little oil at a time, up to 1 cup in total.
Rest in the fridge for at least 15 minutes to let the mayonnaise cool down and firm up after the blending process. It will get a little more solid once cooled.
Enjoy this mayonnaise in various sauces, spreads and veg mixtures!

CASHEW CREAM OF CAULIFLOWER SOUP W. SUN DRIED TOMATO AND ROSEMARY
Greetings from Stockholm!
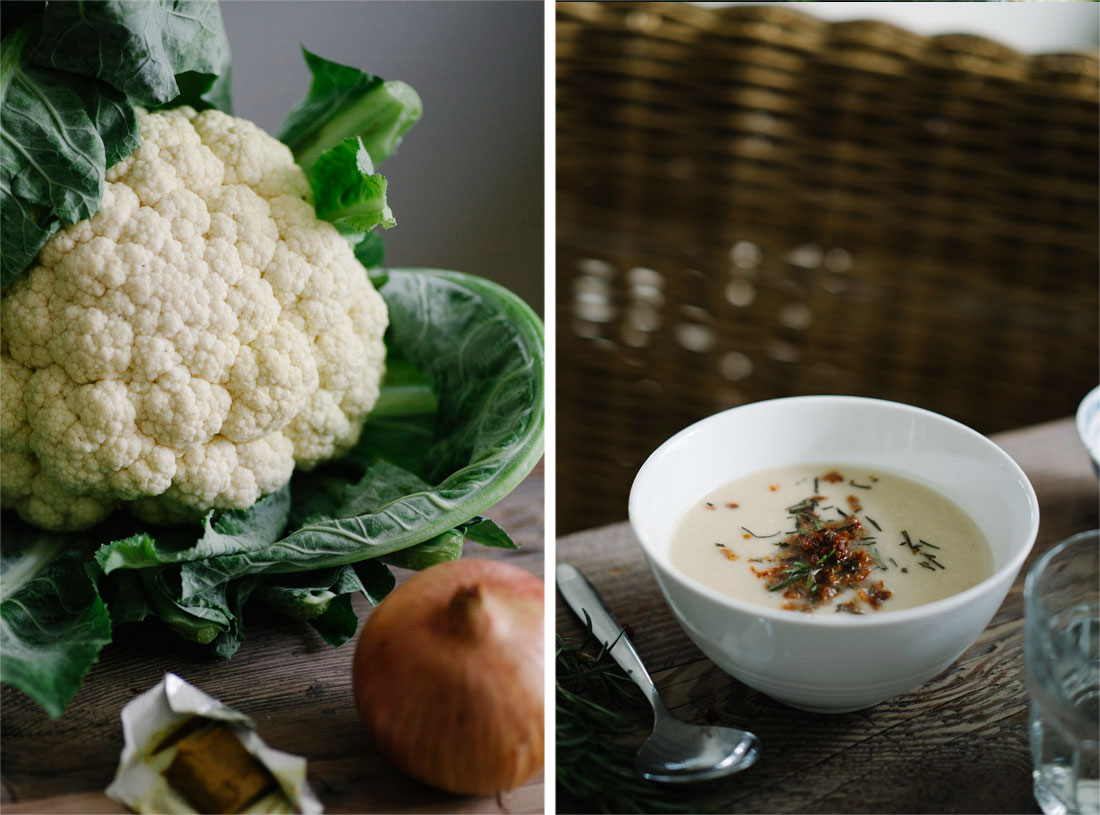
Are you keeping up with my where abouts? I’m not, haha! No, I am more or less aware of where I am at the moment. And to be completely serious Rob and I arrived in Stockholm on Saturday afternoon and have since been battling colds right, left and center but things seem to be looking up again and I’m glad to be back here with another recipe. It’s a actually a recipe we filmed in Mauritius that I was keeping for a colder day and today here in Stockholm is definitely one of those. What’s it like where you are? I give you a cashew cream of cauliflower soup topped with finely chopped sun dried tomatoes and fresh rosemary. To me this is perfect January food when you might want to inject some lighter meals into your life but still want smething warm and cosy to snuggle up with in front of Netflix (yes, I might be projecting slightly, ha!).
Speaking of Netflix, before we get into more of today’s recipe, there are so many good food documentaries there! I have been using the American channel, but I’m pretty sure there are a few on the British and Swedish one too. Having been ill at the beginning of this year I’ve had plenty of time to plow through them at a frantic speed, in fact I’ve watched six food related documentaries already this year. And! That’s not including the Netflix original Chef’s Table which by the way is beautifully shot but has a tad too much meat for my liking. The films I’d really like to give a shout here though are films like Forks over Knives, Cowspiracy, Vegucated and Food Matters. All of which I’d recommend to anyone and everyone. Especially if your considering becoming vegan or changing your diet and want to learn more about what doing this might mean on a larger scale for your fellow animal friends, the planet and your very own health. Also this is not an add for Netflix I’m just very excited with their offerings and thought I’d share the love. My love for this information/entertainment provider that is. You can of course watch these films elsewhere and I’d highly recommend doing so whether you have Netflix or not!
Now let’s get back to what today is really all about, which is of course totally vegan too, and it’s creamy cauliflower soup! I made this and posted a picture on my instagram which got great response and quite a few people wanted the recipe so here it comes. Your wish is my command! At least in (vegan) food related matters. First I’d love it if you’d watch my new youtube video where I invite you into the Mauritius kitchen for some cooking and eating as a preview to what you could be making at home. I’ll go into more detail on the soup itself below!
Subscribe to my YouTube channel.
I made a version of this soup the first time in Dubai with Rob’s mother and it was heaven. I did however miss the creaminess and therefore I came up with adding the soaked cashew nuts to the soup to create hat desired effect. In my opinion it came out great and I wish you’ll give this cream of cauliflower soup a go because I’m hoping you’ll love it as much as I do. If you are a devoted reader of this blog (which of course I hope you are, haha) you’ll know that I love soups and this one is no exception as you can probably tell from this paragraph.
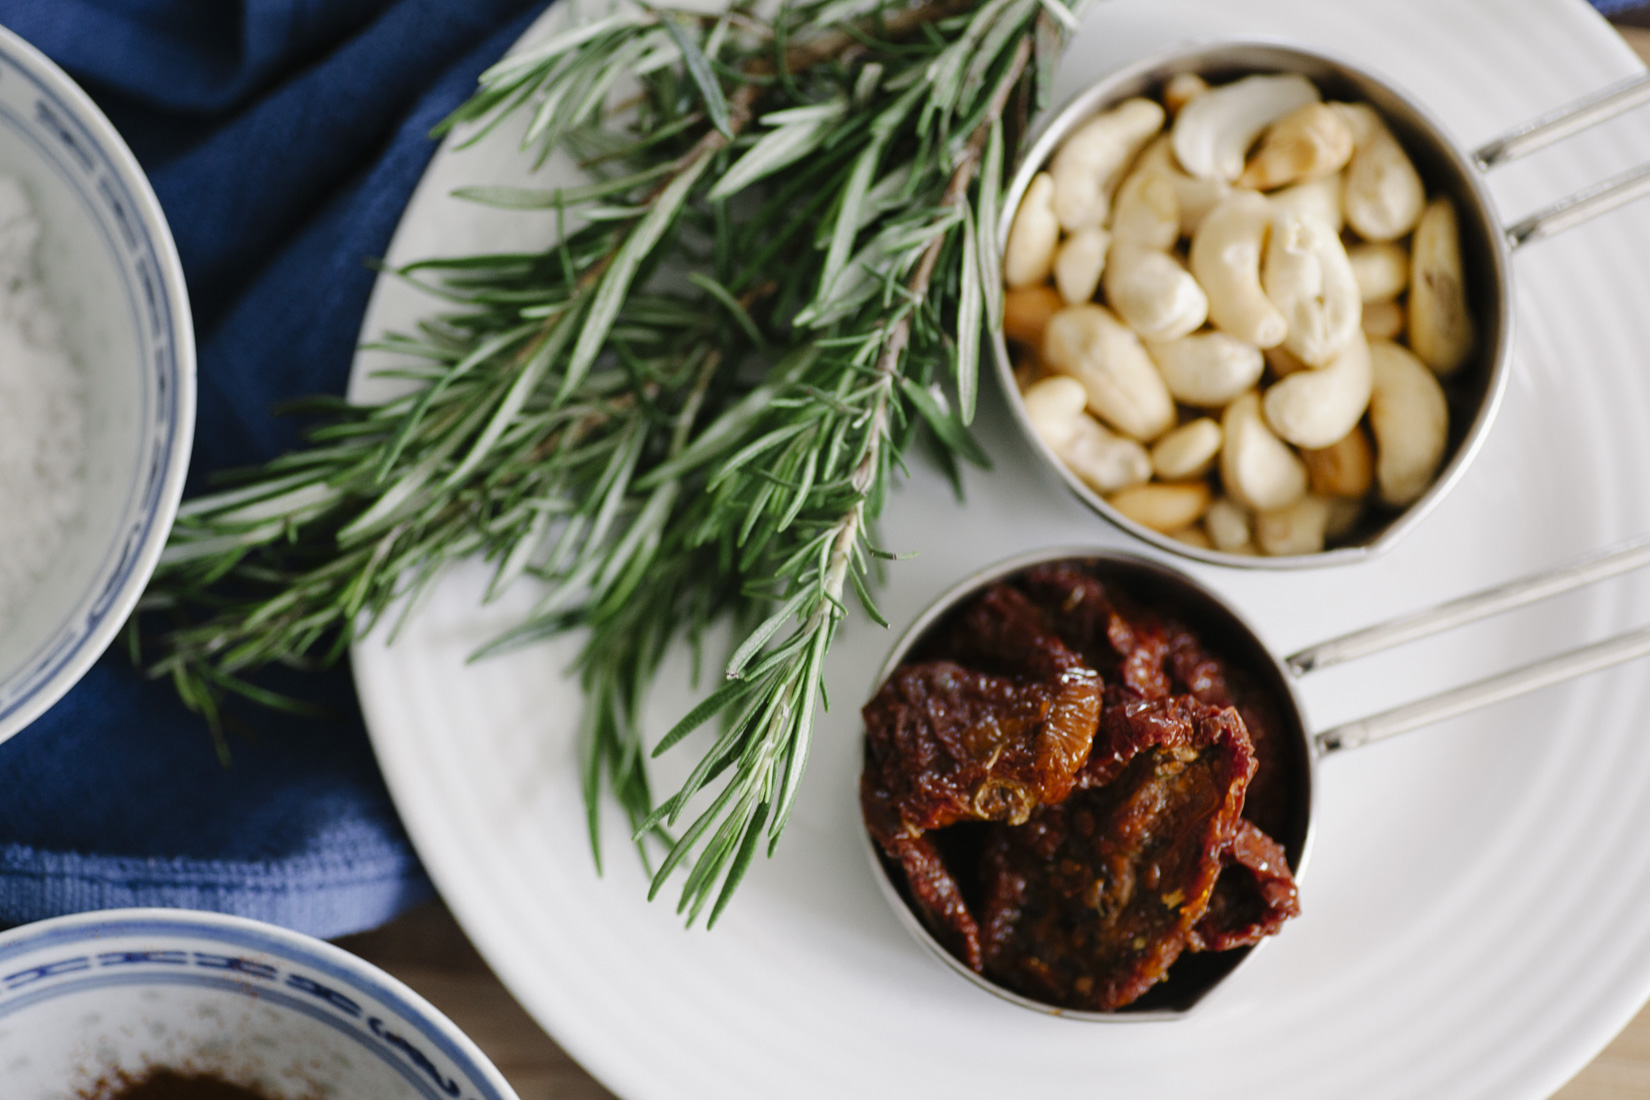
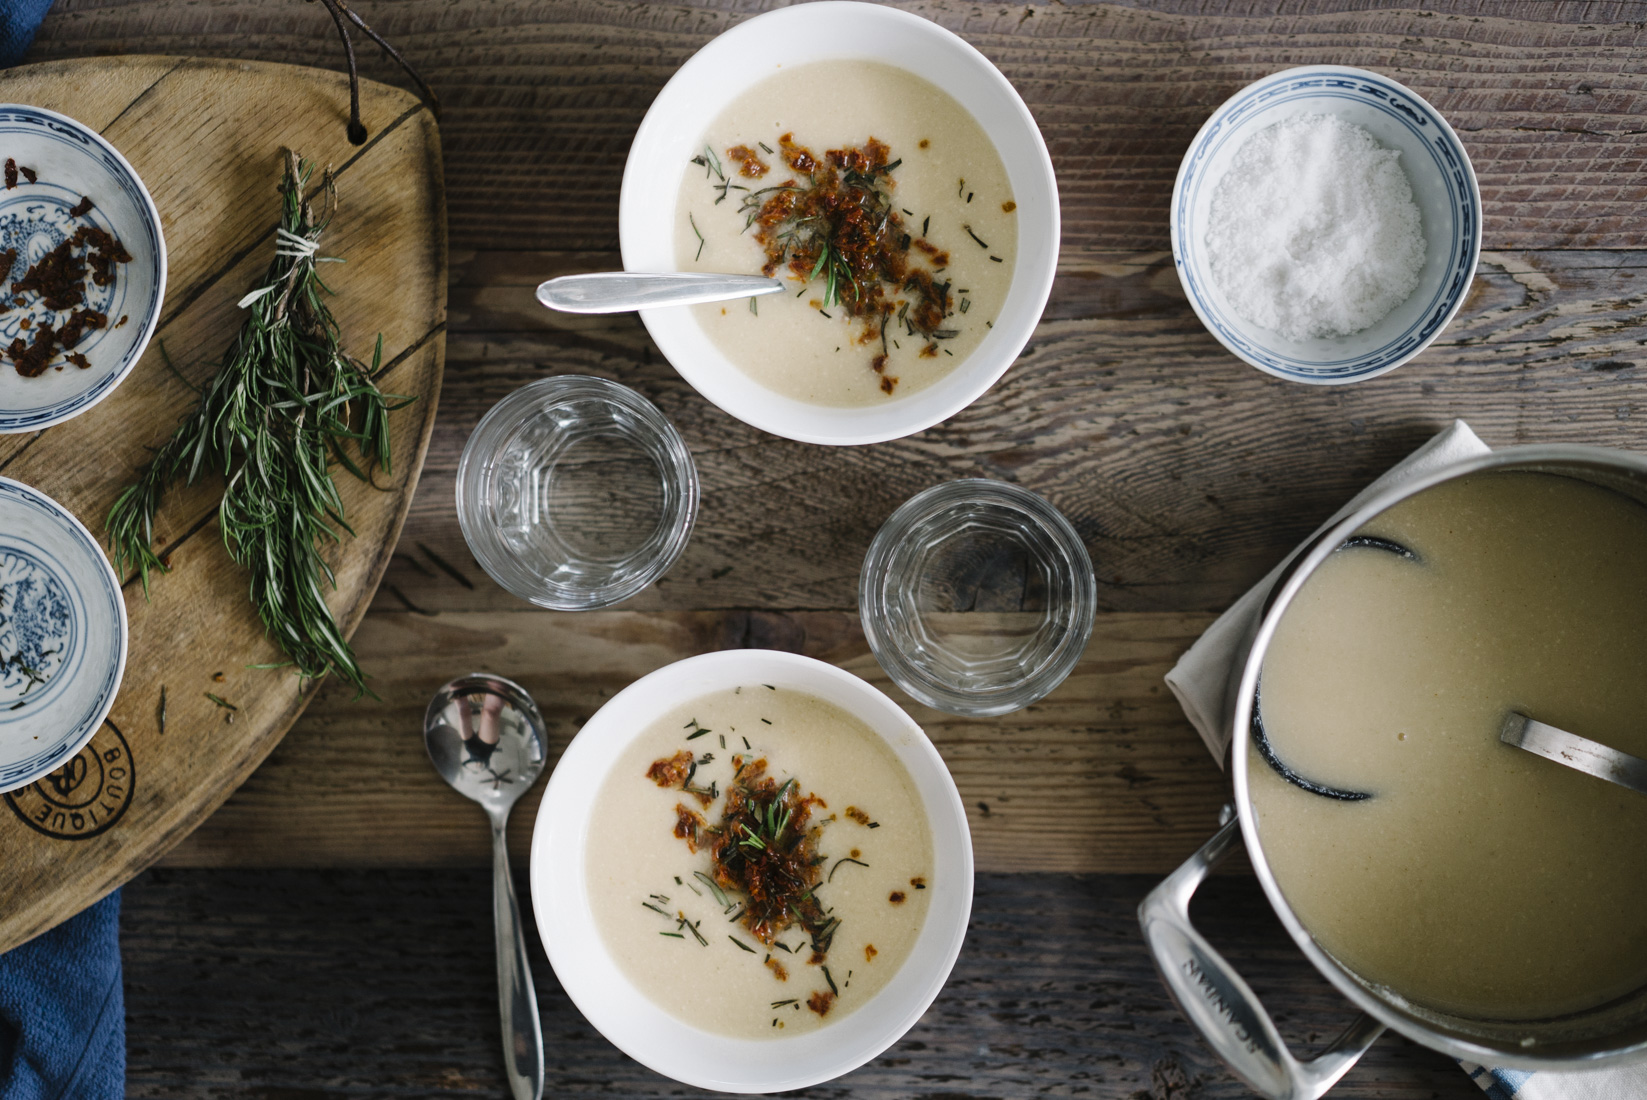
Further I added some toppings to the cauliflower soup base, this seems to have become a trend amongst food creators last year and I don’t want to be inferior of course. No, jokes aside I really love the opportunity of adding textures and flavours to your soups through toppings to let them go that extra mile in terms of tastiness. Here I added finely chopped sun dried tomatoes, an ingredient that’s very hot in our kitchen right now, as well as fresh rosemary. I love those tougher more earthy flavoured herbs in winter and I think rosemary lends itself perfectly to the smooth cashew and cauliflower base whilst the tomato adds a bit of tang.
Enjoy this soup with your favourite chunk of bread (in my case this has to be gluten free) for that ultimate rustic feel. x
CASHEW CREAM OF CAULIFLOWER SOUP
PORTIONS: 3-4 / TIME: 40 min
1 medium cauliflower, florets
1/2 cup of cashew nuts, soaked for roughly 8 hours (if in need of a quick fix soak for 20 min in boiling water)
1-2 brown onions, chopped
1 tbsp boullion, 1 stock cube or vegetable stock instead of water
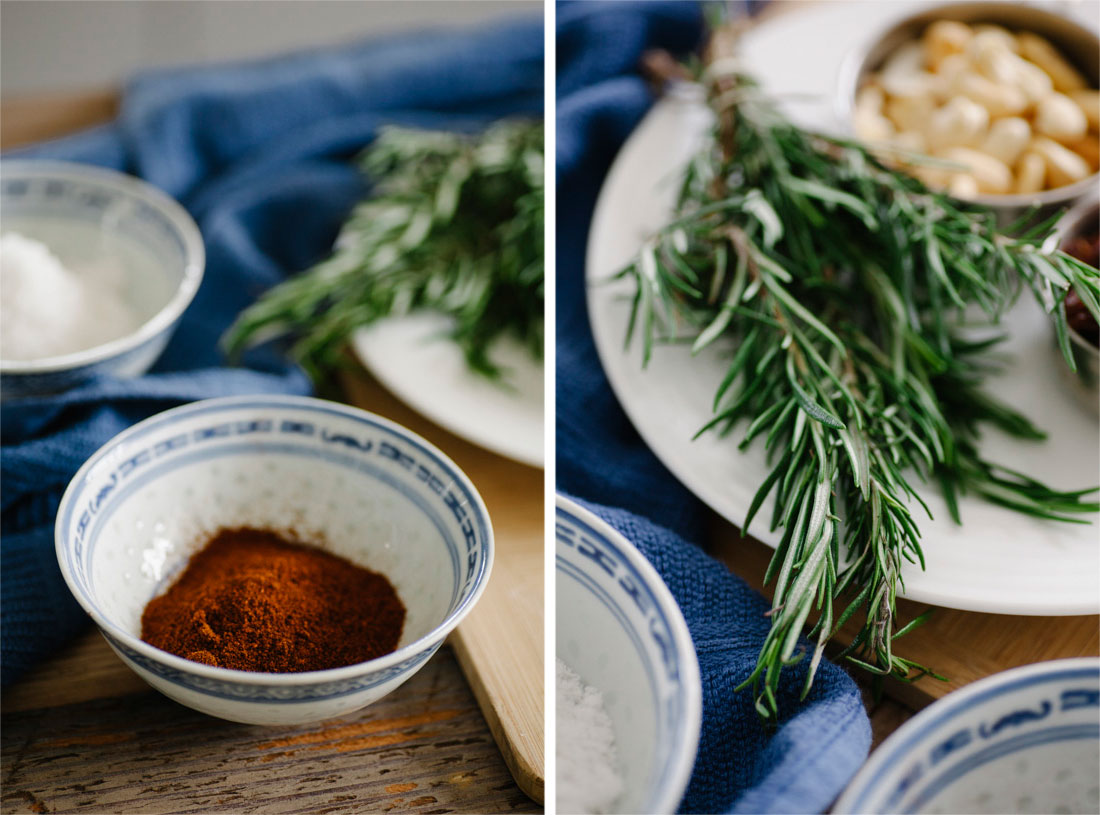
1 1/2 tsp sweet paprika powder
Salt and pepper to taste
Water, barely to cover
8-10 sundried tomatoes
3-4 sprigs fresh rosemary, or other herb like parsley
Drain and rinse the cashew nuts and place in a pot together with all the other ingredients.
Add water, be careful not to add too much however as this will make the soup watery. Barely cover the ingredients and give the conents of your pot a stir a couple of times thoughout th cooking time so that everything cooks evenly.
Cover the pot with a lid and bring to a boil. Then leave to simmer on a medium low heat for roughly 30 min.
Use a hand blender to blitz the soup until smooth.
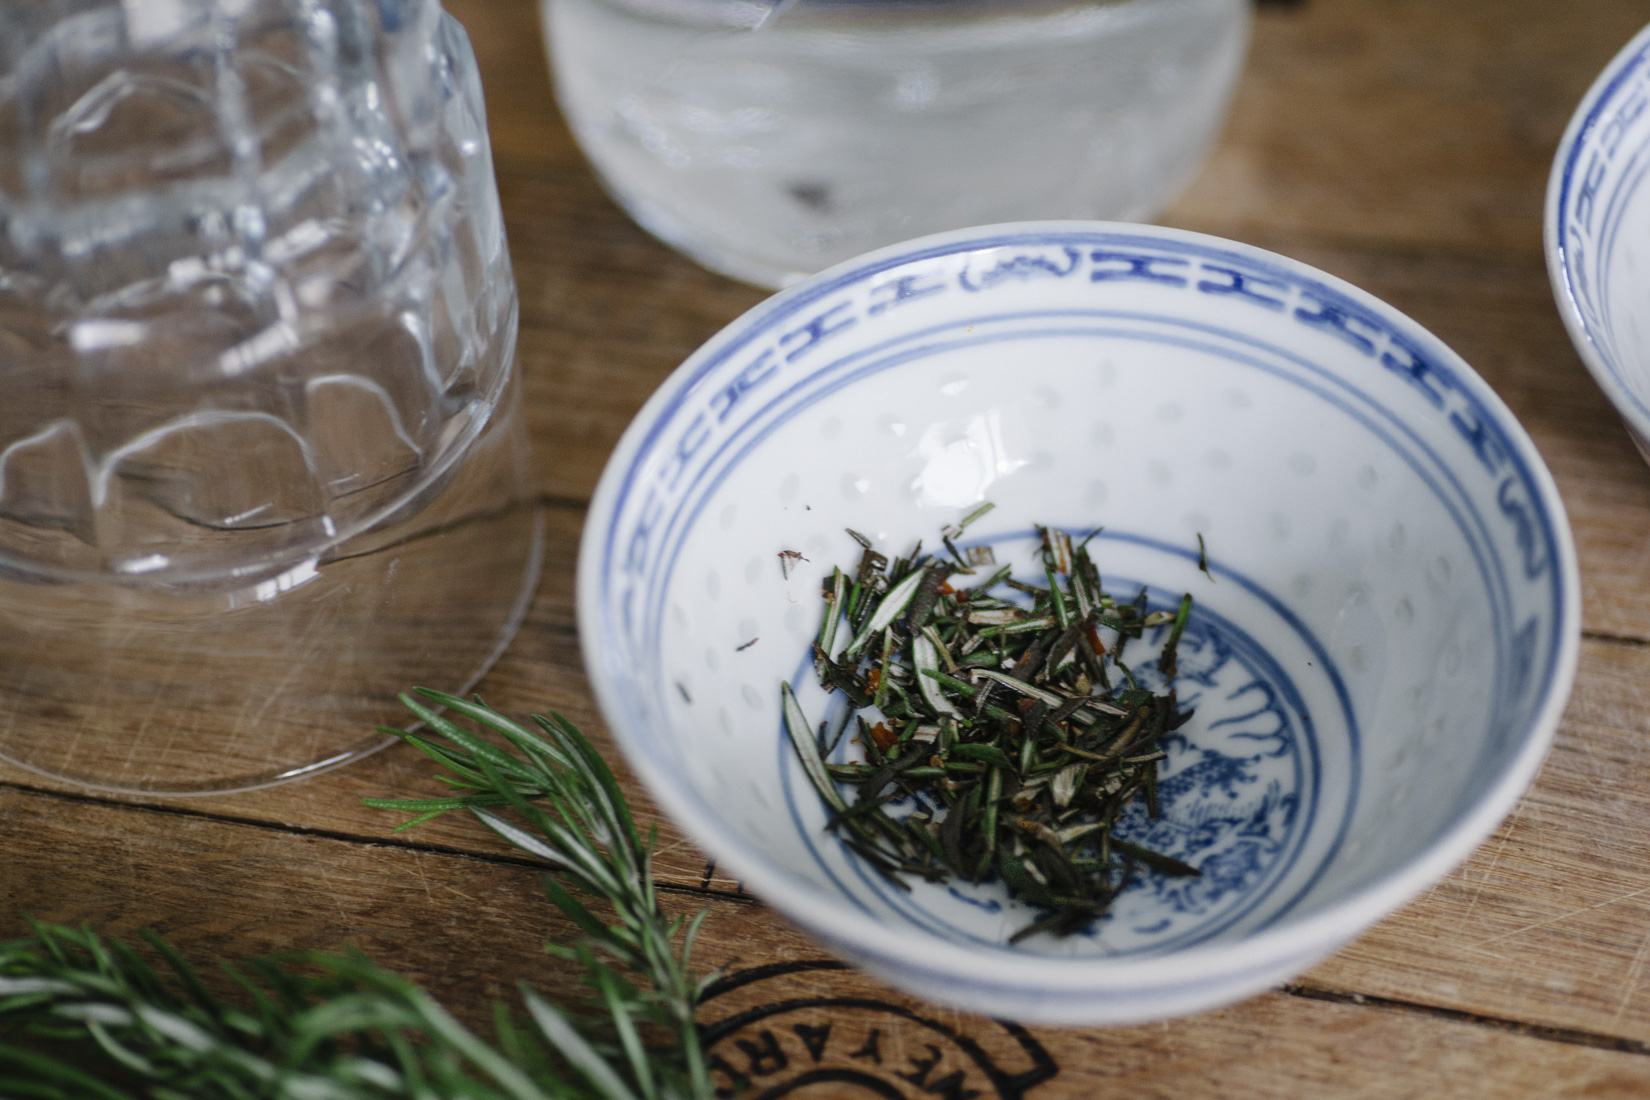
Whilst the soup is cooking finely chop or puree (using a food processor) your sundried tomatoes. Finely chop the rosemary.
Serve with some black pepper, a dollop of sundried tomato and chopped rosemary.

CREAMY COCONUT MILK CHIA PUDDING W. BANANA + NEW YEAR INTENTION
Hello everyone and happy new year to you all,
All of a sudden it’s 2016 and whilst everything is the same it’s also new. A bit like this recipe which has been on the blog for a while already but that now has got a little make over in the shape of a video and some new images, you can still read my initial post below the video but here’s a little cheers to the new year.
I think this recipe deserved a new chance to shine and this is very much how I think of this new year; as a time for me to get a new chance to shine. I don’t let myself do that very often which in a way is very Swedish of me. Whilst Swedes are generally quite confident and straight forward we have this culturally inbuilt idea that we mustn’t be better than others. As noble this might sound it can be quite challenging to always have someone on your shoulder telling you that you mustn’t ‘shine your brightest light’ (as my friend and yoga inspiration Anita Goa always encourage her followers to do). I really like this idea of shining my brightest light; being my brightest self in whatever way this might be or shape this might take.
So instead of having a new year’s resolution I have set this as an intention for my 2016, to shine my brightest light. This encompasses efforts to let go of inhibitions and fears of what may come if I live up to my true potential. It also means that I will need to let go of fear of judgement so that I can really speak about things that matter to me in an open and inviting way – something I really want to do but have been a little shy to do so far. I’m sure there are more of you out there who similarly to me have these fears that can truly inhibit a strong feeling of self worth and therefore success in our undertakings. Therefore I wanted to share this as an invitation to you guys to join me in my quest to shining brightly this year.
Maybe the notion of ‘shining your brightest light’ sounds a little fussy to you but to me it simply means to really look inside myself and listen to what is at the core of my being and then communicating this as honestly as I can. And this is where letting go of inhibitions and fears come into play. Maybe there are things you dream of that are actually in your reach right this moment if you just remove the obstacle of fear. Think about it, it has really opened up some ideas for me this past year which has lead me to wanting to deeply manifest this intention in 2016.
A few things I’ve found that help me stay true to my intentions and dreams in 2015 that are coming with me into this new year are yoga, meditation and journalling. This might sound very simple and even maybe cliche but they have both had a great impact on my clarity of thought which helps me stay connected to my beliefs and ideas as well as with having healthy relationships and communicating with clarity and ease. It simply has made me calmer, more collected and more connected. This for me is inredibly valuable and on busy days these things do not have to take more than 20 minutes, about 10 minutes of deep breathing and tuning into silence/stillness as well as another 10 minutes for scribbling down my thoughts and feelings.
I hope me sharing my intention and the tools I use to keep on track with it is inspiring to you, I find others sharing their thoughts and views on these matters very inspiring myself. I’d love to hear what your intentions and dreams are for this new year, what are you focusing in on?
And! Don’t forget to cook this year – it brings me so much joy and maybe it will do the same for you. Ground your feet on your kitchen floor and really enjoy the gifts of the food that you have in front of you. I’m starting to sound like a preacher now so I’m going to stop and leave you with something to ease you into cooking up a storm this year, 2016.
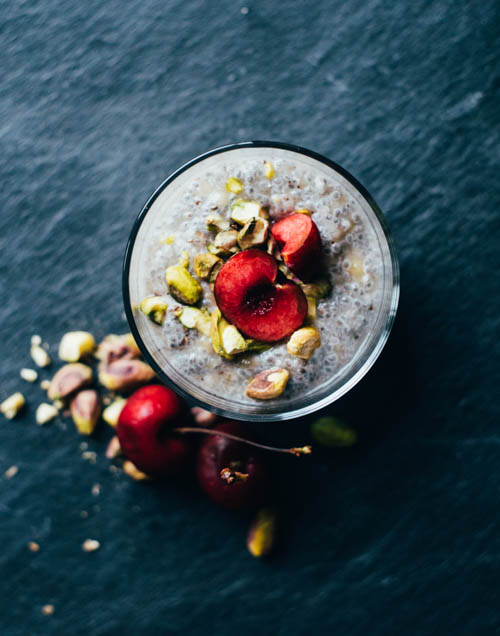
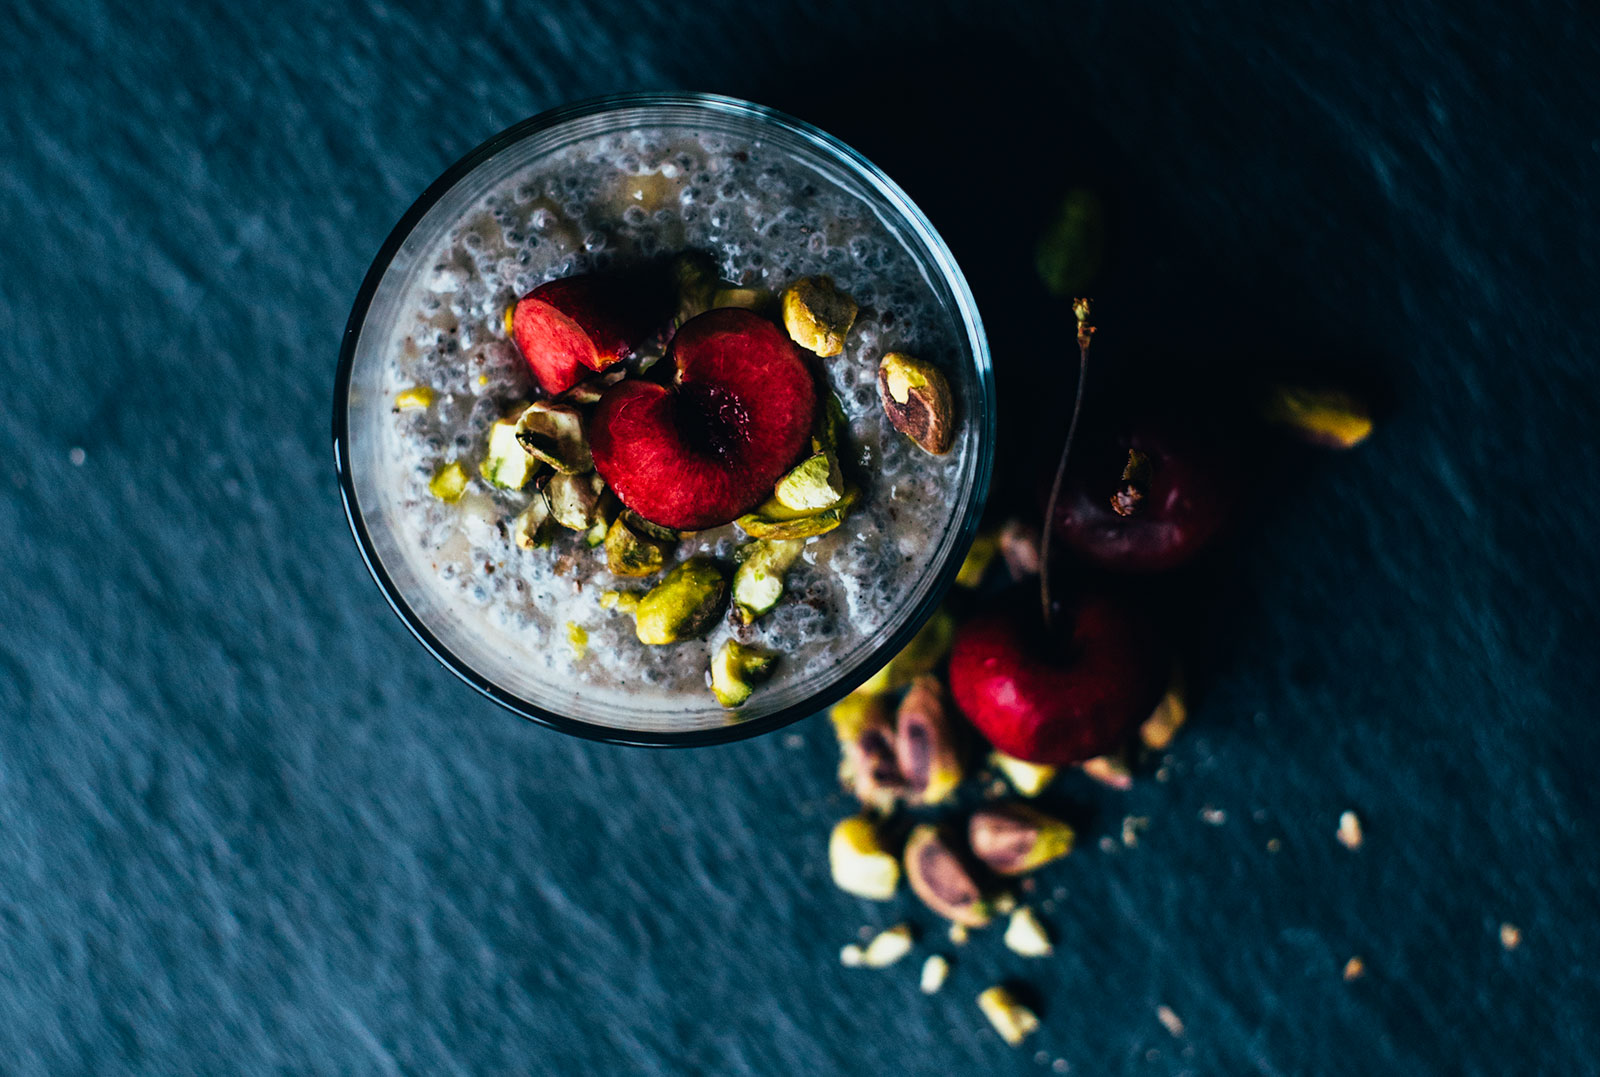
I love chia pudding because it’s so easy to make but can be such a satisfying breakfast or even afternoon pick me up. I also enjoy the fact that I can flavour it in any way I fancy. In this particular recipe I add banana and some vanilla powder as well as use coconut milk for the liquid base which make it a creamy and comforting yet light breakfast. Although if someone told me a few years ago I’d be eating swollen seeds for breakfast I would have probably looked at them with a rather confused facial expression. Then I met the chia seed and got very in to it straight away. I don’t just like it because it makes a great breakfast and can even replace egg due to its fantastic gelling effect when mixed with liquid. It is also a super nutritious little seed. Below I will list my favourite health benefits of the chia seed:
– It is rich in omega 3 fatty acids
– It has a good amount of plant protein, about 17 g per 100 g
– It is a good source of calcium
(Find this info backed up online for example here)
These three points make me happy, they are a great motivation for eating chia seeds in any way you like them. For example hidden in a muffin or a smoothie if you’re not a big fan or in this chia pudding if you like them more as they are, but even if chia seeds are not you’re favourite I would urge you to try this recipe anyway because so far I have only had happy smiles in return when serving it. As you’ve probably gathered I really love the flavours and textures of this breakfast/dessert and I hope you will too. And on a last note it only takes a couple of minutes to make it so there’s really no excuse not to get on the chia pudding train.
CREAMY COCONUT MILK CHIA PUDDING W. BANANA
PORTIONS: 1 / TIME: 3 min (active) + minimum 15 minute (absorption)
1 1/2 tbsp chia seeds
1/3 – 1/2 cup coconut milk
1 small ripe banana
1/2 tsp vanilla powder
Optional toppings: seasonal fruit and berries, nuts and seeds etc.
Place the chia seeds straight in a glass for single portion, and dish saving, making or double up the recipe and make in a bowl.
Add vanilla powder, 1/3 cup coconut milk and maple syrup (if you want to sweeten) and mix. Set to the side for 10-15 min or until the seeds have soaked up the liquid.
If the mixture is too compact for your taste add the rest of the coconut milk.
Finally mash banana and mix in and top with nuts and fruits if you fancy.
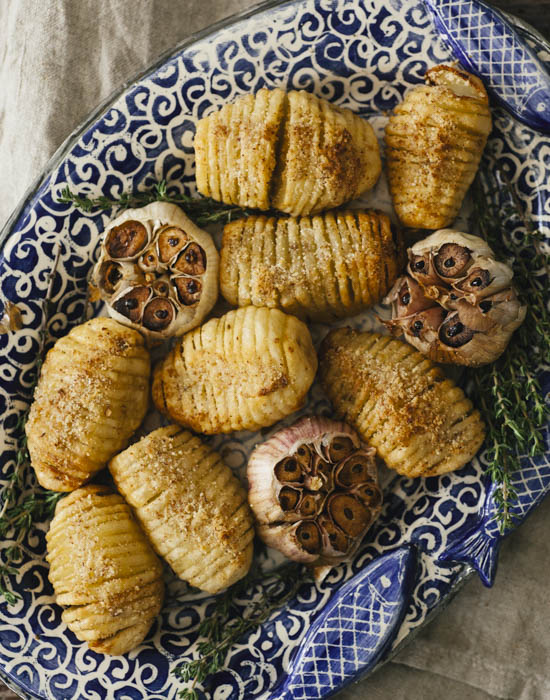
SWEDISH HASSELBACK'S POTATOES W. THYME AND ROASTED GARLIC
Happy Christmas people, or at least almost!
Here comes my last post before I’ll be digging into my Christmas meal and it’s the last recipe which will carry the holiday spirit I’ve been working on awakening the last couple of weeks. But before we get into the nitty grittys of this recipe I wanted to share with you all my Christmassy recipes in one spot so here comes a list with links:
- Creamy coconut oatmeal w. cinammon apples
- Festive saffron and chia seed pancakes
- Spiced persimmon and blackberry chia jam
- Bitter sweet brussel sprouts salad
- Holiday lentil and nut roast w. squash and herbs
- Swedish mushroom, spinach and quinoa meatless balls
- My favourite roasted roots
- Smashed, mushy and crispy roasted sweet potato
- Baked cardamom pears w. cashew cream and cinammon pecans
- 5 minute salted peanut butter and tahini chocolates
Well, that was a handful! I hope it can bring you some inspiration if you’re still wondering what to make for yur Christmas gatherings. Now please have a look at this video I made for you all where you’ll see me preparing the recipe you’re really here to check out! It’s the yummiest of Swedish potato recipes; the Hasselback.
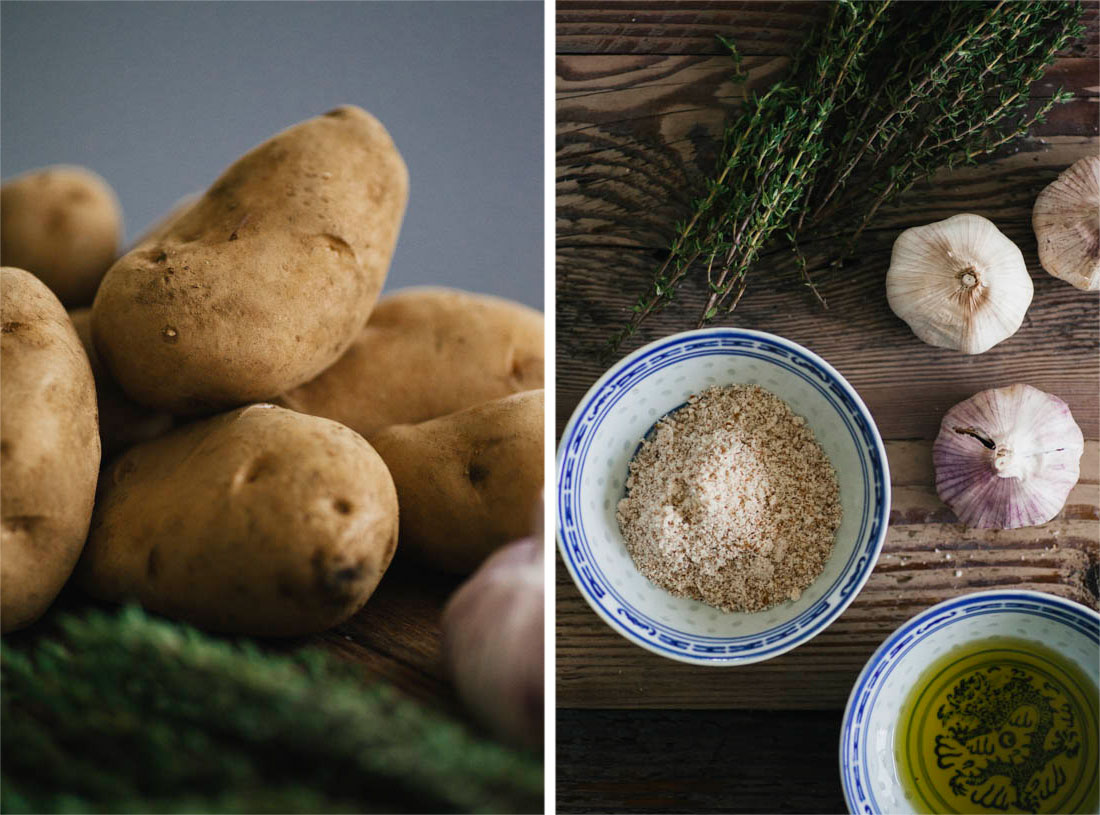
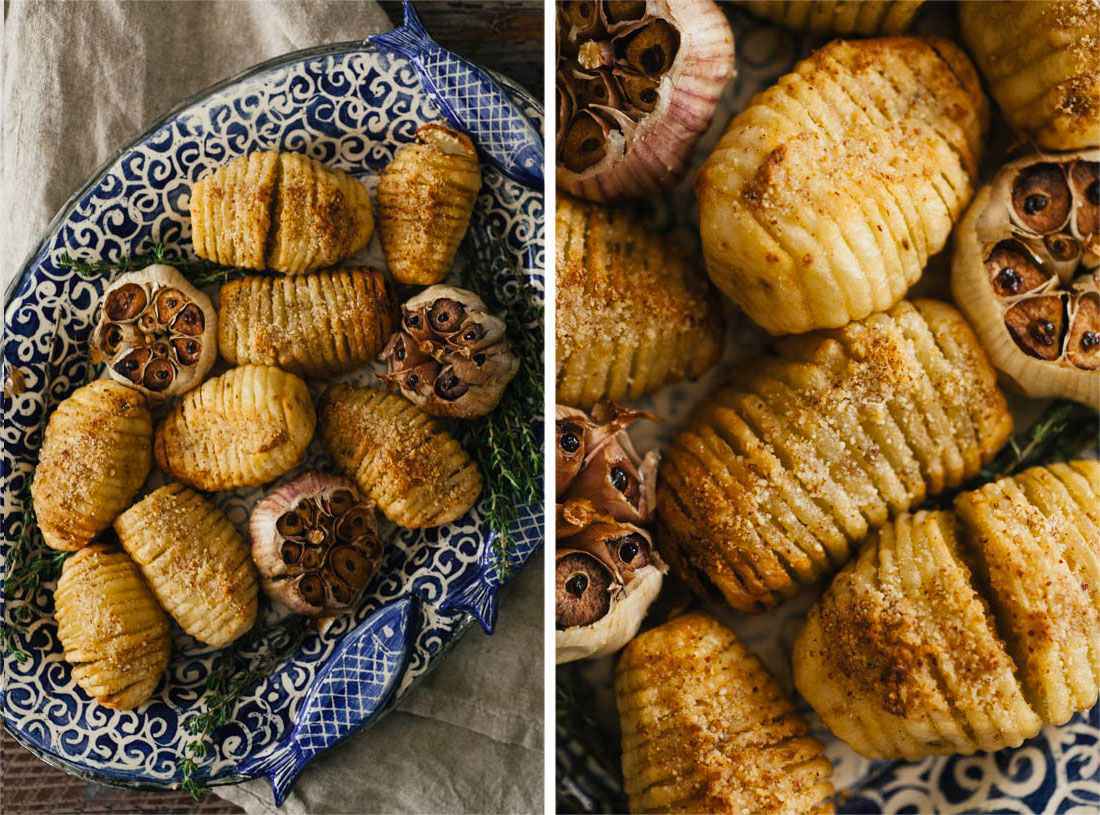
These roasted potatoes are enhanced by the fact that you slice them before roasting which gives you extra crispy potatoes, and who doesn’t like that?! I know I like it anyway and hope you will too. Traditionally these potatoes are cooked with butter and bread crumbs but since I don’t eat butter as such I swapped that for rapeseed oil which I think has a nice flavour in recipes like this. The bread crumbs are also something I don’t use in my cooking so I decided to try these taters with almond meal instead and it tastes pretty fab. Personally I enjoy the nutty flavour it gives the potatoes but if your stomach is okay with gluten (or maybe you have some gf bread crumbs lying around?) you can of course go right ahead and swap my almond meal back to bread crumbs.
Finally I’d like to wish you all a fantastic Christmas holiday filled with yummy food and lots of chocolatey treats! And remember that if the family gatherings get manic take three deep breaths and put your experience into perspective; if you have a family to gather with over Christmas, if you have a luscious Christmas meal lined up and maybe even some gifts under the tree you are a lucky person and I think this is always something to embrace and celebrate. Now enjoy and Merry Christmas!


SWEDISH HASSELBACK’S POTATOES W. THYME AND ROASTED GARLIC
PORTIONS: 3 / TOTAL TIME: 45-60 min
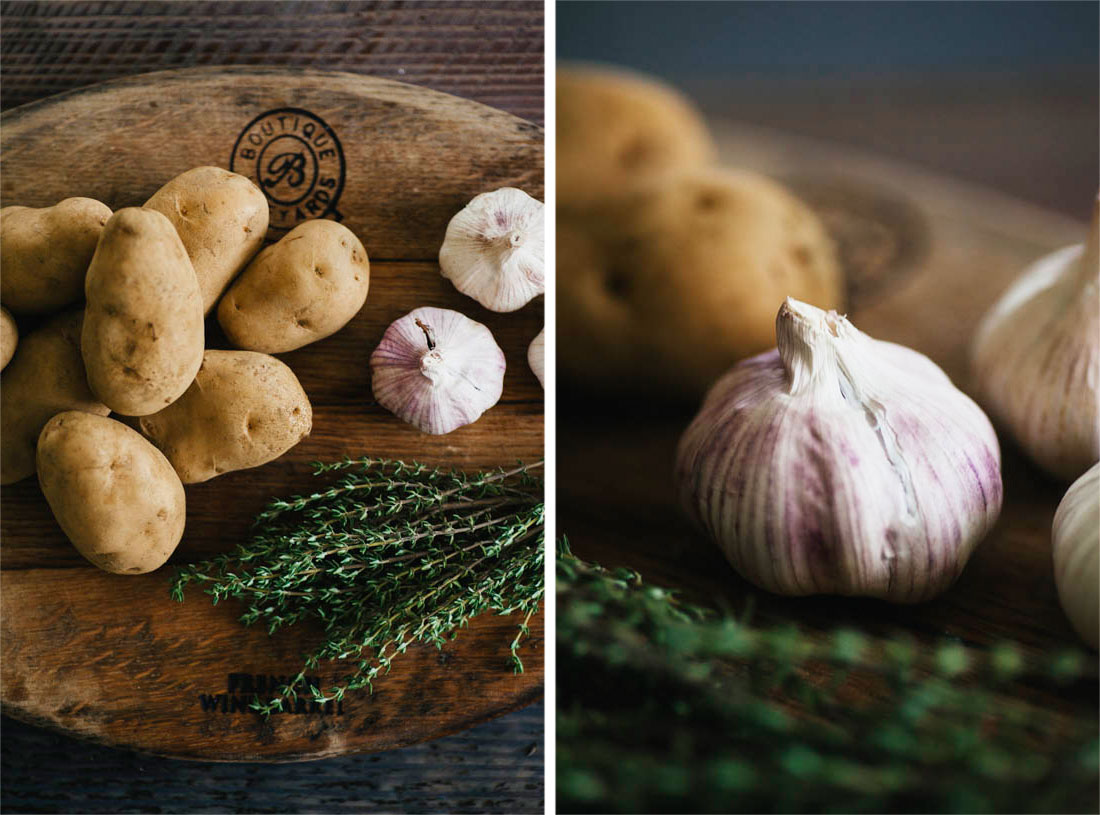
8 firm potatoes
3-4 garlic bulbs
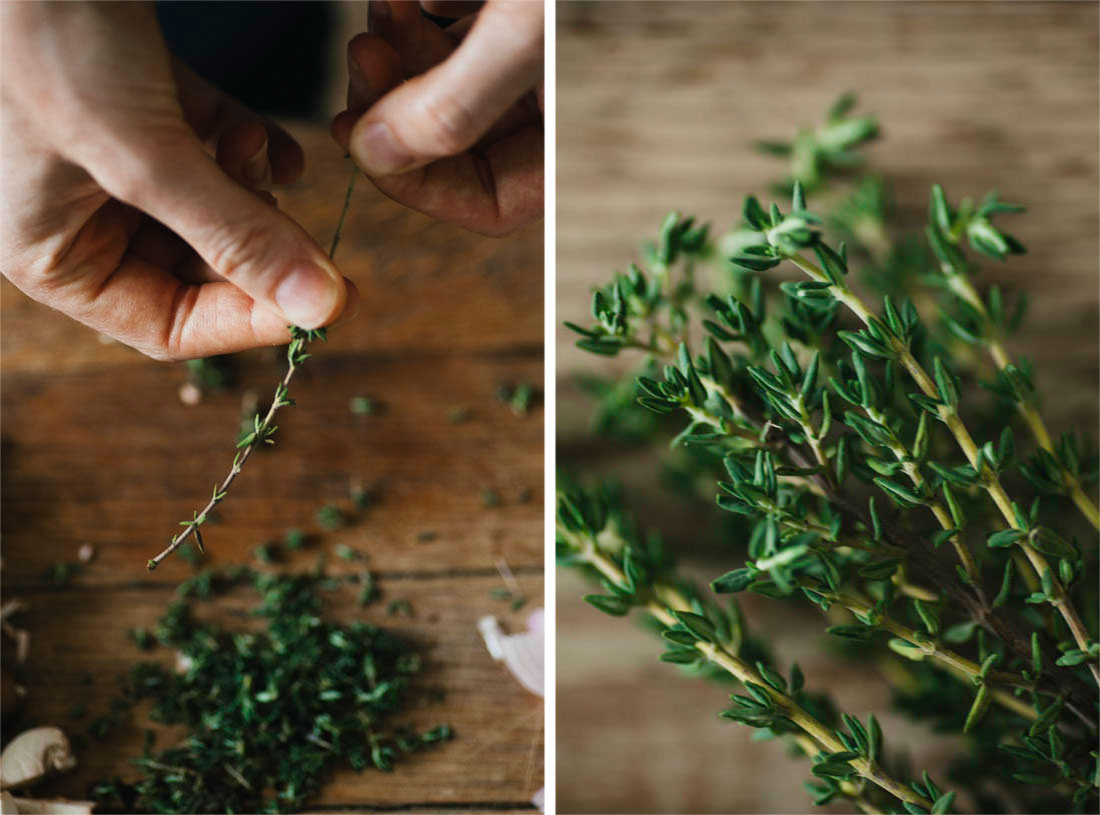
Bunch of fresh thyme
Good quality rapeseed oil, or other oil with high smoke point
Preheat oven to 200 degrees celsius.
Peel the potatoes. Place a potato at a time on a wooden ladle and cut 3 mm thick slices into it, without cutting all the way through. The ladle should help keep the potatoes in place and can also help with not cutting all the way through.
Cut tops of garlic bulbs so that you can see the cloves.
Get the aromas out of the fresh thyme by smacking something hard, like the end of a knife, onto the leaves. Then place on an oven tray.
Dip each potato into an oil with a high smoke point, a good quality rapeseed oil will do well. Coat the potatoese and place on the oven tray next to the thyme.
Also dip the garlic bulbs into the oil so that the cut side is coated and add to the oven tray.
Place in the middle of the oven for 20 min.
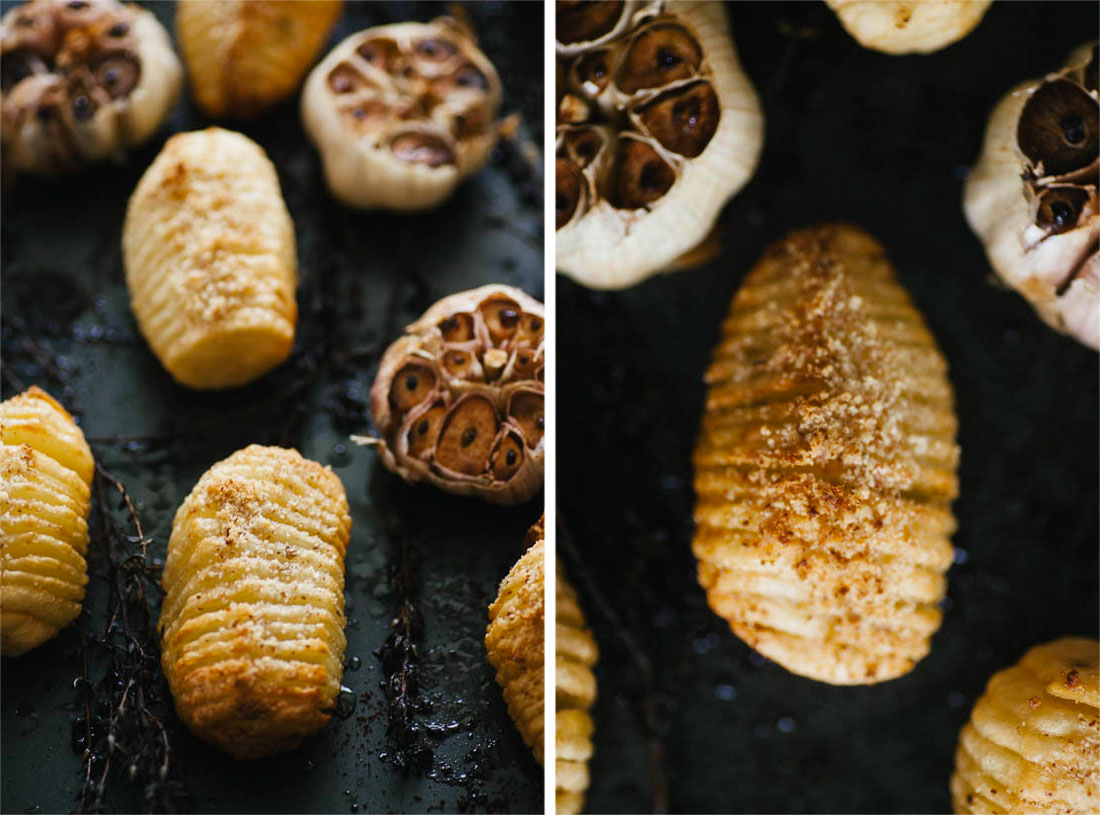
Take the potatoes out of the oven and pat with more oil. Then sprinkle the almond meal mixed with a pinch of salt on top before returning to the oven.
Check on the potatoes every 5 min at this stage, dabbing with oil if needed. Make sure the almond meal or garlic bulbs don’t burn.
Ones the almond meal has turned golden and the potato slices has turned slightly crsip the potatoes are done. And ones the garlic bulbs are soft they are done too. You might need to remove them at different times but all in all the complete cooking time should be roughly 35 min for smaller potatoes.

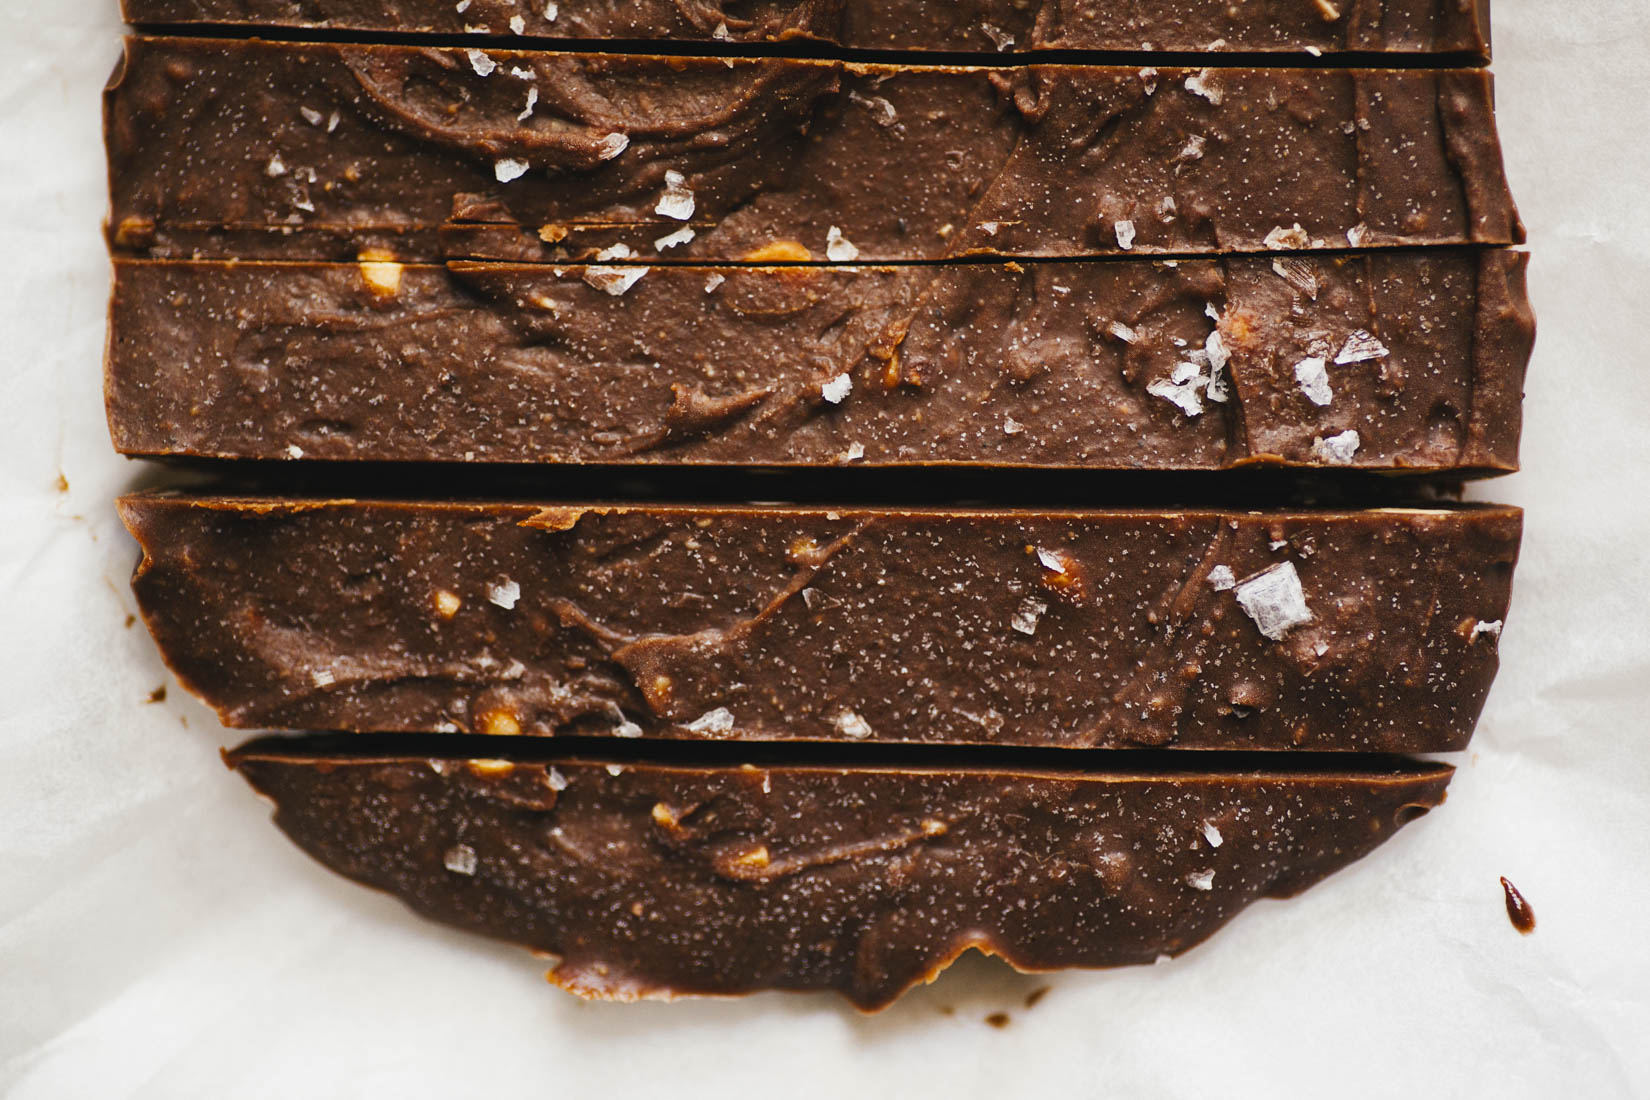
5 MINUTE SALTED PEANUT BUTTER AND TAHINI ICE CHOCOLATES
Hello Everyone,
This week I’ve managed to put together two absolute treats for you which I’m very pleased about and I hope you are too! The first one was my baked cardamom pear dessert which you might have checked out but if not you definitely should, just click here. And the second treat is right here in this post and I’m having to pull myself from the freezer to write this post because these chocolates seem to have an immense magnetic power on my sweet tooth!
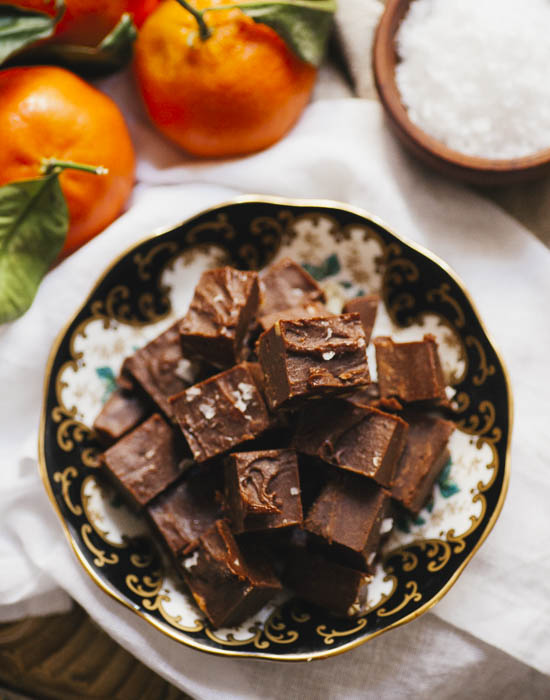
They’re reminiscent of the Reese’s peanut butter cup which I have fond memories of from my pre-vegan life and I think many of you know what I’m talking about. They also remind me a little of a Swedish Christmas treat we call ‘ischoklad’, simply translated to ice chocolate – hence the name of this recipe. I’ve also decided to call these treats ice chocolates because they are frozen and need to be kept that way until you eat them due to the nature of their ingredients.
These peanut buttery tahini chocolates sprinkled with sea salt will take you more or less five minutes to throw together and then the freezer will do the rest. In these busy holiday times I’m sure you’ll appreciate the speedy experience of preparing these chocolates as much as I do. It’s also a great way to stay away from other chocolate temptations this time of year which are usually full of refined sugar.
I’ve made these twice in one week and have had some taste testers giving them approving nods so I feel safe to say that these chocolates are five minute winners and I hope you’ll give them a go! Also they are rather versatile and you can use whatever nut butter you have/prefer and you could also leave the tahini out if it’s not your cup of tea. If you do leave buy diazepam valium something out though you need to tweak the ratio of coconut oil and maple syrup, i.e. decrease them a little so that they match the amount of nut/seed pastes.
Enough from me, now enjoy! x


SALTED PEANUT BUTTER AND TAHINI ICE CHOCOLATES
SIZE: / TIME: 5 min + 3 hours minimum freezer time
1 cup smooth peanut butter (or a mixture of smooth and crunchy)
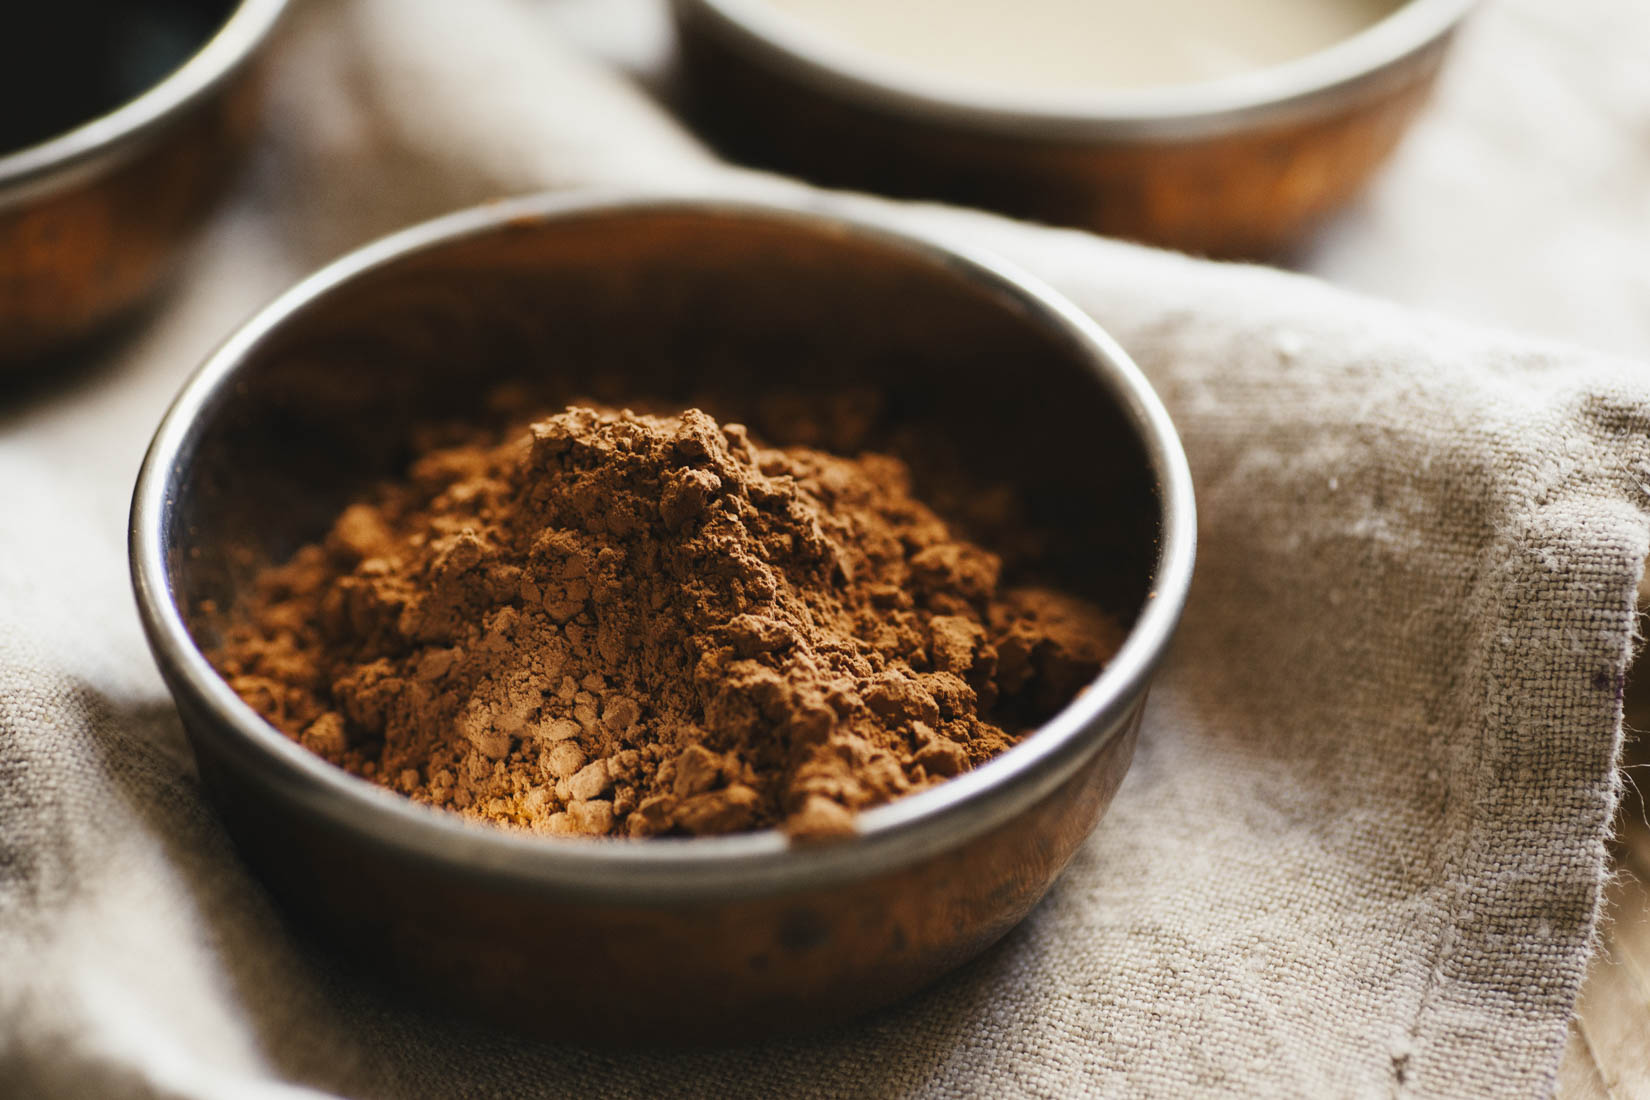
1/3 cup cacao powder
1/3 cup maple syrup
1/4 cup melted coconut oil
2-3 tbsp tahini
1 tsp vanilla powder
A couple of pinches of flaky sea salt, to taste
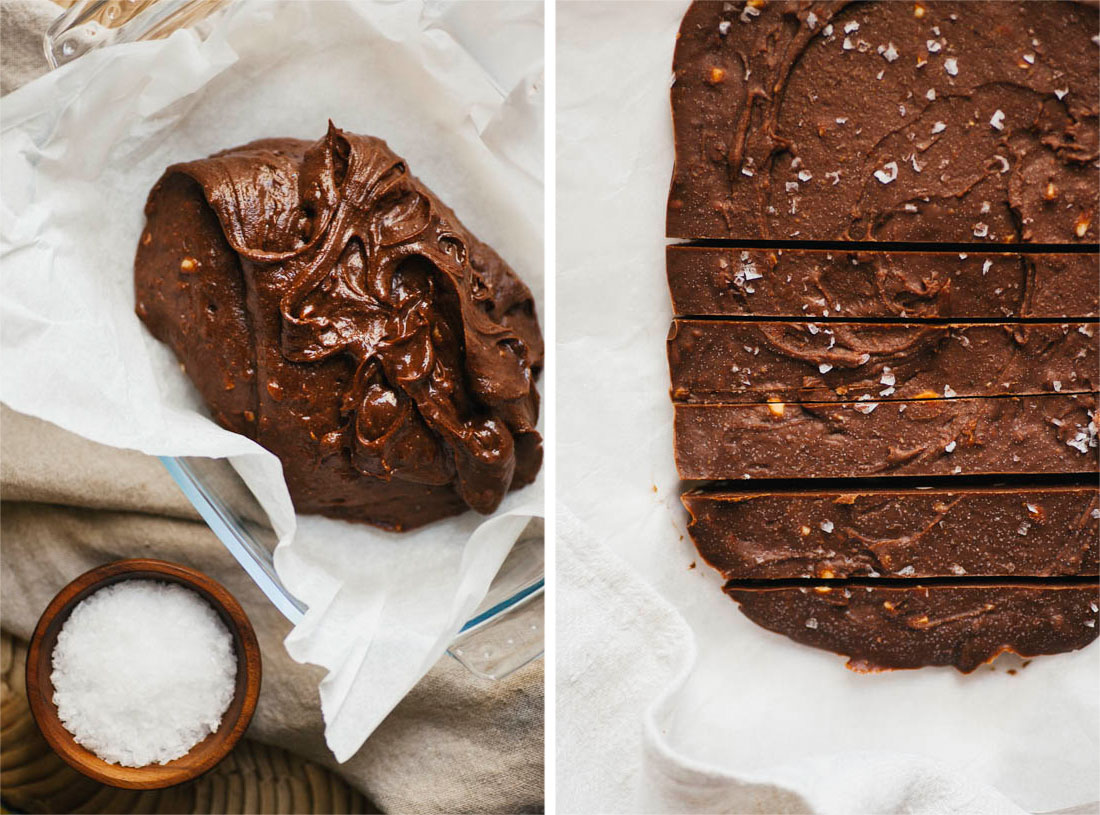
Mix all ingredients in a mixing bowl.
Line a small dish with baking paper and for extra safety grease with a little coconut oil.
Transfer the mixture from the bowl into the lined dish and flatten it out to cover the whole bottom.
Sprinkle with a pinch of flaky sea salt and place in freezer for at least 3 hours to set.
Once set break or cut into bite size chunks and enjoy.
Keep in the freezer as they will loose their texture in the fridge and after a while will melt at room temperature.


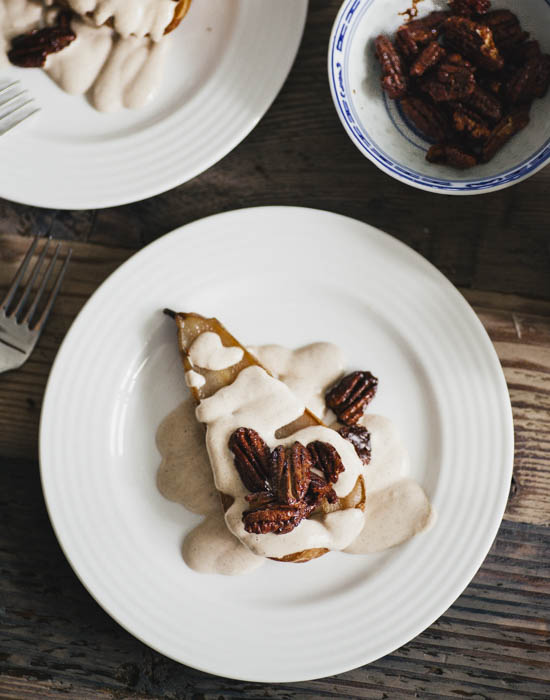
BAKED CARDAMOM PEARS W. VANILLA CASHEW CREAM AND CINNAMON PECANS
It’s a dessert! I really think that I’ve neglected desserts on this blog so far and am very happy to share this utterly delicious baked pear number as a token of my appreciation to you and as a promising start of many more to come. This particular dessert I created with the holiday spirit in mind and loaded it with spices I love for winter and Christmas alike; cardamom, cinnamon and vanilla.
It might not be a very traditional dish to serve for Christmas dinner, and I know everyone is very into their traditions and I salute you for your devotion, but I’d like to offer it up as a lighter yet delicious option to the British ‘Christmas pudding’ or the Swedish ‘ris a la Malta’. Personally neither of those are my cup of tea so this is perfect for me but if you are completely committed to your traditional dessert than these pears will hopefully come in handy at another occasion.
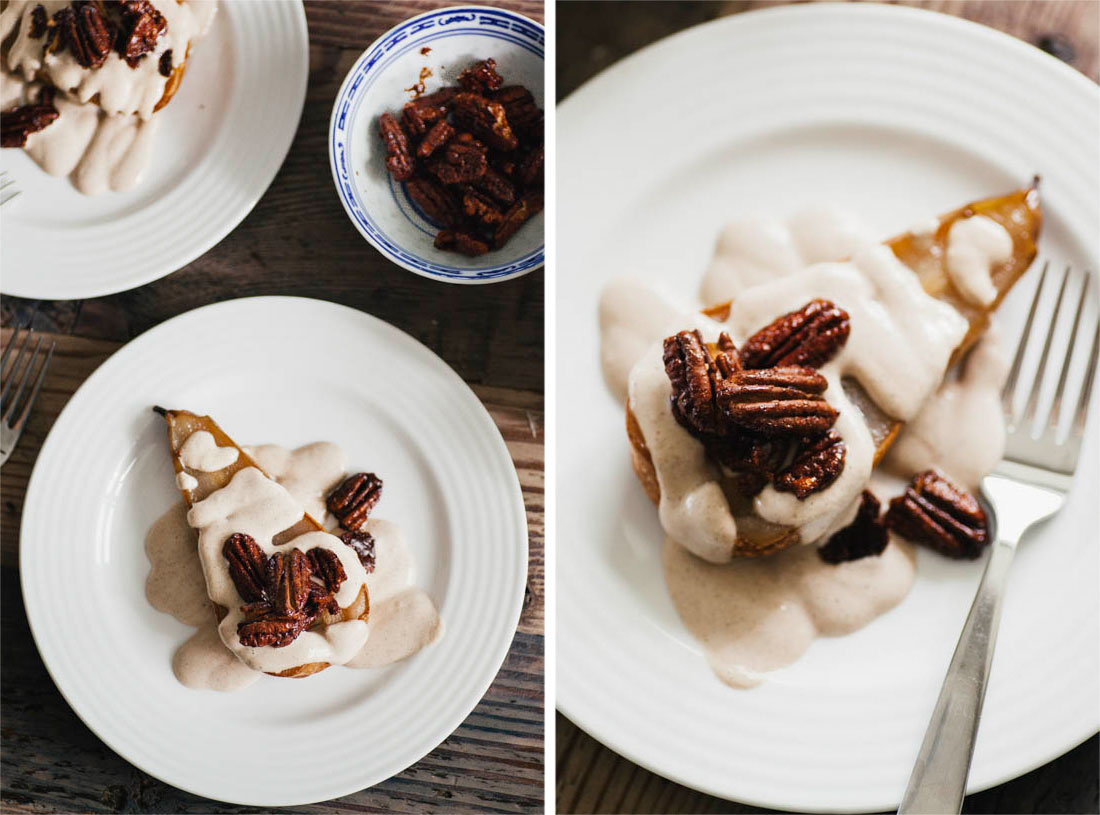
They are super easy to whip up and I’ve paired them with a simple vanilla spiked cashew cream and some caramelised pecan halves spiced with cinnamon because that seems like an ideal combination to me. However this dish is totally versatile and you could add any spices to the pears and top them off with whatever tickles your fancy. I always add something crunchy though, Rob taught me that every plate served needs a crunch and I must admit he’s right!
I’d really love to hear about what you guys are having for Christmas? Since becoming vegan and a lot more conscious of the ingredients that go into my food and body in general I’m slowly reinventing Christmas to suit my own wishes. It can be tricky though when you’re with the whole family and everyone has a different idea of what’s a good Christmas meal.
Traditions can be such a delicate matter, especially when you’re not following protocol people around you might feel a little irritated. Maybe some of you are new vegans wondering how to tackle the holiday season without stepping on too many toes? My best tip is to bring dishes to gatherings and if at home take charge of your destiny and make some suggestions of dishes you could make to add to what’s already on the given list.
Take the opportunity to introduce your friends and family to something new but be careful not to push them too hard during this time of year. In my experience Christmas can bring quite a bit of stress to people and I find it’s important to tap into my most loving, understanding and compassionate self during the holidays. Meaning I try to accept people for who they are and let them eat whatever they feel like without judgement. Hopefully with that spirit in mind they will do the same to me, and you.
Enough about Christmas for this time! Again I’ve made a video for this recipe as you can see above which of course I hope you enjoy! I’d love it if you had a look at my youtube channel too if you haven’t yet. And please let me know what you think, and if you have any requests of what you’d like to see on it – simply scribble it in the comments!

BAKED CARDAMOM PEARS W. VANILLA CASHEW CREAM AND CINNAMON PECANS
PORTIONS: 6 half pears/3 whole pears / TOTAL TIME: 50 min
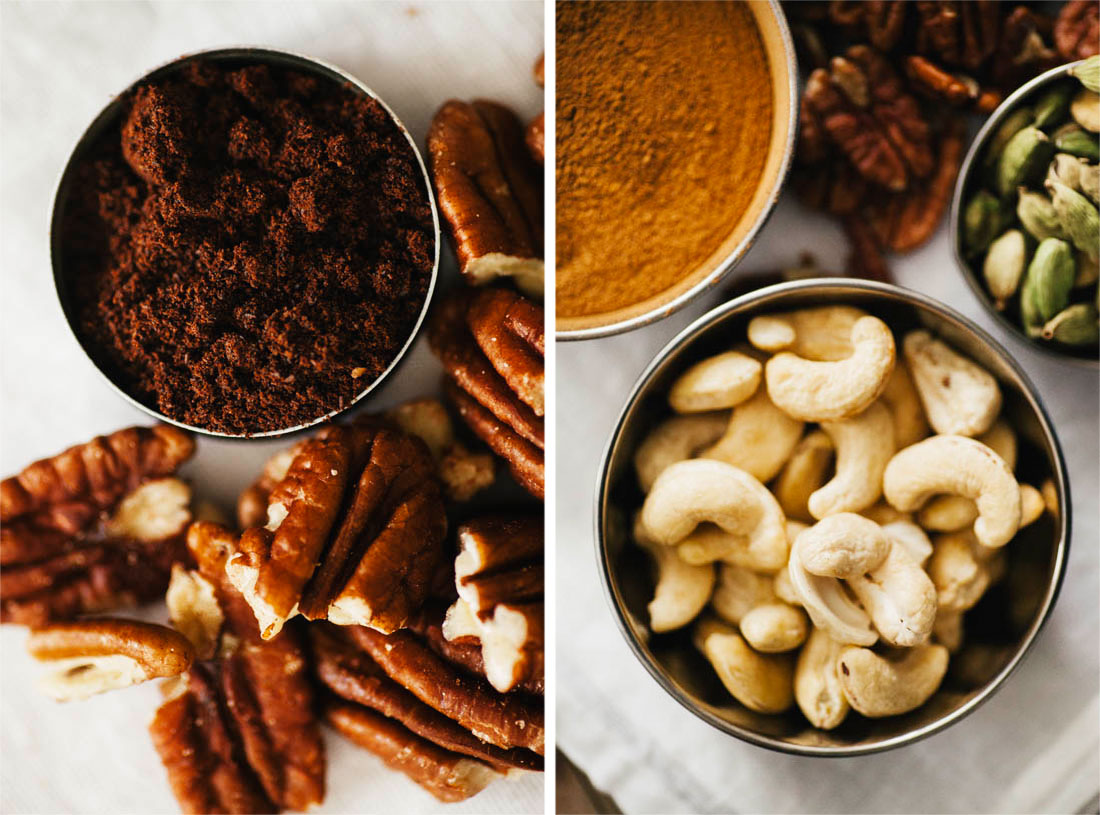
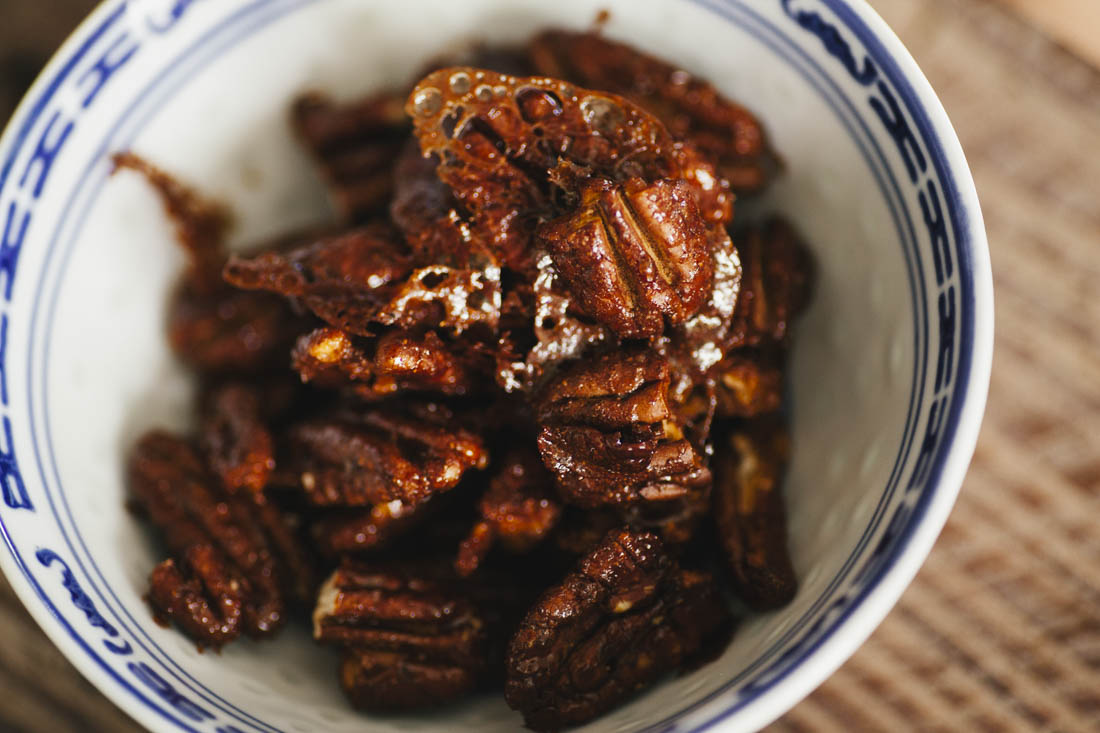
1/2 cup pecan nuts
1 1/2 tbsp brown rice syrup
1 tsp cinnamon
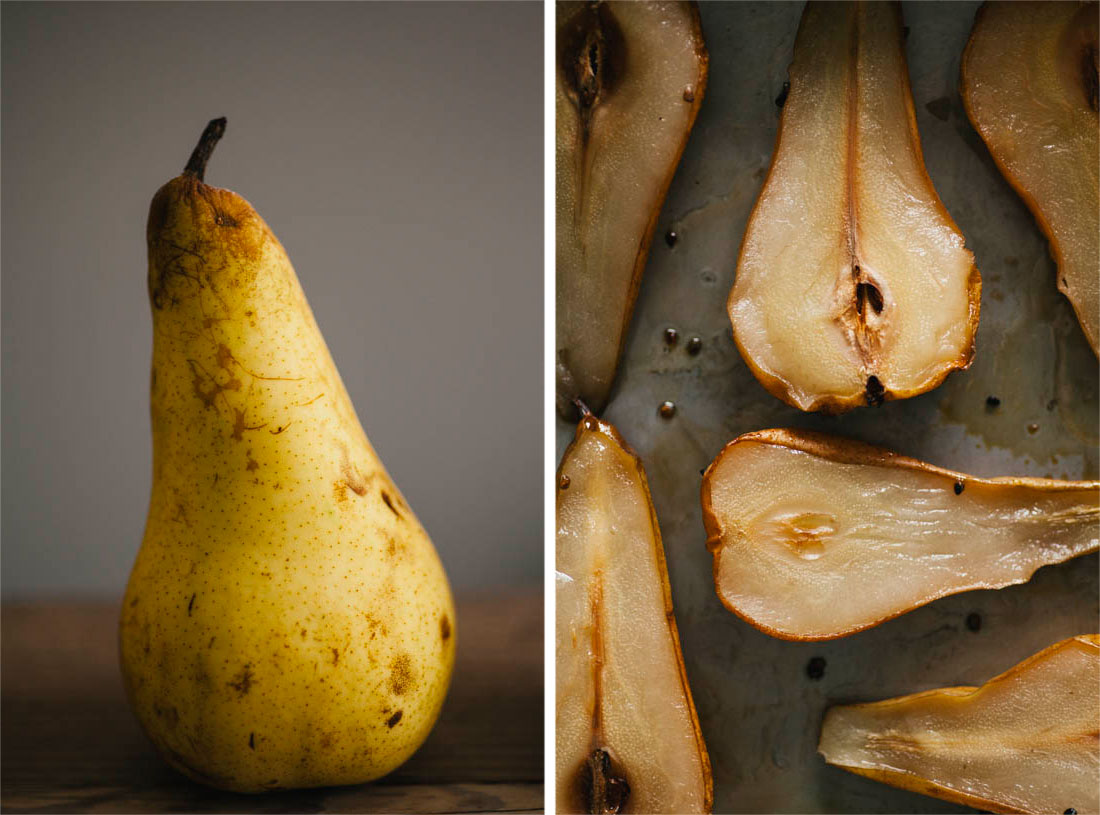
3 semi-ripe/ripe pears, conference would be suitable
1/3 cup water
10 cardamom pods, seeds
2 tbsp brown rice syrup
1/2 cup raw cashews, soaked
1/2 cup plant milk
1 tbsp maple syrup
1 tsp vanilla powder
Soak the cashews for roughly eight hours or for the quick version in boiling water for about 20-30 min.
Preheat oven to 160 degrees celsius.
Mix pecans with rice syrup and cinnamon until covered. Spread out on a baking sheet and place in oven for roughly 10-15 min, until they are slightly darker and caramelised. They will crisp up when they cool off so don’t worry if they don’t seem crunchy, just don’t let them get too dark and burn.
Ones you’ve taken out the pecans increase the heat of the oven to 175 degrees celsius.
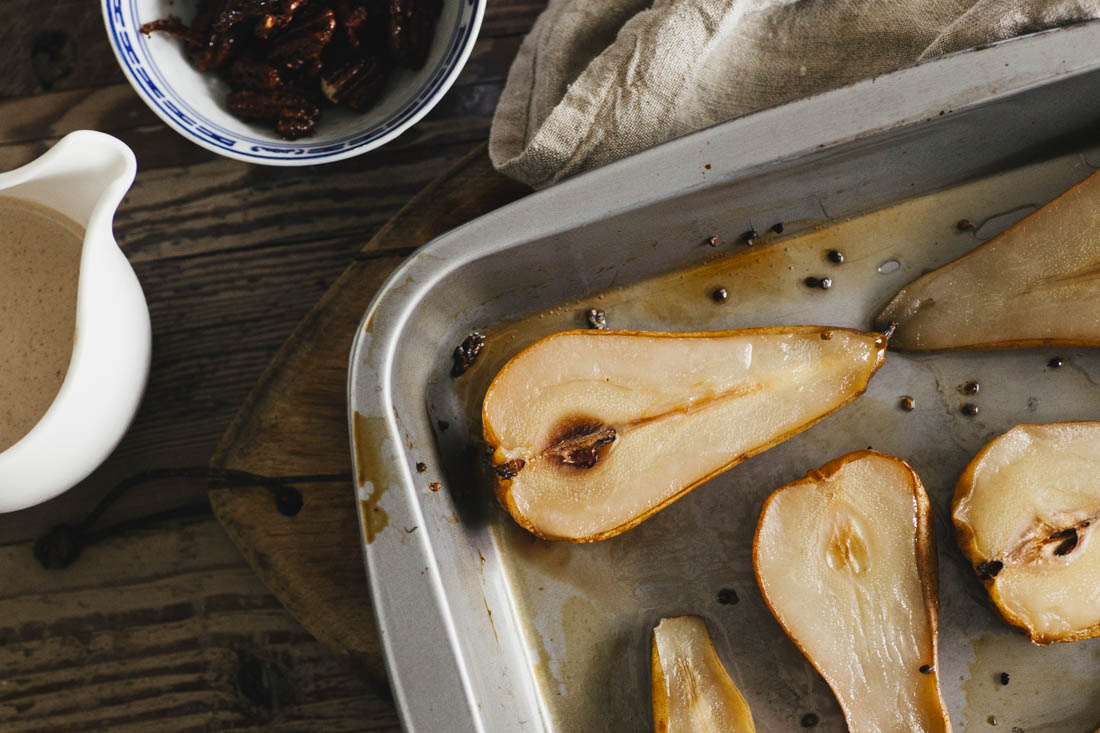
Heat up water, the second amount of rice syrup listed in the ingredients along with the seeds from roughly 10 cardamom pods in a small pot. As you heat the liquid try to bash the cardamom seeds a little so that the aroma releases into it. Bring to a boil, simmer for a couple of minutes and then take off the heat.
Cut the pears in half and place cut side down in an oven dish just big enough to fit the pears. Pour the cardamom water over the pears and cover the pan with kitchen foil.
Bake in the middle of the oven for 15 min and then remove the foil and return to the oven for another 10 min, this should evaporate some of the water. Drain leftover water, but be careful not to lose too many cardamom seeds as these are yummy and each crunchy bite will contributr to the cardamom flavour of the dessert. Then flip the pears over so the cut side is up. Roast for another 10-15 min at the top of the oven, making sure that the pears do not burn but gently caramelise.
Whilst the pears are cooking prepare the cashew cream by draining and rinsing your soaked cashews. Place them in a blender and add you plant milk of choice, maple syrup and vanilla powder. Blend until smooth. Give it a taste and assess wether you would like it sweeter or you might want to add more vanilla or even milk to make it less thick – the choice is yours. Do however remember that the pears will be nice and sweet.
If you’d like more kick to this dessert you could add other spices and flavours to the cream like ginger juice. Or you could add a pinch of spice to the cinnamon nuts, chilli powder would make a nice addition.
Serve the pears warm with a drizzle of cashew cream and a sprinkling of cinnamon pecans.


THE LAST MINUTE VEGAN HOLIDAY GIFT GUIDE OF 2015
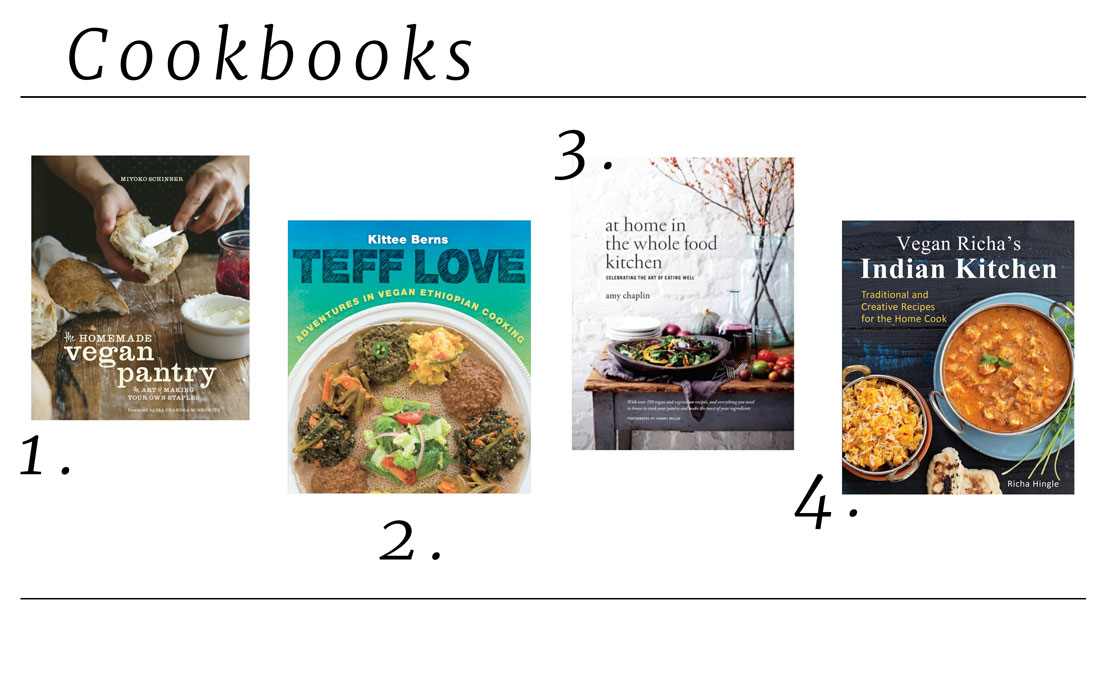
Of course I will start by listing cookbooks and yes, cookbooks are great gifts for foodies indeed. But! They are also great for new vegans and others who need a little bit of inspiration in the kitchen to get them up and running with their, maybe new, vegan lifestyle. Pictured above are two books I have and love as well as two that are on the top of my wish list and I think they’ll all make a very good gift, although maybe not to the same person. Below I will list their names, where you can get a hold of them and who they’re suitable for.
1. The Homemade Vegan Pantry: The Art of Making Your Own Staples by Miyoko Schinner
This book is pretty phenomenal, it will get you making everything from scratch and filling your kitchen completely with natural products that you know exactly where they came from; simply because you bought the ingredients and made them. This book is perfect for new vegans and veterans alike as long as they are interested in making their own staples and be the queen/king of their kitchen.
Find it HERE.
2. Teff Love: Adventures in Vegan Ethiopian Cooking by Kittee Berns
This book is high on my wish list, and Rob’s too, as we both got a slight addiction to this yummy cuisine at market stalls in London. We’ve since seaked out Ethiopian far in many other places on our travels. It is a cuisine using great vegan staples and could therefore be good for new cooks, especially those new to vegan cooking. It is also a rather inexpensive way of cooking usually making it perfect for anyone in need of pinching their pennies for a while. Lastly it’s perfect for those who enjoy new food experiences or need to renew their repertoire.
Find it HERE.
3. At Home in the Whole Food Kitchen: Celebrating the Art of Eating Well by Amy Chaplin
Your foodie friend probably already have this book because it’s been a hot topic this year and for good reason I might add, it is simply beautiful! Both the book itself and it’s contents. It has a great introduction where you’ll learn everything about cooking satisfying and tasty meals from scratch using whole food ingredients which I think most people can find useful and beneficial. And on top of that there are heaps of inspired vegan recipes in their for all occasions, although some are not completely vegan. The dessert section is all vegan however and it’s off the hook!
Find it HERE.
4. Vegan Richa’s Indian Kitchen: Traditional and Creative Recipes for the Home Cook by Richa Hingle
Another book I would love to hold my hands is Richa’s and reading the reviews for this book I know that everyone with a love for Indian food will enjoy this book. Again I think this book is suitable for pretty much everyone, as long as they like Indian flavours.
Find it HERE.
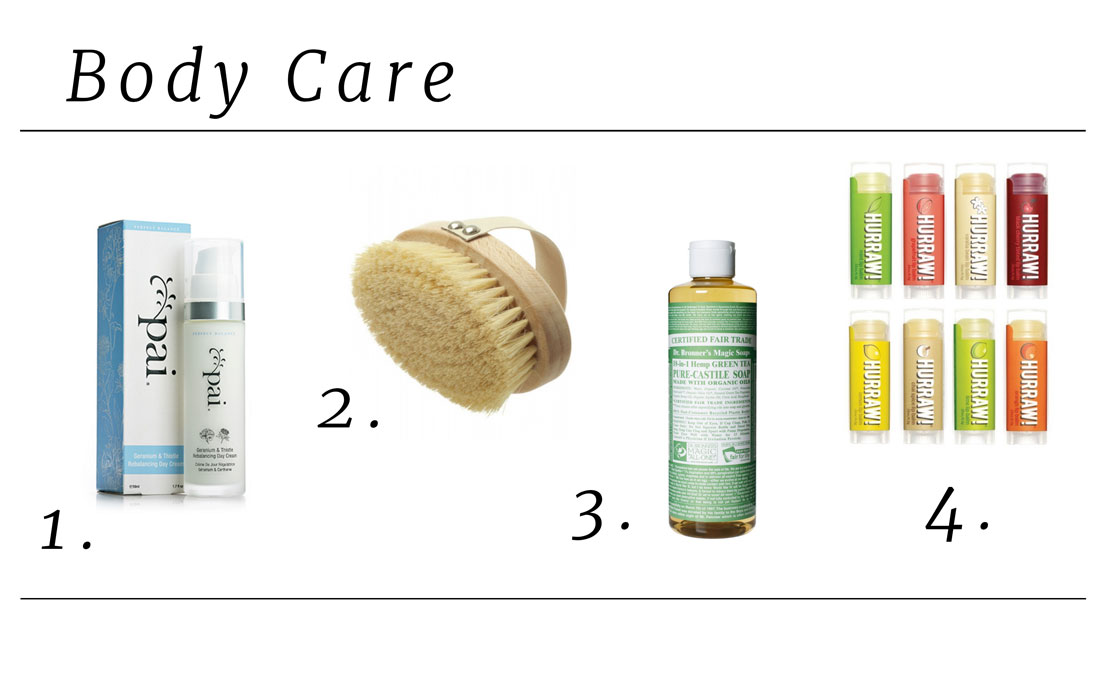
I always enjoy receiving gifts that I can pamper my body with and if you are part of a family that give smaller gifts in stockings then these types of gifts can be great as some are smaller in size as well as price, the lip balms pictured above for example. It is also an opportunity to spoil a loved one with that product they’ve been pining for but is really a little out of reach in the day to day budget. You could also take this gift giving opportunity to introduce your friends to more natural and crueltu free products they might end up loving for life, just make sure you do first so that there’s no disappointment.
1. Geranium and Thistle Rebalancing Day Cream by Pai
The first time I tried this product I really loved it and it just brought my skin back from worn and dull to silky smooth within just a few days. Usually I use coconut oil to moisturise, which in itself could be a nice gift if you get a good quality oil packaged nicely. But once in a while I treat myself to a moisturiser and this one is always the one I want. Check out their whole range though if you’re into skin care products, it’s all certified vegan and organic.
Find it HERE.
2. Body Brush by Hydrea London
This year I started dry brushing my skin and it’s something I’ve come to really enjoy and would recommend to my family and friends. As you’ve probably gathered by now I like to introduce people to new ideas in my gift giving so this could be one of those things that people might not know they want but will enjoy when they have it. Just a couple of benefits are increased circulation and stimulates the lymhatic system.
Find it HERE.
3. Organic Green Tea Castile Liquid Soap by Dr. Bronner
This soap works for everything; washing your body, cleaning and you can even brush your teeth with it. Okay, I haven’t gone as far as brushing my teeth with this guy but it is my trusted friend in the shower. It’s dilluted with water so it lasts a very long time and a tip is to mix it with a little almond oil in your mixing vessel so maybe it would be nice to combine the two into a skin loving gift.
Find it HERE.
4. Organic raw lip balm by Hurraw
These lip balms are great little treats for a friend or to put in a Christmas stocking. My personal favourite is the Earl Grey flavour, I love the smell. It’s very natural in conjunction with being vegan which I think isn’t all that easy to find when it comes to lip balms so thumbs up to Hurraw.
Find it HERE.
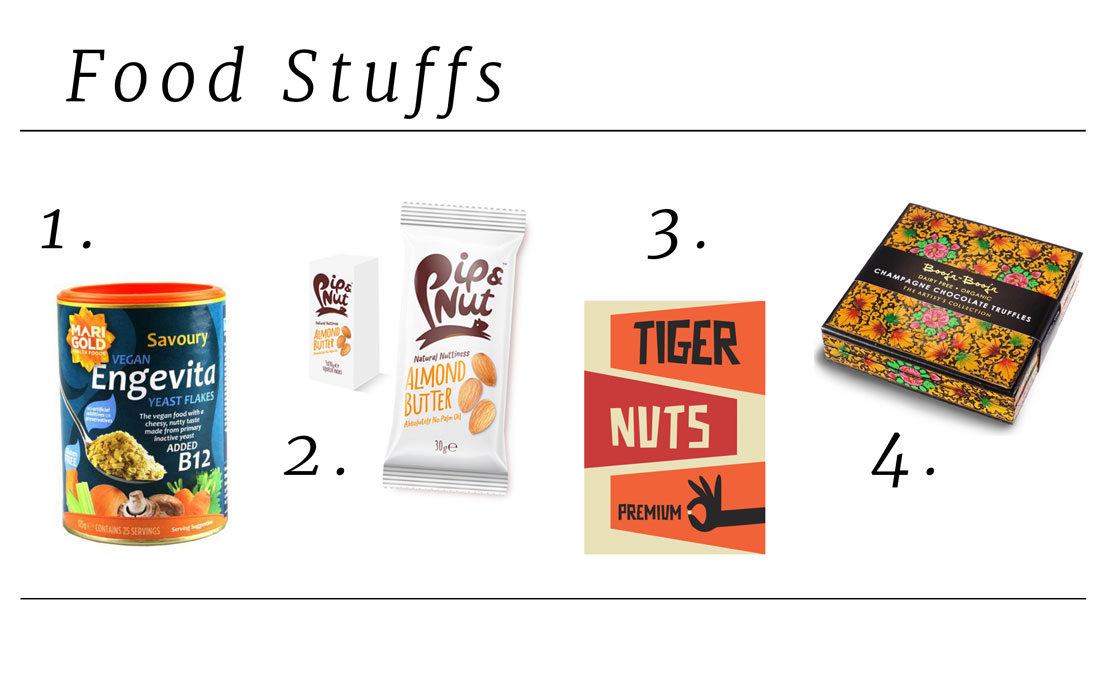
I completely believe in gifts that are useful to the receiver and food is always a welcome gift. If you don’t make your own food gifts or need to fill out a nice box or hamper with some yummies that will bring a smile to your loved ones’ faces then I’ve listed four items that would do just that. Hampers might be getting a little too vintage for some or they are usually pre-packed in the shp and rather uninspired but I believe in the hamper – the hamper can be a big bundle of love if you choose exactly the things you think the receiver will enjoy. A nice idea could also be to add a cookbook to the hamper and match the ingredients with a recipe or the theme of the book.
1. Engevita Nutritional Yeast by Marigold Health Foods
Since being introduced to them these little flakes of vegan cheesy goodness completely changed the way I eat. If you know a new vegan or someone giving up dairy you will do them such a big favour by introducing them to nutritional yeast. Also this product comes in a version fortified with B12 which is another thing important for new vegans to pay attention to so there you have two gifts in one!
Find it HERE.
2. Nut Butters by Pip and Nut
Pip and nut’s butters have been on the lips of pretty much all of the London food bloggers this year and I must admit that I haven’t tried it myself but would love to and therefore think it would be a great gift. And everyone’s been raving about it so don’t worry it’s a safe bet! In general I think nut butters are a nice gift, they’re a little decadent and usually a little expensive if you’re getting good quality. A perfect gift for a nut loving friend and if you make you’re own – even better! Just wrap it up nicely and you’re all set.
Find it HERE.
3. Tiger Nuts by The Tiger Nut Company
Ever since I tried tiger nut milk at Well and Happy’s pop-up cafe at Celestine Eleven in my old neighbourhood in London I’ve been in love with the flavour of these tubers. They come in a flour as well as whole or peeled ‘nuts’. The whole nuts are perfect for making mylk but I’m excited to try the flour in the new year.
Find it HERE.
4. Chocolate Truffles by Booja Booja
I have received these truffles as a gift on numerous times and they always make me equally happy. The hazelnut ones as well as the espresso flavoured truffles are my all time favourites but the given holiday gift would probably be the champagne truffles.
Find it HERE.

I must admit that ethical vegan fashion shopping has had me pulling out tufts of hair in a mad frustration this year but I refuse to give up. Here I’m sharing four items I think are worthy of wrapping and placing under the tree for someone you love! They probably reflect my own persoanl taste quite a bit but even if these specific items don’t tickle your fancy you can always check out the companies listed as they will have varying styles on offer of course and they’ll all be vegan and produced with care. I’ll also list a couple of other brands I keep an eye on below!
1. Derbys Dark Brown by Wills London
These men’s shoes would look great on Rob, and if it’s good enough for my Rob I hope it would be for your love too. I think Will’s make some pretty good looking shoes in general, both for women and men, and it’s an all vegan brand.
Find it HERE.
2. Gathered Waist Dress by FC UK Made
Like a lot of vegan fashion shopping out there I think the website I found this dress on leaves a lot to be desired but I do enjoy the fact that I don’t have to necessarily worry about reading descriptions etc to know that it’s vegan and has been produced ethically. The dress itself is however pretty perfect in my opinion and is on my wish list this year!
Find it HERE.
3. Gobi 2 Boot by Vegetarian Shoes
I’ve been trying on Vegetarian Shoes’ Chelsea boots about a million times but they simply don’t fit my feet (to be fair I do have feet that are rather different in size). Now I have my eyes on the ones pictured bove instead and they’d be perfect for winter. Vegetarian Shoes is more or less an institution for vegans at this point and definitely worth a look if you’re looking to gift someone with new shoes.
Find it HERE.
4. Raylan Med Diaper Bag by Matt and Nat
If you want to treat someone to a luxurious gift than I’d recommend Matt and Nat’s bags and accessories. They’re completely vegan and completely understand what is required from a customer in today’s shopping sphere. I might not be the one for buying more things than you need but I still want to feel like I’m in the 21st centure when I shop and Matt and Nat are my favourite vegan brand with a conscience for shopping. This bag pictured above might be a diaper bag but I think it would be pretty ideal for baby-less people too.
Find it HERE.
Other brands I keep an eye on: Good Guys Don’t Wear Leather, The People Tree
I have not been endorsed by any of the above brands and all opinions stated are my own.
HOLIDAY NUT AND LENTIL ROAST W. SQUASH AND HERBS
It’s that time of year again when I always seem to find myself a little bewildered by the fact that it has come so soon. The last month of the year with Chrtistmas and New Year’s Eve right around the corner. Somehow I’m never prepared for this season. My socks always seem to have lots of holes in them when it’s starting to be way too cold to walk barefoot inside and I’m always rushing to figure out the perfect gifts to my loved ones.
And even though this feeling of complete surprise is just the same as last year and the year before everything else this Christmas will be completely different. Usually I spend Christmas eating what has become a rather strange concoction of vegan Christmas inspired dishes and traditional Swedish Christmas fare with my mamma, and sometimes big sister Flo, before veging out on the couch watching Donald Duck and his friends. The latter is a totally Swedish tradition that noone seems to have heard of but I’m letting you know now that in Sweden on Christmas Eve, that’s when we celebrate, we watch a marathon of Disney clips and we find this completely in line with what Christmas is all about.
Once we’ve engaged in some TV watching we’ll open presents and have way too many chocolate pralines before we fall asleep on the couch. Maybe we’ll head to the midnight mass in my hometown’s cathedral to see pretty much everyone in town joining together to sing in the beautifully lit church (which by the way is usually completely empty but magical on Christmas Eve). Unless we don’t want to brave the cold (and the snow we always hope for but rarely get). If we do go we tend to come home and eat some more before having the best sleep of the year induced by eating a few too many helpings of pretty much everything. This might not sound to you like the most festive or enchanting of Christmas celebrations but it’s my family’s way and it’s lovely.
This year though I’ll be spending Christmas in the Dubai sun with Rob’s family. To be perfectly honest wrapping my head around this has been a rather difficult task for me and I’m still getting used to the idea. I know however that it will be fun and full of decorations because Rob’s mother is pretty good at that. Rob’s family are all rather relaxed as well so I know I’m in good hands all in all. There’s just that little nudge telling me it’s not the same, and at the end of the day that’s true – but different is not necessaily less good, it’s just different. Maybe you guys have also gone through adjusting to new holdiay situations, I’m sure many of you have partners and are merging traditions in the best way possible, I’d love to hear your tips and tricks for adjusting to new traditions!
Now let’s talk about this recipe, before I bore you with too many Christmas anecdotes. This type of roast is something that I’ve wanted to make my own for a couple of Chrismases now and finally I’ve figured it out. Roast is not something we’d have for Christmas traditionally in Sweden but in the UK where I’ve been residing for the last five or o years it is the Christmas center piece. And to be honest most of the Swedish Christmas food is various types of meats; ham, sausages, meat balls, pate, smoked salmon, pickled herring and the list goes on into infinity so there’s not many things for me to enjoy at this point in time. If you’d like my veganised Swedish meat balls recipe though you can check it out here.
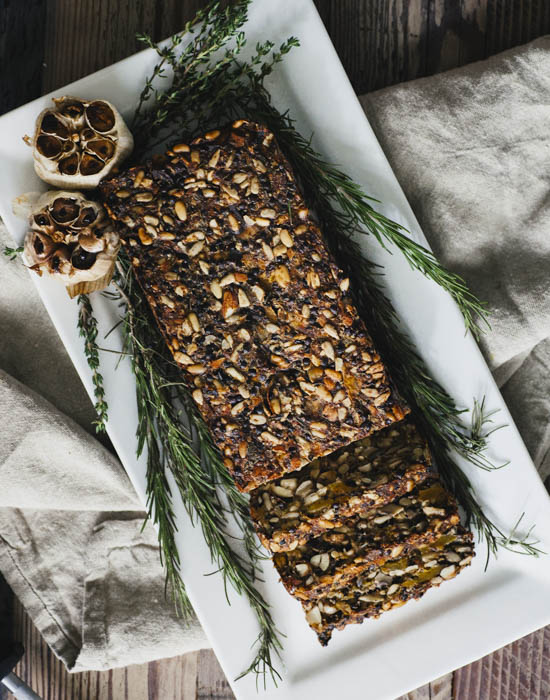
Anywho, the roast seems like the new given order in my new Christmas dinner traditions and this is the one, I’ve created it and it’s the one I want to put on the table this Christmas. And for good reason; it is moist and deliciously herby. It also has a rather ‘meaty’ texture from the use of mushrooms as well as a crunch from the nuts and seeds. It is just yummy, that’s it. It requiers a little bit of time to prepare though and I use some pre-cooked ingredients like tamari beluga lentils and butternut squash which I roast the day before but I don’t see this as an issue as the two mixed together with some massaged kale or other greens and some pine nuts make a delicious pre-Christmas dinner salad. But other than that it’s rather fool proof and low maintenance!
For this recipe I’ve also made another cooking video which of course I’ll hope you enjoy! I hope you’ll take a look at it above and at my youtube channel too. And please let me know what you think, and if you have any requests of what you’d like to see on this rather new youtube venture – simply scribble it in the comments!

HOLIDAY NUT, SEED AND LENTIL ROAST W. SQUASH
PORTIONS: 1 loaf tin / TOTAL TIME: 3h 30 min
5 chestnut mushrooms, chopped
1 onion, halved and sliced
2 garlic cloves, minced
2 tbsp chopped fresh rosemary
2 tbsp fresh thyme leaves
1 tsp dried oregano
2 tsp psyllium seed husk powder
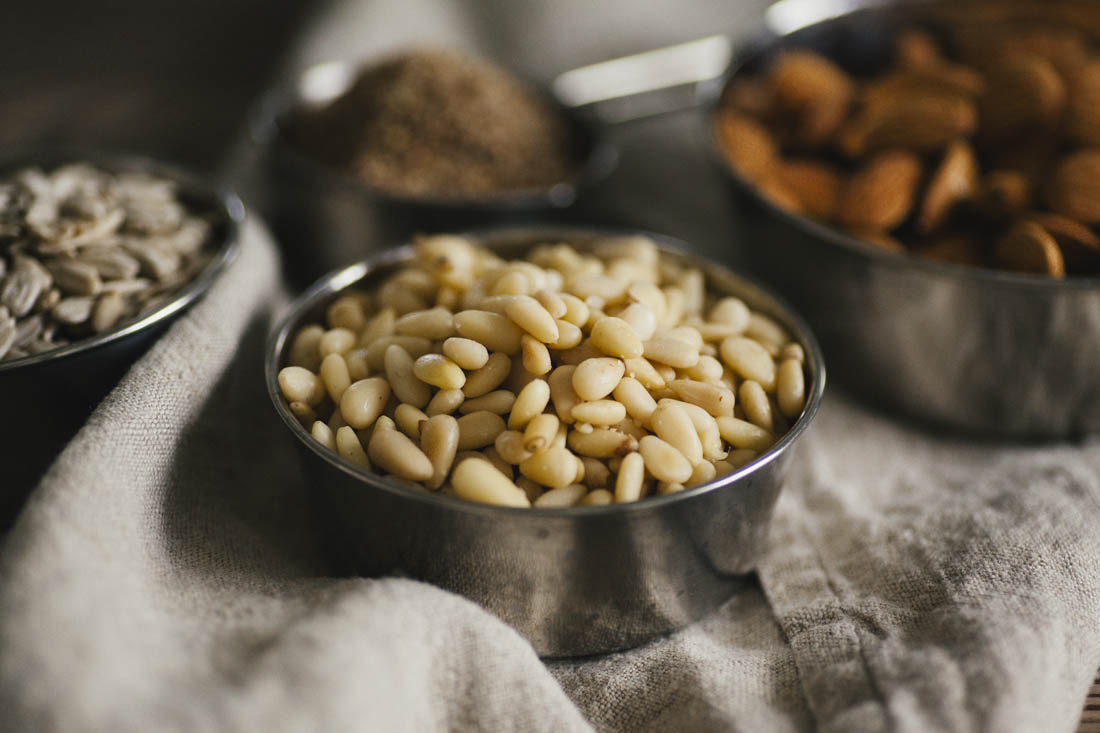
1/2 cup almonds, chopped
1/2 cup pine nuts
1/2 cup sunflower seeds
3/4 cup cooked beluga lentils (preferably cooked w. 1/2 tbsp tamari)
1 1/2 cup steamed/roasted pumpkin, mashed
1 tbsp extra virgin olive oil
Salt and pepper to taste
Line a loaf tin with baking paper and if you’re like me and worry about things sticking also oil the paper.
Brown onion, add garlic, then mushrooms and fresh herbs. Sweat for 5-10 min.
Chop almonds and mix with pine nuts, sunflower seeds, beluga lentils as well as oregano, psyllium husk powder, salt and pepper.
Mash roasted/steamed butternut squash and add to the bowl along with sweated mushroom mixture, psyllium husk, flax seed gel and olive oil.
Mix well and make sure it is mostly sticking together, otherwise you might want to add a little more mashed pumpkin.
Place mixture into prepared loaf tin and press down until even.
Let rest in fridge for 2 hours, this will allow for the gelling agents to firm up, ensuring a loaf that will not fall apart.
Prepare oven at 180 degrees celsius and bake for 45-55 min in the middle of the oven, or until the middle of the roast is mostly dry when knife is inserted.

