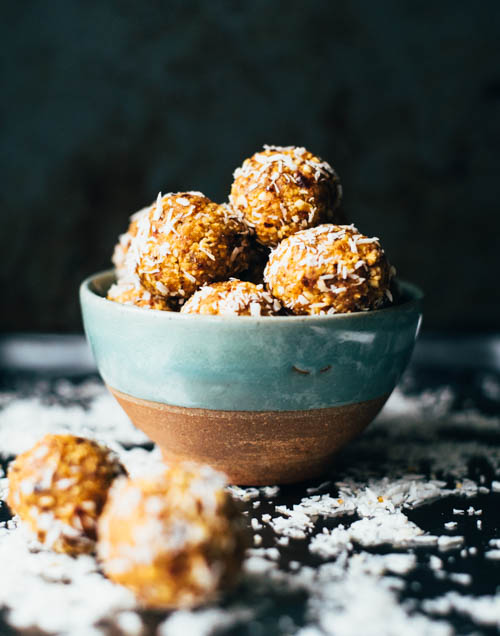
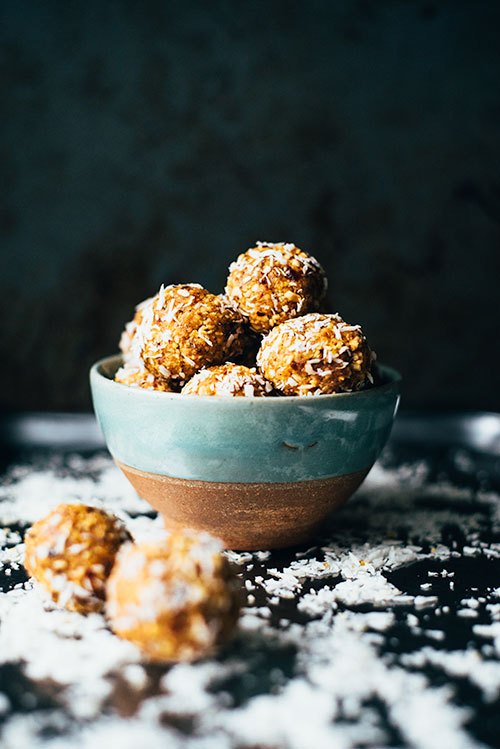
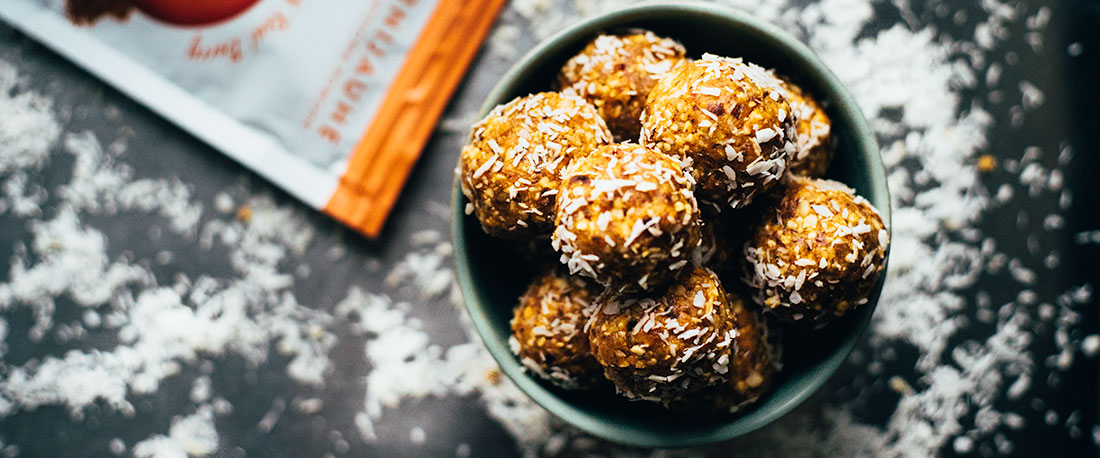
DATE, NUT AND SEA BUCKTHORN ENERGY BALLS
I have been playing around with Finnberrys wild nordic super berry powders for the last week now and for this recipe I use their sea buckthorn powder along with nuts and dried fruit to create these vitamin, mineral and antioxidant packed energy balls. They have become my new immune booster and pick me upper! The dates make the balls stick together and give them sweetness whilst tahini and cashew butter gives them a creamy flavour and cashew and brazil nuts some crunch. All of these ingredients don’t just add to the flavour and texture but have fantastic health benefits too:
– Dates are rich in iron and a great source of fiber
– Tahini is made from sesame seeds which are rich in various minerals including zinc which is great for glowing skin, it is also a good source of plant protein
– Nuts are another good source of plant protein and contain important minerals, in this case cashews offer zinc and iron and brazil nuts are rich in selenium
The added sea buckthorn take these balls to another level, but is not necessary for their composition. I add it because it is a great source f vitamin C and I can never get enough of that. It also contains healthy omega fatty acids and antioxidants which I won’t say no to either. With that said this is a healthy and naturally vegan and gluten free alternative to store bought snacks and treats which often have lots of preservatives and sugar hiding inside. You can easily adapt the recipe to suit your pantry using different nuts or dried fruit and they are easy and quick to make.
PIECES: 16 / TIME: 15 min
1/2 cup cashew nuts
1/3 cup brazil nuts
1/3 cup desiccated coconut
1-2 tbsp wild sea buckthorn powder (depending on potency required)
1 tbsp cashew butter
3-4 tbsp tahini
12 medjool dates
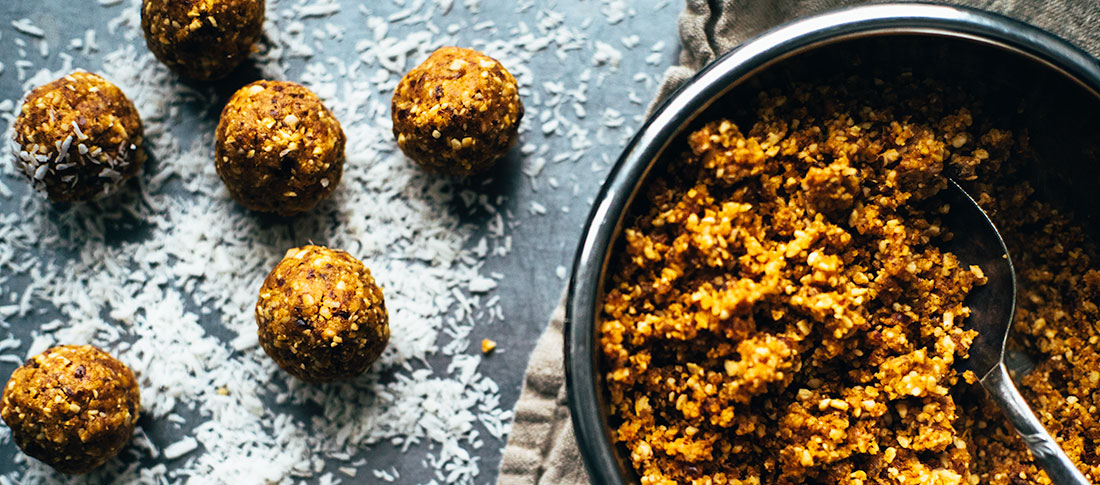
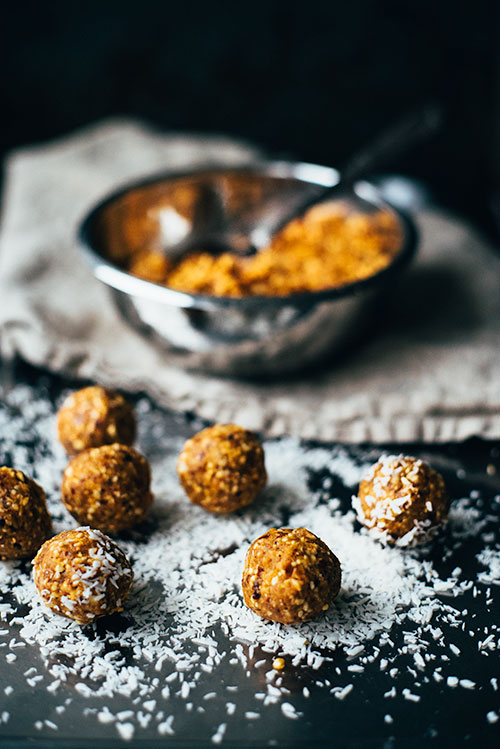
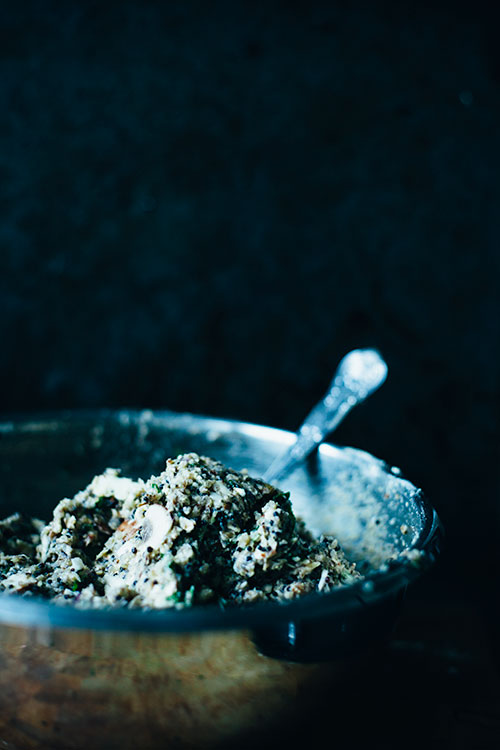
Place cashews and brazil nuts in food processor and pulse until it is a rough meal with small bits of nuts still left.
Add dessicated coconut and sea buckthorn powder and pulse a couple of times to mix.
Add the cashew butter, tahini (start with three spoons and add another if you need your mixture to be more sticky) as well as the pitted medjool dates.
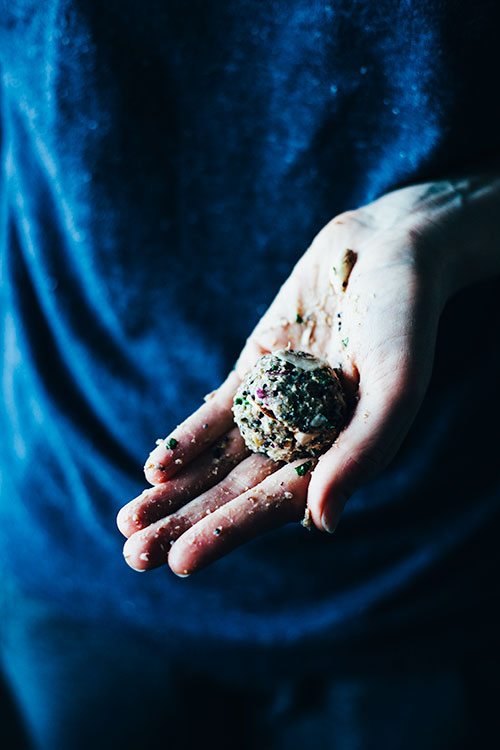
When the mixture is roughly combined and it sticks together when you press it between your fingers remove it from the food processor and roll into balls, roughly the size of half a golf ball.
If you wish roll in coconut and keep in the fridge for 5-7 days.

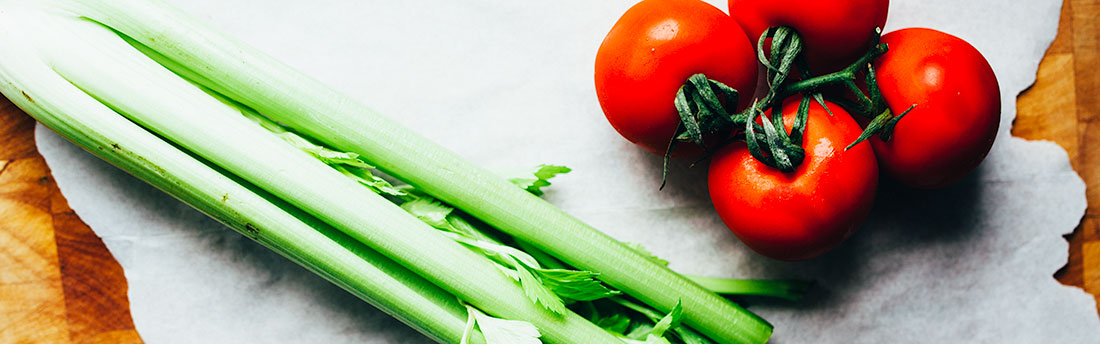
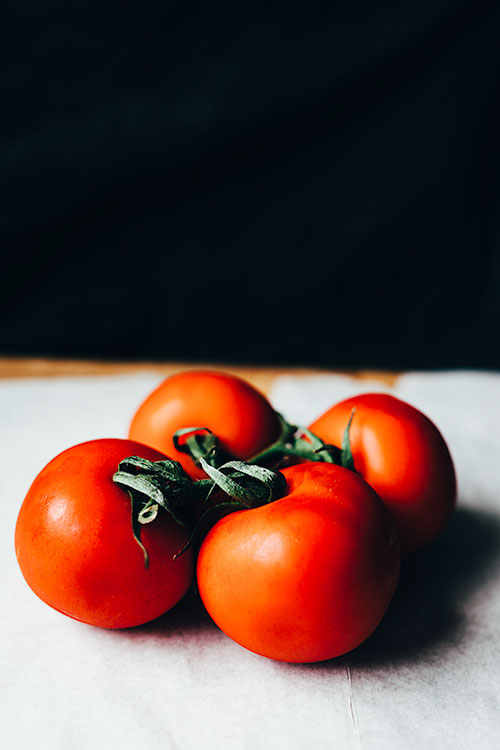
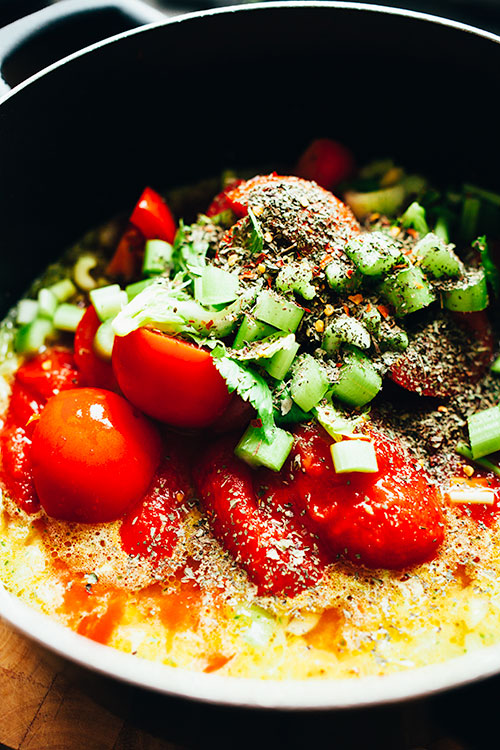
THE QUICK, EASY AND YUMMY TOMATO SOUP
I think everyone has a quick and easy go to recipe and this is my new one. I have been known to make this more than twice a week. It contains quite basic ingredients that most of you will have in your cupboards. It lliterally takes 10 minutes to prepare and another 15-20 min on the hob and that’s it, dinner’s served. I like serving it with some vegan parmesan which you can find here and some parsley.
Soups really are something I make every week, at least one if not two or three. They are simple to make and you can be successful with almost any ingredients. This specific soup is full of tomato goodness with the addition of celery and base of onion and garlic which I pretty much always use for soups for flavour enhancers. I also season it with dried basil but if you have fresh that works too and some chilli flakes but powder or cayenne pepper will have a similar effect. I use canned plum tomatoes which I think give a richer flavour and good consistency for this dish but if you only have chopped tomatoes at home you can still make it. You might need to add less water in that case. I add fresh tomatoes too for added freshness and flavour. This recipe is perfect if you’ve got some tomatoes that have started to go old and soft as you won’t notice when they’ve been cooked. A win win situation really!
PORTIONS: 3-4 / TIME: 35 min
2 tbsp olive oil
2 brown onions
3 large garlic cloves
2 cans plum tomatoes (800 g)
4 medium sized tomatoes (roughly 300g)
2 celery sticks
1 cup water
1 tbsp vegetable stock
1 tbsp dried basil
A pinch of chilli flakes
Salt and black pepper
Roughly chop onion and garlic and add to a large pot and place over medium heat until shiny and slightly see through.
Meanwhile quarter the tomatoes and chop the celery into half inch long pieces.
When onion is ready add water and stock powder, mix.
Add all other ingredients to the pot, stir and cover with lid.
Bring to the boil and then let simmer on low-medium heat.
When the celery and fresh tomatoes are soft, after about 15 min, blend the soup (I use a hand blender).

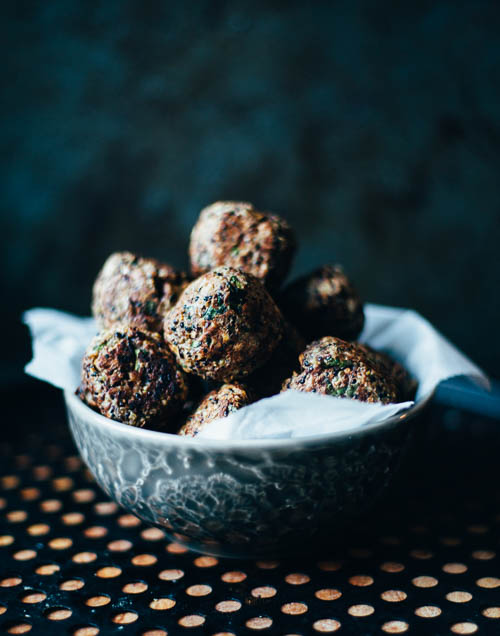
SWEDISH MUSHROOM, QUINOA AND SPINACH BALLS
Growing up one of my favourites on the Swedish Christmas table was meatballs. And my mother’s was of course the best. I decided to make a plant based and gluten free answer to my national dish and this is it. Moist with a little crunch in the crust and with lots of flavour from herbs and liquid aminos.
I’ve always wondered what’s so Swedish about meat balls? Apparently they are called just that because the Swedish immigrants in America made them over there and spread the love for them to other citizens. However these mushroom balls are Swedish simply because I’m Swedish and because they were inspired by the meaty original.
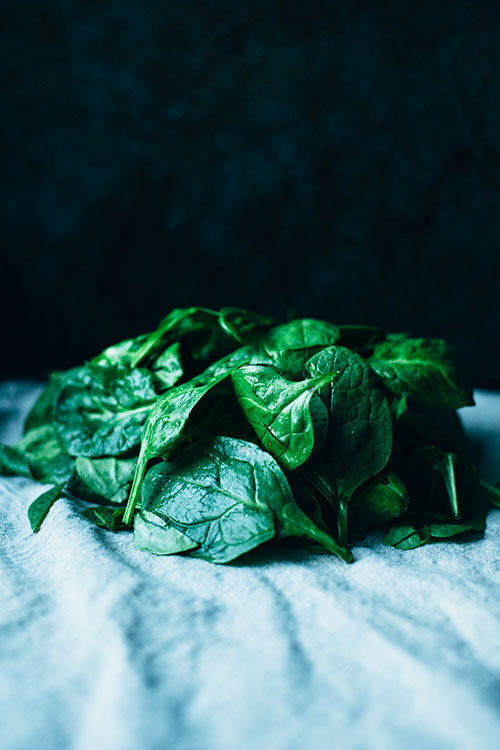
Mushrooms have a great consistency and flavour for dishes which assimilate a meat based original. I don’t often create recipes that do this but this one ultimately does as you might have comprehended a paragraph or two ago. I like using chestnut mushrooms because of their lovely colour and flavour. In addition to the mushrooms I use quinoa as a base for the recipe which is the main source of protein in this recipe. The quinoa is seasoned before cooking so that it absorbs all the flavours which then is part of the flavouring of the balls, this step is pretty important to get the right flavour in the mixture. I also add spinach which definitely isn’t a very Swedish tradition but I like a bit of green in most of my food so I am breaking some new ground here.

BALLS: 25 / TIME: 45 min
1,5 tbsp milled flaxseed + 1 tbsp chia seeds + 6 tbsp water (gelled)
1/2 cup quinoa (I used pearl) + 1 cup water
1 tbsp liguid aminos/tamari
A generous pinch each of dried basil, oregano and rosemary
1 small red onion
3-4 garlic cloves
250 g chestnut mushrooms
1/2 packed cup of baby spinach leaves
1/2 cup walnut pieces
Juice from 1/2 lemon
3 tbsp gluten free oats
3 tbsp chickpea/gram flour (or other dry ingredient like buckwheat flour or almond meal)
Salt and black pepper to taste
Coconut/Olive oil for frying
Rinse quinoa and place into a pot with one cup water, liquid aminos, herbs and a generous amount of black pepper. Let boil and then simmer until all water is gone, let sit with a kitchen towel under the lid for a few minutes to absorb moisture. (Great to do the day before or use leftovers)
Place flaxseed meal, chia seeds and 6 tbsp water in a cup, mix and let sit.
Finely cut spinach, chop 2 of the mushrooms into small pieces and break walnut pieces finely. Place in a bowl and mix.
Place onion and garlic in a food processor and pulse until finely chopped.
Add remaining mushrooms (halved or quartered might be easier for the processor), quinoa, flaxseed and chia seed gel as well as lemon juice in processor and process until a sticky, quite smooth, mixture is formed.
Add oats and process until combined, if the mixture still seems very sticky add the chickpea flour little by little until the mixture is less but still somewhat sticky.
Place the processed mixture to the bowl and mix with the spinach, mushroom and walnut pieces.
Preheat oven to 180 degrees.
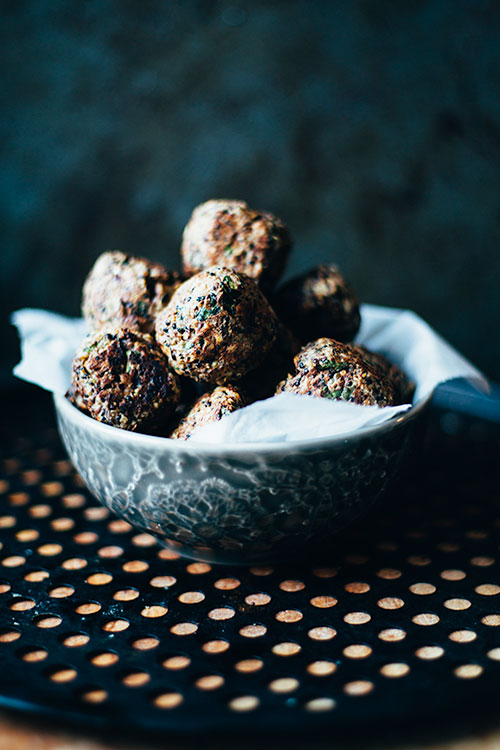
Roll into balls and fry over medium heat (in coconut or olive oil) until browned all around.
Place on a greased (coconut oil) baking paper and bake in oven for 15-20 min
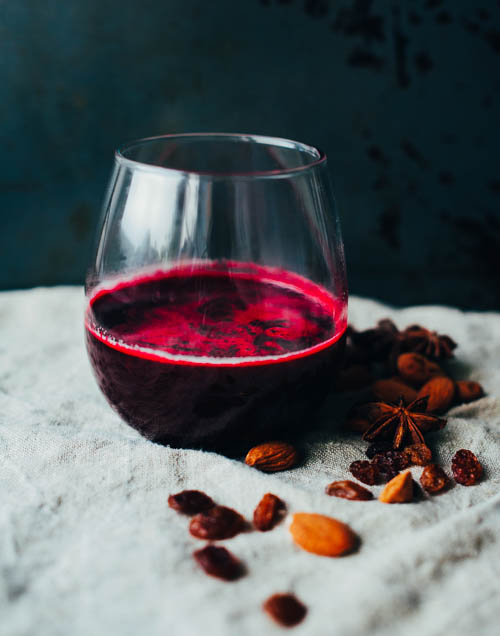
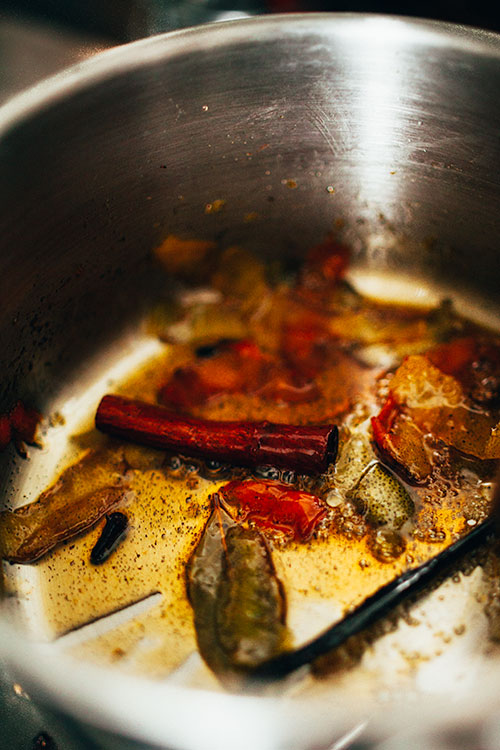
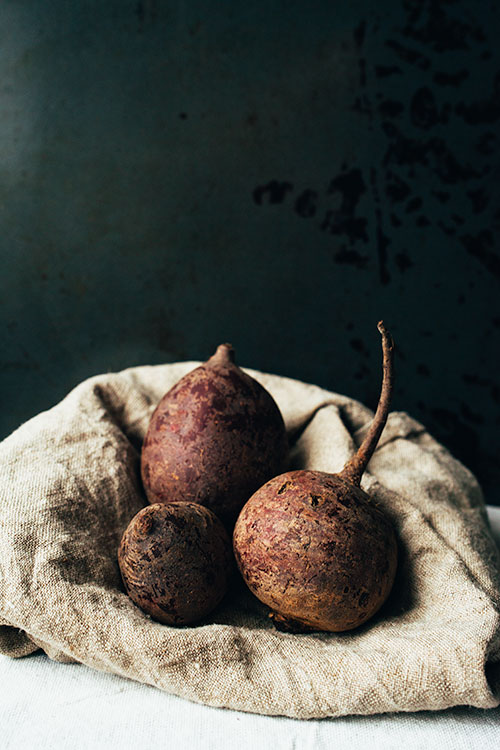
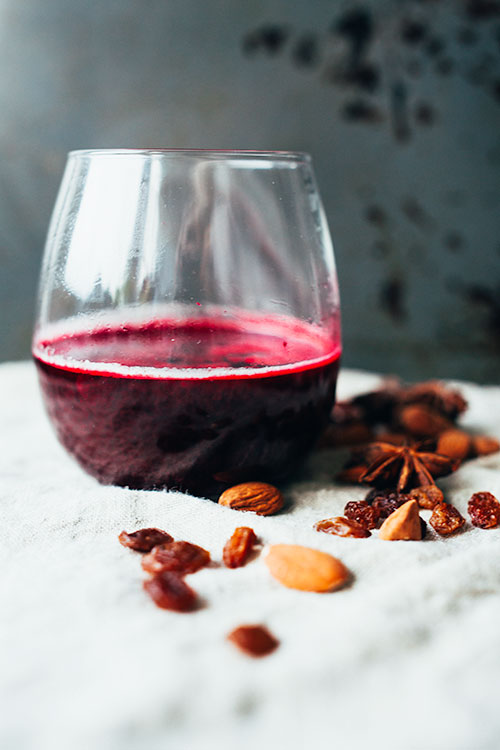
MULLED BEETROOT AND ORANGE JUICE
I left the alcohol train some time ago and I know I’m not alone, whilst some just like to have a non-alcoholic option ones in a while, so I created a mulled juice to substitute the very Christmas warming mulled wine. I used traditional spices and lots of citrus fruits to infuse the juice and served it with almonds and raisins, Swedish style.
Mulled wine screams Christmas festivities to me and to be honest it hasn’t always been my favourite and to be honest again I prefer the English version to the Swedish (oh-oh). Anyway I wanted to make something with the same lovely flavours of mulled wine but free from refined sugars and alcohol. Something you could have in the morning as well as in the evening to warm your cockles.
I love the spices that go into this drink and I use maple syrup and water rather than caster sugar to create a flavoursome syrup before adding the juice to keep as many of the goodies in there and not heat it too much. There might be quite a few ingredients to create the flavours of mulled wine but ones you’ve gathered them all it’s really pretty simple to get the best out of them.
In terms of beet to orange ratio I think it’s up to your taste buds but I use two oranges which I put through my juicer (rather than squeezing them) and the rest red beets for a pint of juice. If you are feeling experimental you could add other vegetables or fruits to create you own version, maybe apple and carrot could be good additions. If you’d like some more heat to your mulled juice add some fresh ginger in the juicing process, this is something I really enjoy!

AMOUNT: 1 pint / TIME: 20 min
1 pint juice from two oranges and red beet root
1 clementine(peel and juice)
1 lemon(peel)
1 lime (peel)
2 tbsp maple syrup + 5 tbsp water
4 whole cloves
1 cinnamon stick
1/2 vanilla pod (halved lengthways)
2 bay leaves
10 gratings of a whole nutmeg
1 star anise
1 pint juice from two oranges and red beet root
1 clementine(peel and juice)
1 lemon(peel)
1 lime (peel)
2 tbsp maple syrup + 5 tbsp water
4 whole cloves
1 cinnamon stick
1/2 vanilla pod (halved lengthways)
2 bay leaves
10 gratings of a whole nutmeg
1 star anise
Juice your oranges and beets.
Use a peeler to shallowly peel strands off the clementine, lemon and lime – about 4-6 of each.
Pour maple syrup and water into a sauce pan over low to medium heat, add citrus peel and squeeze in the juice from the clementine.
Add all the spices except for the star anise to the pan.
Let simmer for 5-10 min or until the water has been reduced and you are left with a fragrant syrup.
Turn the heat down to low and pour in the juice and add the star anise, leave on the hob until hot.

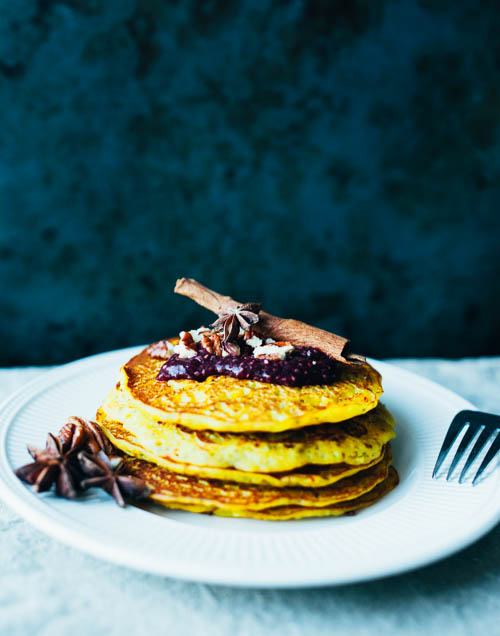
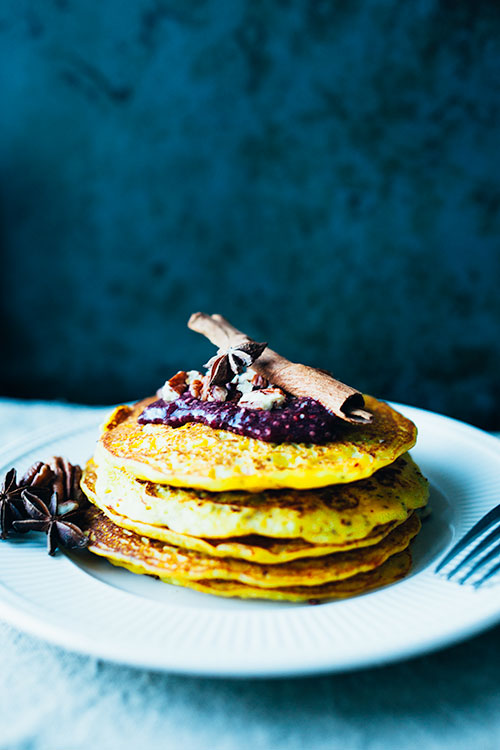
FESTIVE SAFFRON AND CHIA SEED PANCAKES
Saffron might be a tad expensive but for me it really is a flavour of Christmas. As it is Christmas after all and we are generous with each other and ourselves I think it is a perfect time to invest in this beautiful spice. These pancakes remind me of the Swedish traditional saffron bread (lussekatter) which I love making them are a breakfast treat for the holidays. I know many of you love pancakes as much as I do, who doesn’t? And I’m so happy to be sharing this recipe with you. It is very easy to make and comes out lovely with lots of flavour. If you want to impress your family with something a little different on Christmas morning then this is the recipe you’re looking for.
As already mention the saffron is really the most expensive part of this recipe but why not treat treat yourself and your loved ones, you won’t regret it. But if you can’t this time, which is completely understandable as Christmas can be a very costly event, the recipe works without the saffron as well so just add your favourite Christmas spices and find something that works for your taste and budget.
I add chia seeds to this recipe because I think it helps with binding the batter but also for a little protein boost and some healthy fats. Otherwise I use rice flour as a base, and I use a mix of white and brown, but buckwheat flour could work too. I have also tried using half almond milk and half coconut milk to make these pancakes which give them a richer flavour so if you’re feeling experimental, give it a go. I really hope you will all enjoy this recipe as much as I have, it puts a sunny colour to a cold winter morning!

10×10 cm PANCAKES: 6-8 / TIME: 30 min
1 cup rice flour
1 tsp baking powder
1 1/2 tbsp chia seeds
0,4 g saffron (1 sachet)
1 banana (mashed)
1 1/2 cup almond milk (maybe a little more for your required consistency)
1 tbsp maple syrup or other liquid sweetener
If your saffron comes as threads you might want to break it with a pestle and mortar.
Mix all the dry ingredients including the saffron in a mixing bowl.
Either mash the banana and mix with the almond milk and maple syrup or place the three in a blender and blend until smooth.
Place a frying pan over medium heat and add a little coconut oil.
When the oil has melted and your hand can feel the heat when holding it over the pan ladle (I like using a soup ladle for this) enough batter into the pan to make a 10cm by 10cm pancake.
When you can see bubbles on the surface of the pancake and it seems solidified you can flip it.
When both sides are slightly browned and the pancake is solid remove it from the pan and do the same again until you finish the batter.


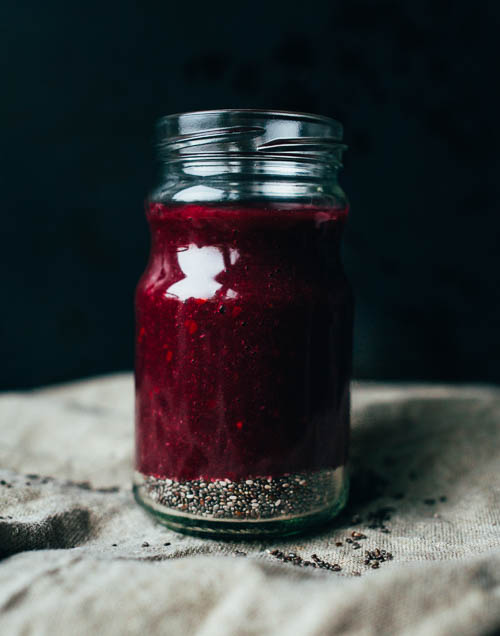
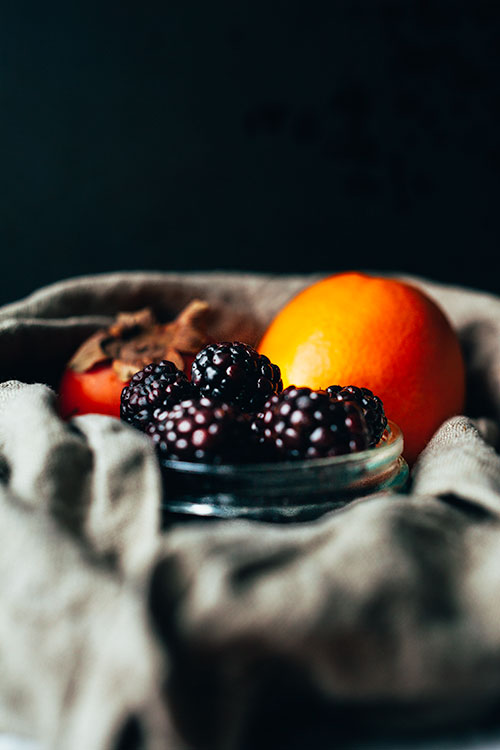
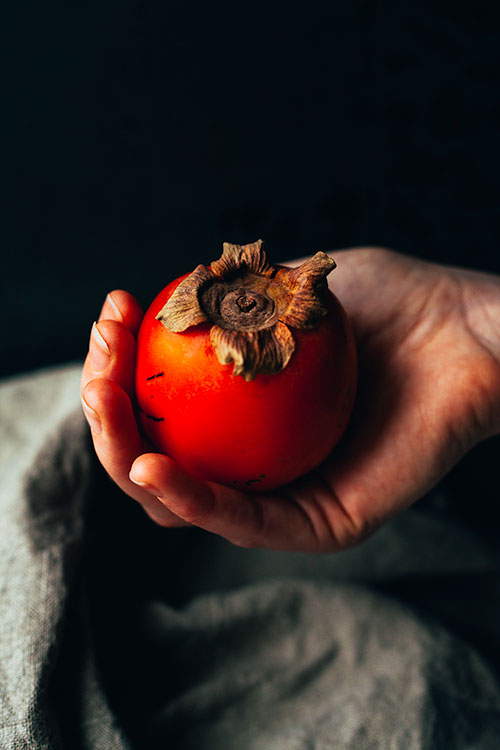
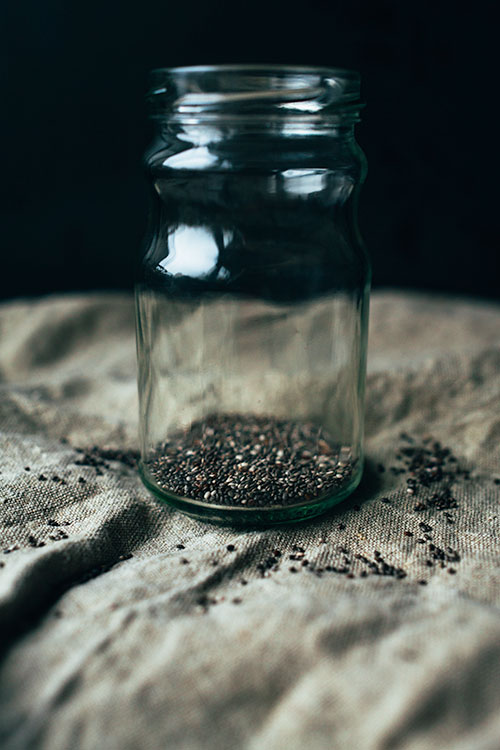
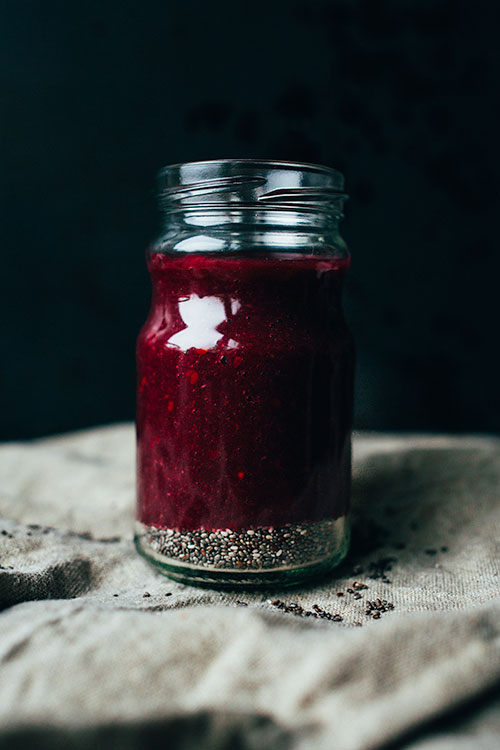
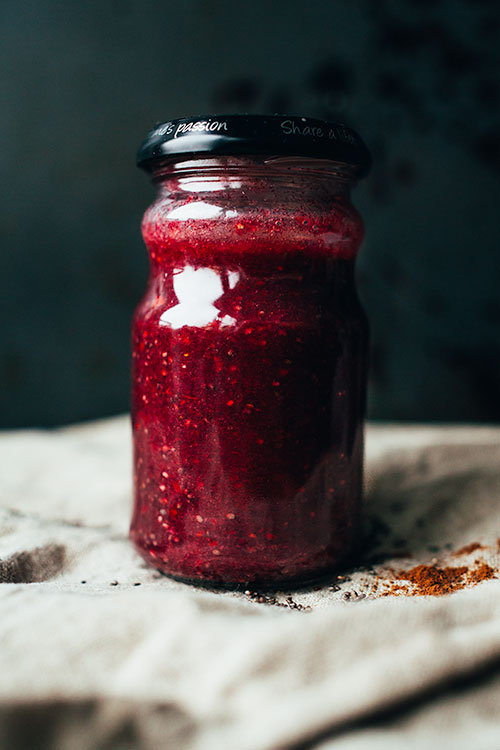
FESTIVE PERSIMMON AND BLACKBERRY CHIA JAM
Jams and jellies are usually filled with sugar or nasty sweeteners, therefore I love making my own chia jams. It literally takes 5-10 min to prepare and then about 20 min to set. I also love them because I can make whatever flavour my imagination desires and this one is full of festive Christmas flavours!
What I don’t like about buying jams in the store (even though I do sometimes) is the sugar content which usually comes to about 50% of the jar. That is insane! Not so good for keeping energy level throughout the day and especially bad because many of us have it in the morning as part of our breakfast. But here is my suggestion for a less sugar spiking solution which won’t take much more time than going to the corner shop.
Chia seeds are great because they are fantastic binders as they gel when they come in contact with liquids. Therefore they make a great base for a raw jam. That is another key word to the greatness of chia jam; it’s raw which means it’s got all the goodness and enzymes intact for you when you eat it. In this recipe I use sweet persimmons and fresh orange juice along with some tart blackberries. I spice the whole thing with some ground cloves and ginger but feel free to mix it up using whatever Christmas spices get you going. Fresh ginger is also perfect, just grate it in. I also don’t add any sweetener to mine as I think the fruits are enough but if you want a slightly sweeter jam just add a teaspoon of unrefined liquid sweetener like maple syrup.
MAKES: 1 SMALL JAR / TIME: 10 min (+20 min to set)
1 ripe persimmon (peeled)
1/2 cup blackberries
The juice (and some zest if you wish) from a 1/2 orange
1 1/2 tbsp chia seeds
A pinch ground cloves
A pinch dried and ground ginger
Optional: liquid sweetener to taste
Peel and quarter the persimmon and add to a blender along with the blackberries and squeezed half orange, blend until smooth (If you don”t have a blender cut the persimmon into smaller pieces and place the ingredients in a bowl using a fork to mash them up).
Place the chia seeds in a jar and pour in the blended fruit mixture, if you are using a sweetener add that as well.
Take a knife and stick the tip of it into each of the spices one by one adding it to the jar as well.
Mix thoroughly and place in the fridge for at least 20 min before eating.

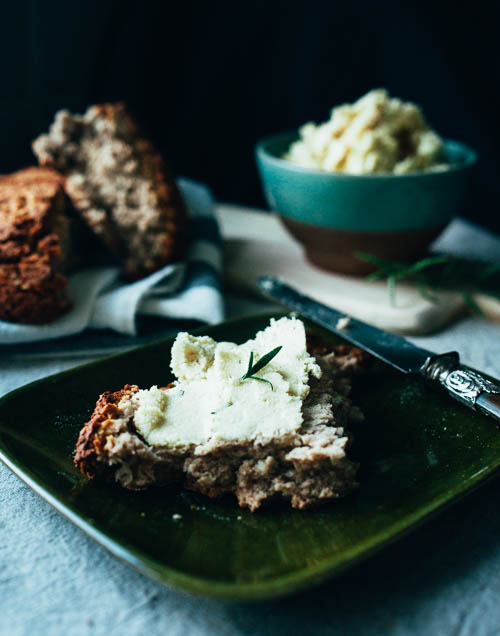
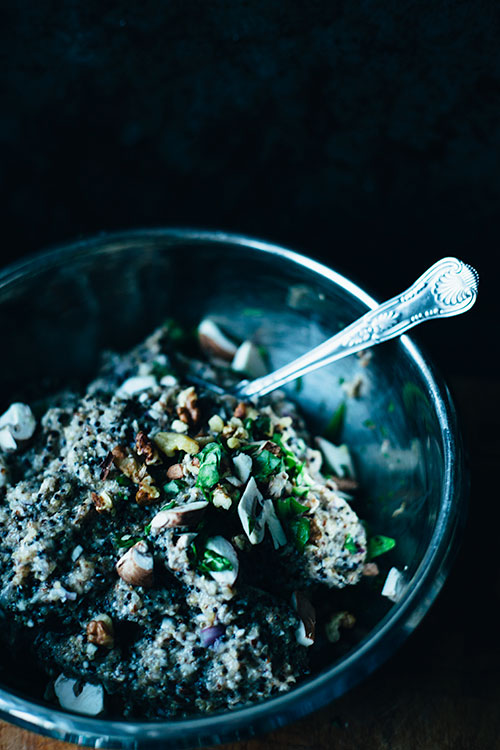
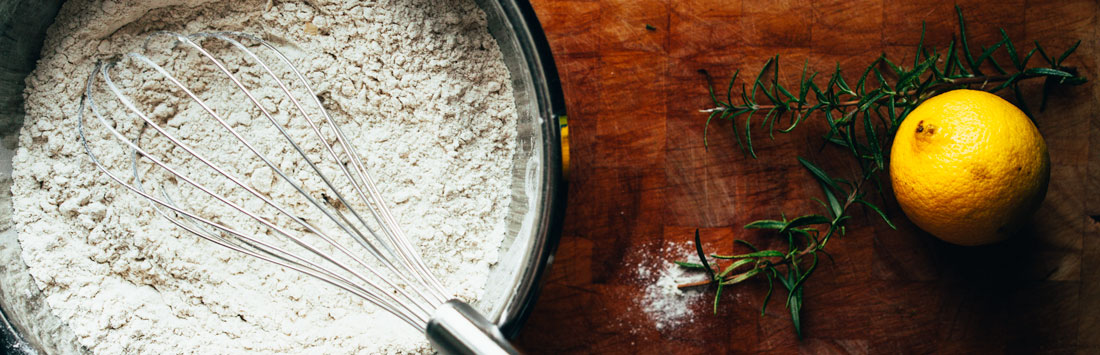
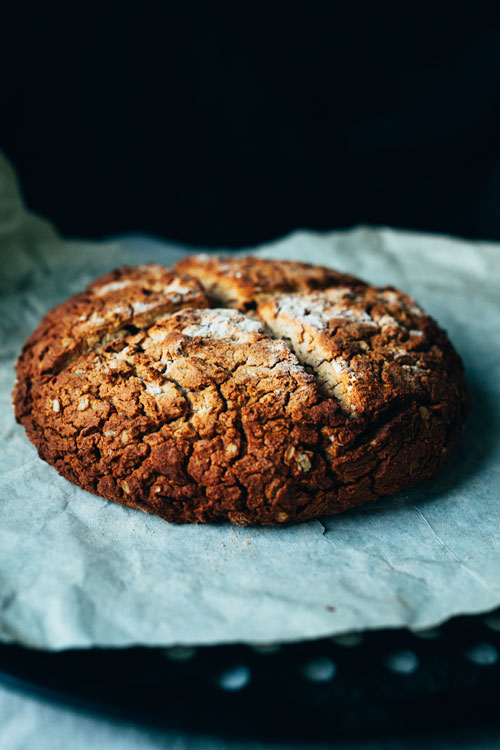
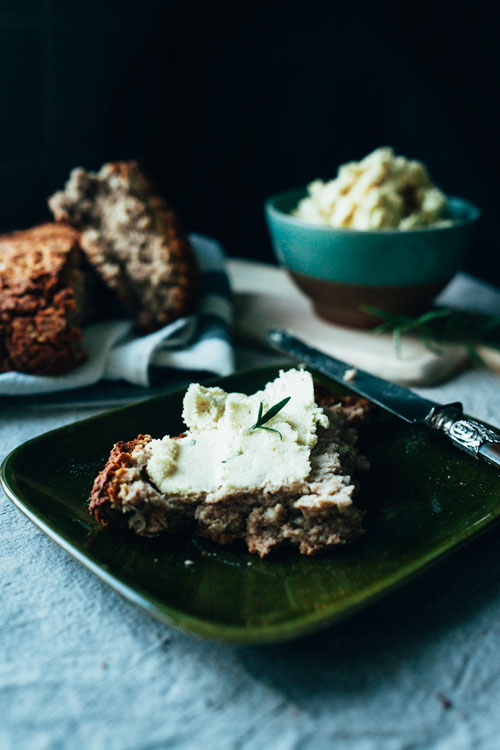
CRISP SODA BREAD W. ROSEMARY MACADAMIA CHEESE
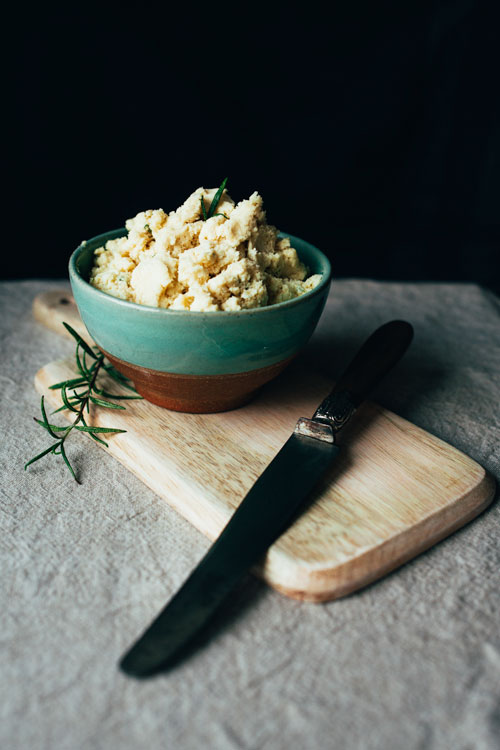
Bread and cheese is a given at my family’s Christmas lunch. Here I’ve made my own take on this tradition with a gluten free crisp soda bread and a raw macadamia nut cheese with rosemary. The real hero in the cheese making is a food processor and nutritional yeast. Nutritional yeast has become one of my favourite flavourings since choosing to be vegan, it really reminds me of cheese and if you haven’t tried making your own cheese spread yet this is the time!
I have found it tricky baking tasty gluten free and vegan breads but this is one I really enjoy and it literally takes five minutes to throw together, then the oven does the rest. It has a very crisp outside, probably more so than the original soda bread, but I enjoy a crunchy crust. This bread is meant to be quite dense so this is something you have to expect but it should rise a little from the baking soda.
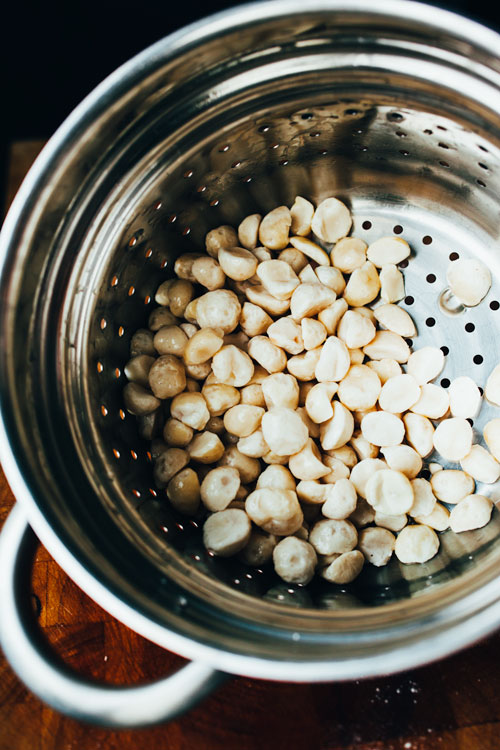
Let’s talk about the macadamia cheese. I’m sure many of you have tried nut cheeses before and this is the lazy version. You could add probiotics and culture the cheese for 24 hours if you wish, there are lots of links on the internet for how to do this, but I prefer making an easy flavourful cheese spread. This is easier as you simply soak the nuts and then add them to your food processor with some liquid and whatever flavourings you prefer and process until smooth. For this recipe I’ve chosen Rosemary for the flavouring on top of the cheesy nutritional yeast and the addition of garlic and lemon.
These types of nut cheeses and cheesy spreads are completely raw leaving all enzymes intact to aid in your digestion. And because the nuts are soaked some of the phytic acid they contain will be removed making the nutrition they contain easier to absorb. Two great reasons for making your own cheesy nut spreads!
MAKES: 1 Bread + 1 1/2 Cup Spread / TIME: 60 min
1,5 dl oats
3 dl brown rice flour
5,5 dl buckwheat flour
1 tsp baking soda
1 tsp salt
1/2 tbsp maple syrup
1 dl soya yoghurt (unsweetened preferably)
3 dl almond milk + 1 tbsp lemon juice
Coconut oil for brushing
200 g macadamia nuts (soaked over night
1 garlic clove
Juice from 1/2 lemon
1/3 cup nutritional yeats
2 tbsp olive oil + 1 tbsp water
Salt and black pepper
1 sprig rosemary or equal from dried
Preheat oven to 180 degrees celsius and place a baking sheet dusted with flour on a baking tray.
Place almond milk in a bowl and mix with lemon juice, set aside.
Mix the first 5 dry ingredients in a mixing bowl.
Move the dry mixture to the sides of the bowl and pour maple syrup, milk mixture and soya yoghurt in the middle.
Mix until combined to a somewhat sticky ball.
Place ball on prepared baking sheet and cut a cross in the bread (see photo below).
Bake in oven for up to 1 hour – it is ready when there’s a hollow sound when tapping the bottom and the top is golden. Check after 45 min and if the top is looking ready but it is not sounding hollow then flip the bread over and keep baking until the hollow sound appears.
When freshly out of the oven brush the bread with coconut oil to soften the hard crust of the bread a little and then leave to cool off a few minutes.
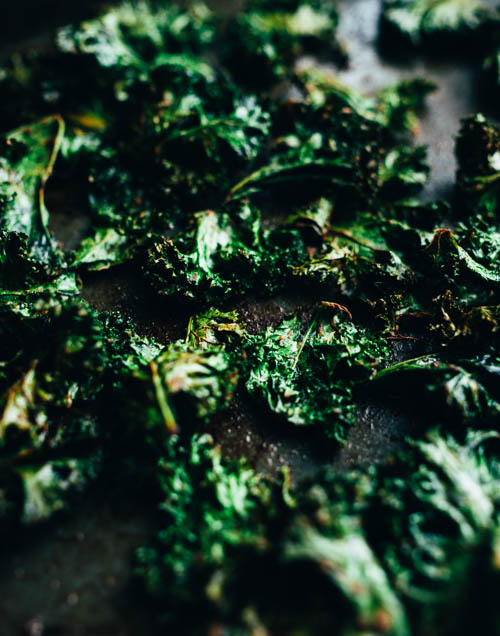
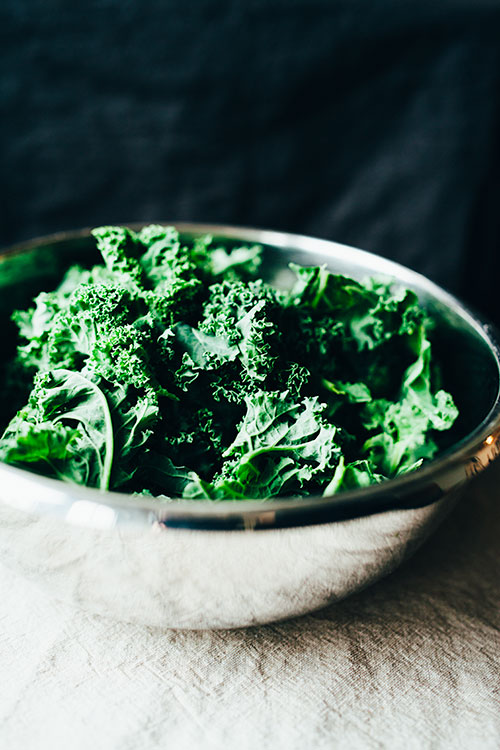
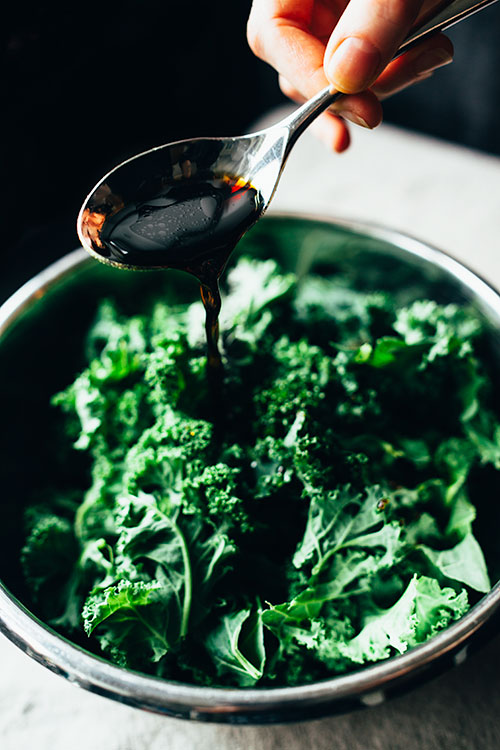
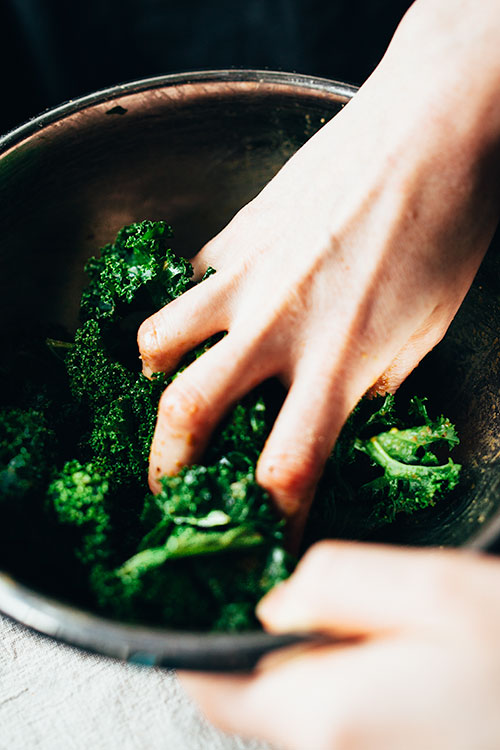
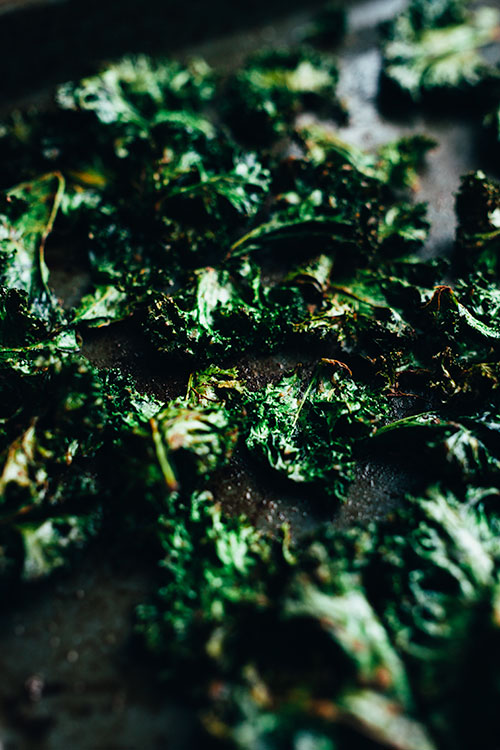
THE ONE AND ONLY CHEESY CRISPY KALE
I have been known to make this every other day in periods because it really is one of my favourite snacks, sides etc. It’s also my partner’s favourite which means he makes it when I don’t, haha. Apart from the crispiness and flavour making this snack even better is how little time and effort it takes to make and the fact that it goes well with most savoury dishes.
Kale is the superfood that seems to have been embraced by most but maybe not loved by everyone. I’ve had many people tell me they’ve tried making crispy kale and not been successful in the flavour department so for all of you here is my best recipe to date. I think the flavour will vary wildly however depending on the kale you are using. In this recipe I use curly kale which is brightly green, very curly and rather soft in comparison to for example cavolo nero (black kale). There’s also a big difference in flavour in these two types and it is probably the most extreme example I could make. Choose your kale after your taste – if you like it subtle choose the brighter and less sturdy kind and if you enjoy a deep kale flavour go for darker and tougher varieties. Personally I think all make yummy crispy snacks.
So if you’re new to the superfood jungle you might be thinking; what’s so great about kale? Well, it contains lots of fibre, is rich in vitamin A, C and K as well as in the minerals iron and calcium which are two things to keep track of as a vegan and last but not least filled with antioxidants to keep your cells happy and healthy.
If you’d like to really keep all this nutrients intact you might want to try to dehydrate instead of oven roast which I do in this recipe. If you do, simply put your dehydrator to 40 degrees celsius or place your oven to the lowest setting and leave the door open when cooking. You’ll then need to leave it for three hours, then flip them over and leave again for another 2-3 hours.
PORTIONS: 2 as a snack / TIME: 20 min
2 packed cups destemmed kale
1 1/2 tbsp olive oil
1 tbsp liquid aminos or tamari
1 1/2 tbsp nutritional yeast
Black pepper
Optional additions: garlic, chilli flakes, dried herbs, lemon juice
Preheat oven to 160 degrees celsius.
Remove kale from stem and rip into pieces (not too small as it will shrink in the oven).
Place the kale in a mixing bowl and add oil, liquid aminos, nutritional yeast and black pepper.
Mix the ingredients together using your hands and give the kale a one minute massage before spreading the leaves out on an oven tray. Make sure they don’t overlap to much as they’ll cook unevenly if so.
Place in oven for roughly 10-15 min, flipping them over halfway through.


CRUSHED, MUSHY AND CRISPY SWEET POTATO
I came to think of this as I was contemplating making regular roasted potatoes for this space. I thought that there are so many recipes for that Christmas staple out there and sweet potatoes seem to have taken over the white potatoes place this year so here I continue that trend. These sweet potatoes come out like mash in the center and slighlty crunchy on the outside for the best of two worlds.
Sweet potatoes are yummy and have been named the white potatoes healthier sister. But why is that? I did some research and it seems that in terms of glycemic index sweet potatoes are lower giving them a point. They are also higher in fiber and vitamin A in comparison to the white potato but in turn the white potato contains higher values of minerals like iron, magnesium and potassium. I think both potatoes are tasty and consume them both, looking at the nutritional facts that’s probably a good thing as they seem to have different benefits, and it’s fun to mix things up!
In terms of seasoning I keep it very simple here with salt an pepper but other additions for super flavourful potatoes I would add some chilli flakes or powder, smoked paprika or a pinch of mixed or your favourite herbs.
I think this dish is a good side to any meal really but it might not travel super well in a lunch box. I’m going to enjoy these on Chrsitmas eve with my family. I might consider not making roasted carrots since I’m making these though as they both have a very sweet flavour. I’ll go for parsnips, beetroot and all the other yummy roots available instead!


PORTIONS: 2-3 / TIME: 60-70 min
3 small to medium sweet potatoes
Olive oil for drizzling
Flake sea salt and black pepper
Optional: chilli flakes/powder, dried herbs, smoked paprika, minced garlic
Clean potatoes with a scrubbing brush.
Place in a pot, cover with water and bring to a boil. Reduce to a soft boil for about 15 min or until tender (but not too soft, this is my forever mistake).
Preheat oven to 180 degrees celsius.
Drain and rinse in cold water until you can handle them with your hands.
Cut off ends and half the sweet potatoes and then place them flat side down on an oven tray drizzled with olive oil.
Crush the potatoes with a fork.
Sprinkle salt and black pepper as well as any other seasoning you might like over the crushed potatoes and drizzle with olive oil.
Roast in oven for 30-45 min, until they look crisp on the outside and have darkened in colour.


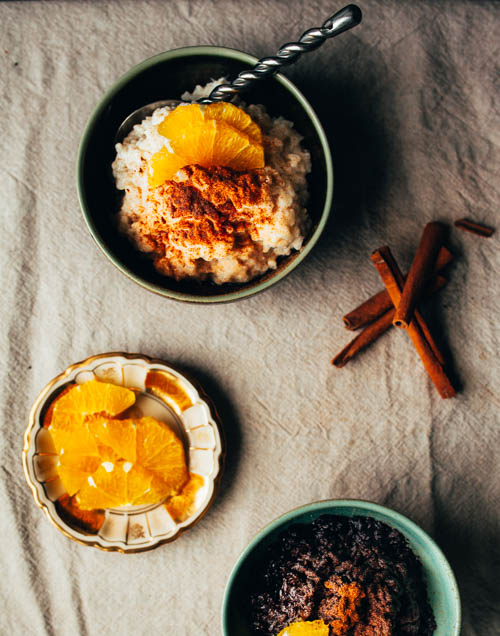
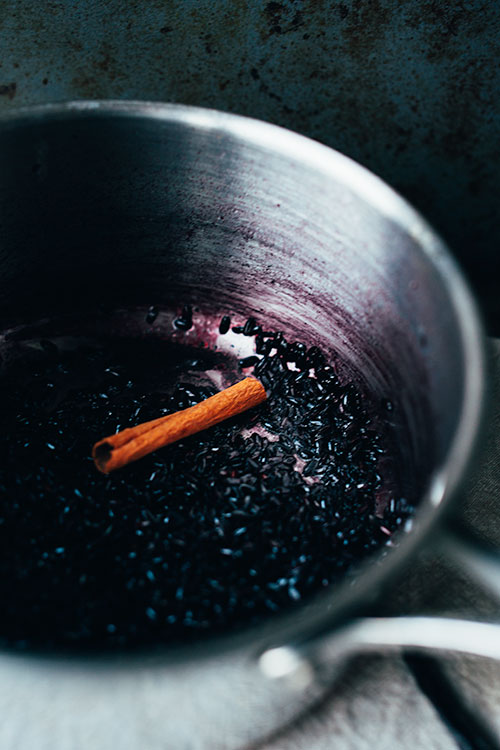
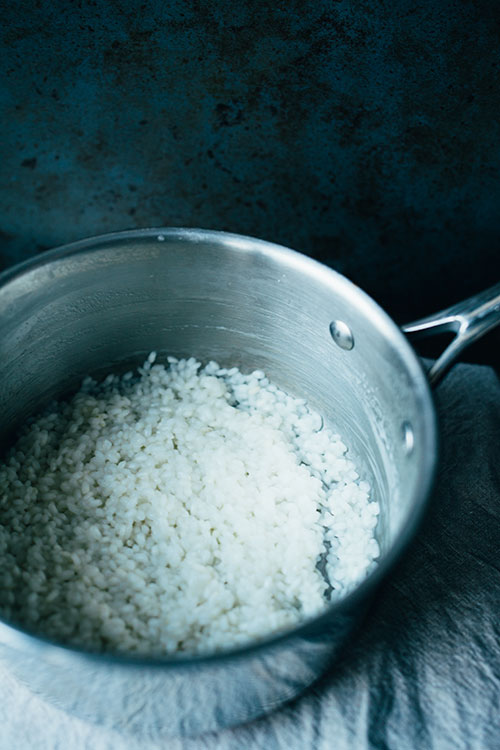
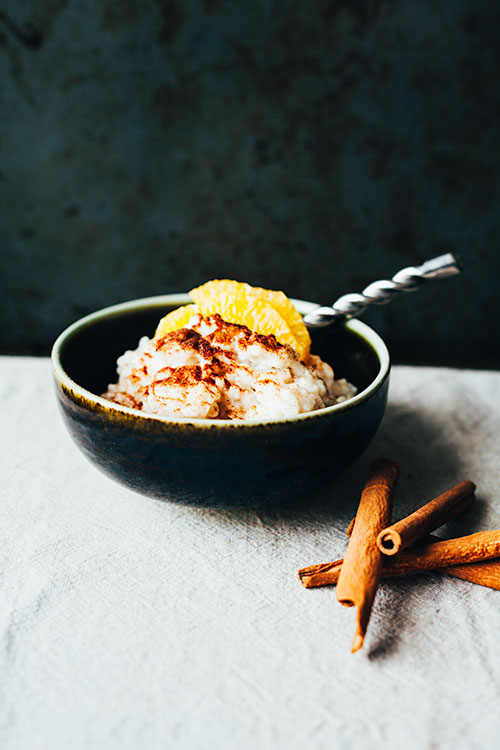
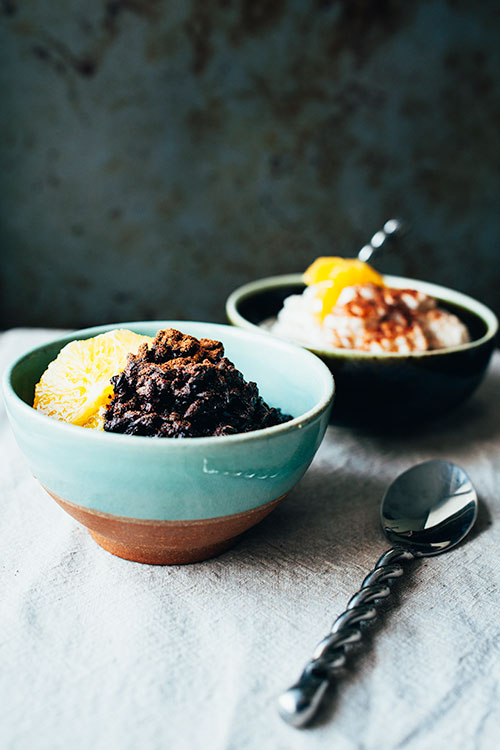
COCONUT MILK RICE PUDDING TWO WAYS
Rice pudding really is the epitome of my childhood festive season. It is usually full of dairy though and made from white rice which many people are trying to avoid. Here I give you a choice between the white rice of most of our childhoods and black rice. I also completely veganise this yummy dish cutting out all dairy.
If you are cutting down on simple carbs, which I completely support as they spike blood sugar and give us uneven energy levels throughout the day, you should go for the black rice option in this recipe. Personally I love both the options and for my nostalgic periods I would go for the white rice but on any other day I would choose the black rice option. Completely up to taste and health choices though.
The black rice pudding, or rice porridge as we would say in Swedish, takes a little longer to prepare due to the grain being a lot more sturdy than the white pudding rice. You can however soak the rice over night and then add only half as much water in the first step of the cooking process. It will cut the cooking time by almost half as well. I’ll write more specific instructions below as usual but if you are making black rice pudding I would really recommend soaking (for at least 8 hours).
In both versions I instead of using butter and cow’s milk add a little bit of coconut oil as well as a whole can of coconut milk. I like coconut milk for this dish because it is slightly sweet and quite rich and creamy giving the pudding a lovely texture and flavour. Another note is to sweeten the pudding as you see fit. I like my pudding quite neutral, meaning only a little sweet, but give it a taste as you go and add your sweetener of choice if needed.

PORTIONS: 3-4 / TIME: 35-60 min (Depending on rice)
1 cup black/pudding rice
2 cups water (only 3/4-1 if you are making a soaked black rice version)
2 cans coconut milk (800 ml)
1 tsp salt
1/2 tbsp coconut oil (not for black rice)
1 cinnamon stick
1 vanilla bean/pod
1 tbsp coconut sugar or sweetener of choice
For topping: cinnamon, orange or other fruit (optional)
If making a soaked black rice version, rinse and cover black rice with water over night or at least 8 hours. Then drain and rinse.
Place oil (not for black rice), rice, water and salt in pan and bring to a boil and then reduce to a simmer for roughly 8-10 min for pudding rice or 10-15 for black.
The next step is different depending on variation:
Black rice – add coconut milk, cinnamon stick and seeds from vanilla pod as well as pod. Cover with lid, bring to a boil and then reduce to low heat and simmer for about 45 min (only2 20-25 min if soaked) or until liquid is almost gone. Stir from time to time, especially the last 10 min.
Pudding rice – add coconut milk, cinnamon stick, seeds from vanilla pod and pod. Let boil and reduce to a simmer for about 25-30 min. Stir often.
Add coconut sugar/sweetener right towards the end.
When most of the liquid is absorbed and a sticky texture is reached (if this has not happened after the time allocated and rice is getting dry – add a little water at a time until desired texture is reached) remove from hob and discard the cinnamon stick and vanilla pod before serving.
The texture of the black rice pudding will be more chewy and less ‘gooey’ in comparison to the pudding rice version.

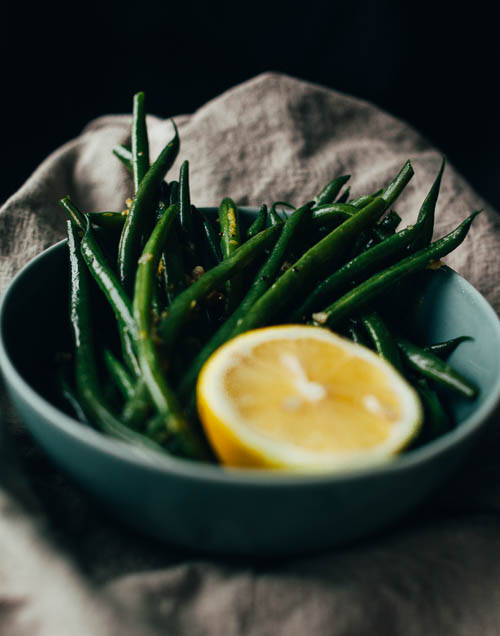
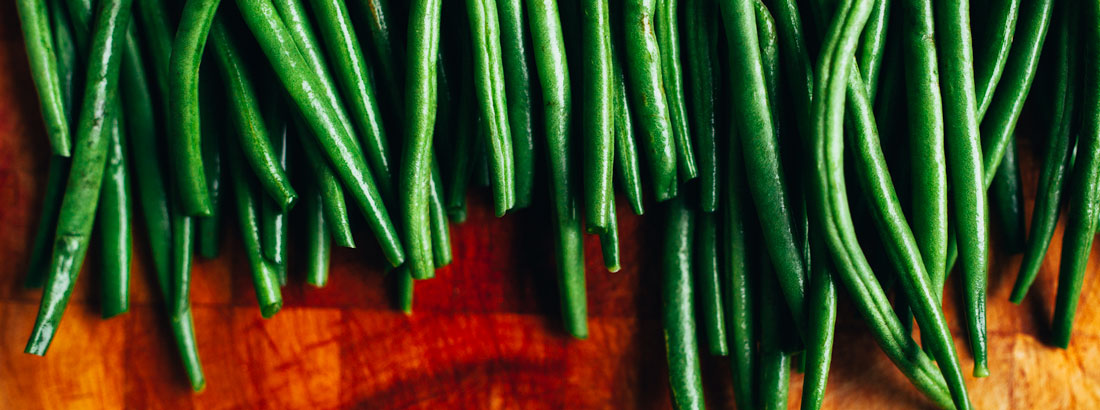
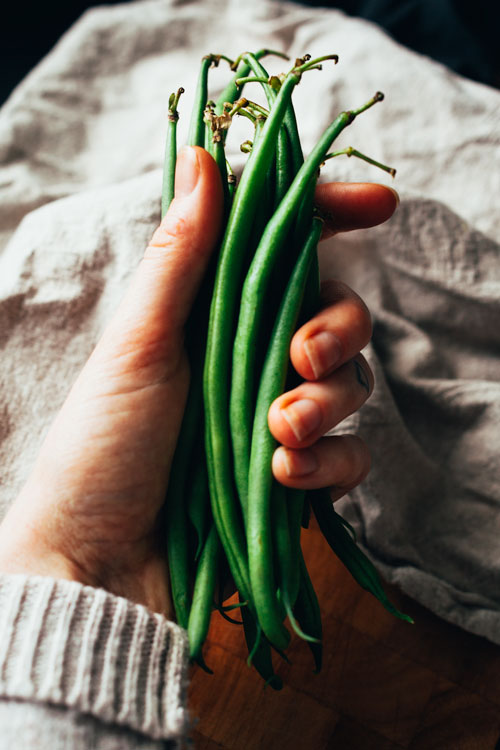
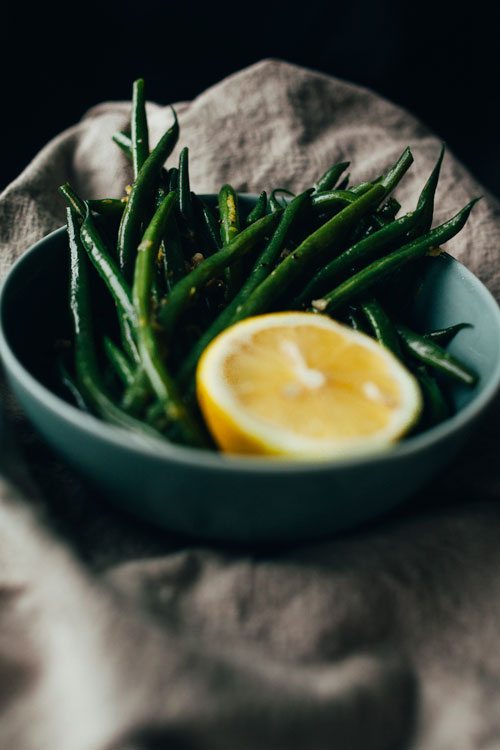
LEMON AND GARLIC MARINATED GREEN BEANS
This concoction is my all time favourite snack and side dish next to cheesy crispy kale. I’m not going to say any more about my love for these beans than that, you simply need to try them.
Although I thought I’d share some info on benefits of eating green beans because often I look these things up and I like to share my finds, (information was found here):
High dietary fibre content.
Good source of vitamin A and antioxidants all protecting you from free radicals which can have a negative impact on cells.
Contains the carotenoid zea-xanthin which has a positive impact on eye health.
Provide good amounts of vitamin B-6 and thiamin (B-1) as well as C.
They are also a good source of minerals like iron, calcium, potassium, magnesium and manganese.
PORTIONS: 2-4 as a side dish / TIME: 15 min
225g fine green beans
Rind and juice from 1/2 lemon
1 tbsp olive oil
1 tbsp liquid aminos/tamari
2 garlic cloves, minced
Black pepper to taste
Clean the beans and remove the end which attached to the stalk.
Place in a pot and cover with water, bring to a boil and then simmer until tender (or steam), takes roughly 5 min after boiling.
Mince garlic into a cup and mix with the rest of the ingredients.
Drain and rinse tender green beans and place in a mixing bowl.
Pour marinade on top and mix.

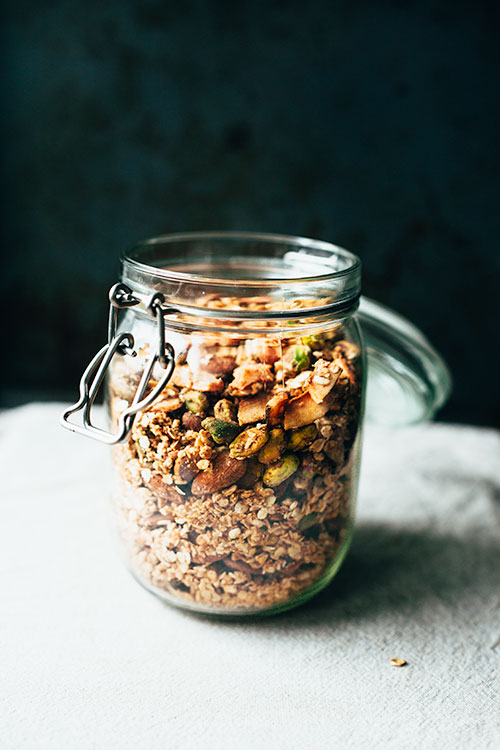
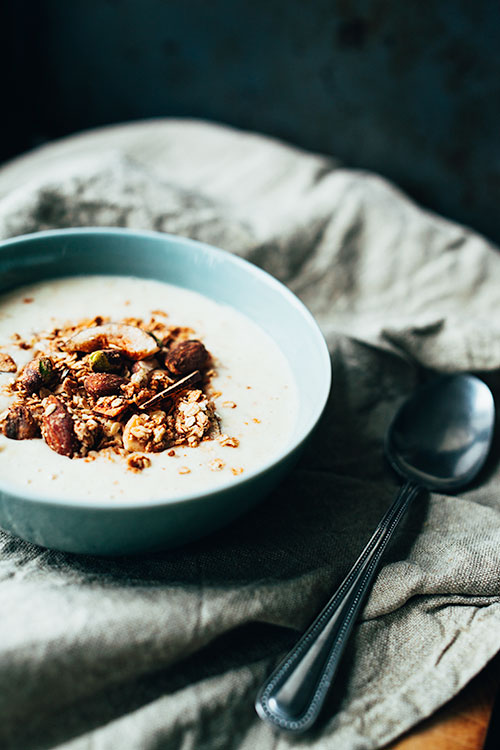
Luxurious Cinnamon Granola | Vegan and Gluten-Free
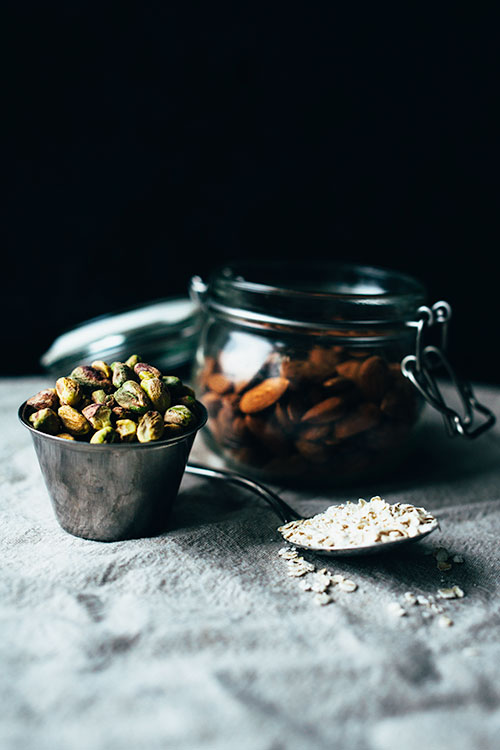
Granola! Granola, granola, granola. It really can be so many things and pretty much always comes out tasting awesome. I love granola. I love it on smoothies, on top of my porridge, with yoghurt, nut milk or even as a snack on its own. This is a very simple recipe with a delicious and rich result.
This recipe has very few ingredients and that is always a plus in my book. It really only contains staples that I keep in the pantry at all times like nuts, oats, cinnamon and neutral tasting oil as well as maple syrup. Mixed together it becomes a rather decadent tasting granola and now that Christmas is getting closer I want cinnamon in pretty much everything and anything. Meaning this could be a great addition to your Christmas holiday breakfast if you will.
It only takes about 30 min to make from start to finish and 25 of those you really have to do very little, like shake the oven tray ones or twice. I make this in the mornings on weekends and days off and eat it warm. I do usually have to eat a little snack whilst I wait though as I’m the kind of person who almost always wakes up ravenous – so if you’re like me you can always prepare your granola while meal prepping or the night before you want to have it for an easy and quick breakfast. Enjoy!
Malin x
Active cooking time 5 min, total cooking time 30 min.
Makes one large jar.
Ingredients:
3 cups oats
1 cup unsalted nuts, I used almond and pistachios
0,5 cup dried coconut shavings
1 tbsp cinnamon
0,3 cup pure maple syrup
0,3 cup neutral tasting oil such as rapeseed

Method:
Preheat oven to 150 degrees celsius and line an oven tray with baking paper.
Place all dry ingredients in a mixing bowl and mix (if you have thin coconut shavings you might need to leave those out and add to the oven halfway through baking).
Mix all dry ingredients in large bowl except for dried fruits.
Add all wet ingredients and mix until combined.
Place on prepared oven tray and pinch in a few places to make some clusters.
Bake for 25 min, mixing the granola a couple of times so that no pieces get burnt.